![]()
Creating a Smart Form from GPM
This tutorial will take you through each step necessary to create a Smart Form and to use it on GPM Web.
Estimated time: 60 minutes
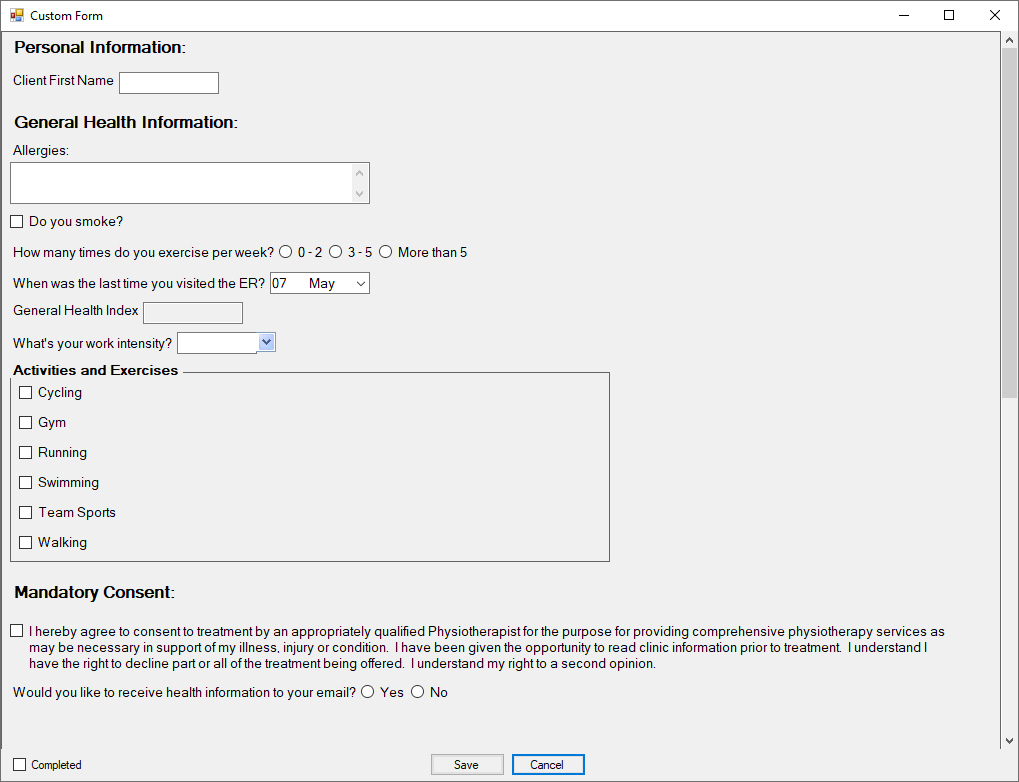
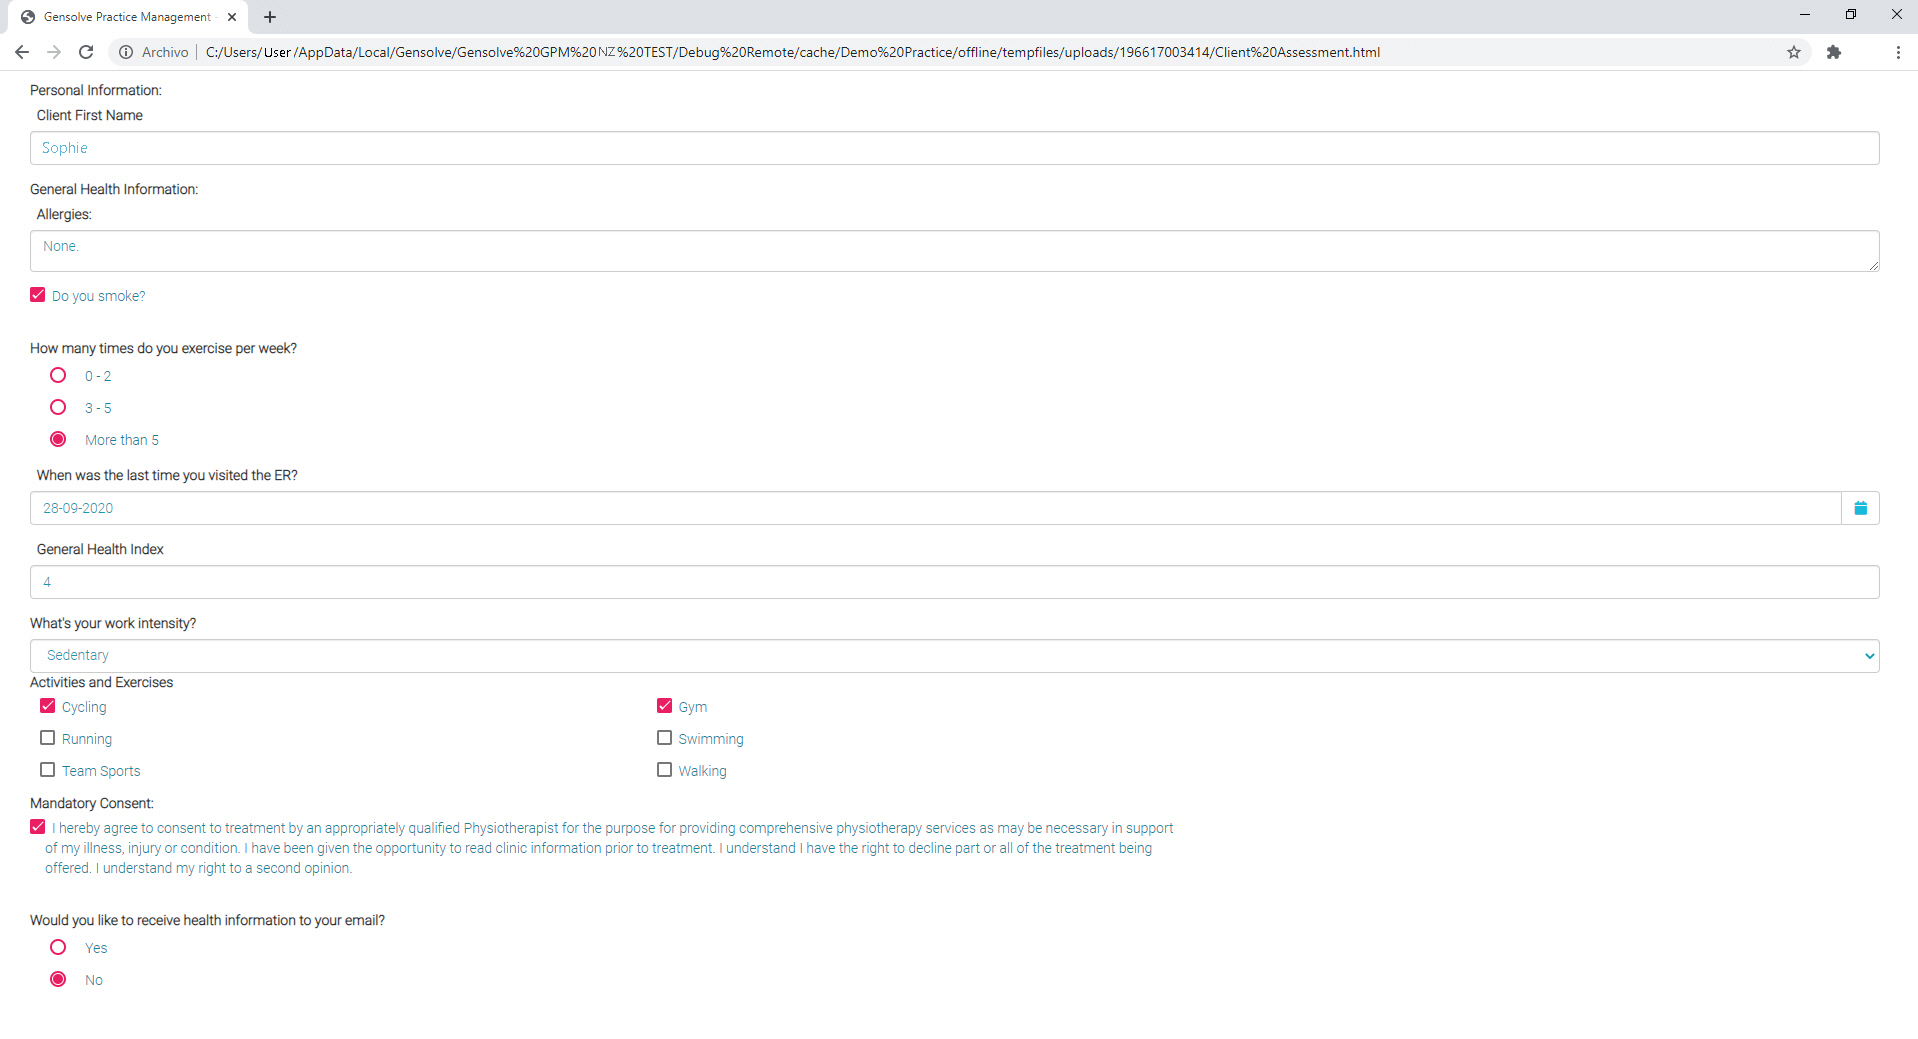
Goal: These are the forms that we will be creating through this tutorial. They both can be used in GPM Web and GPM.
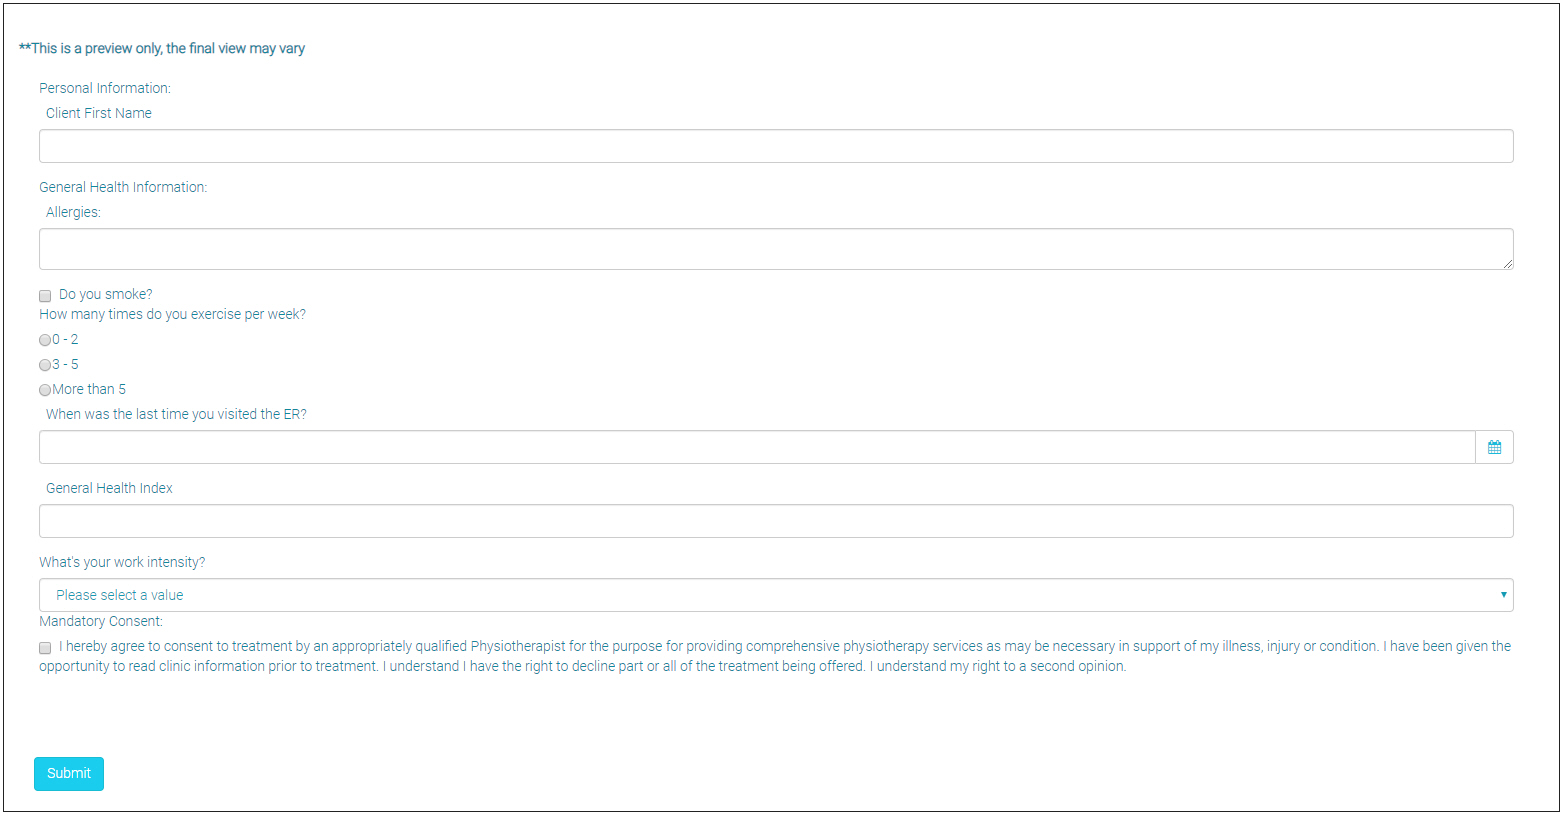
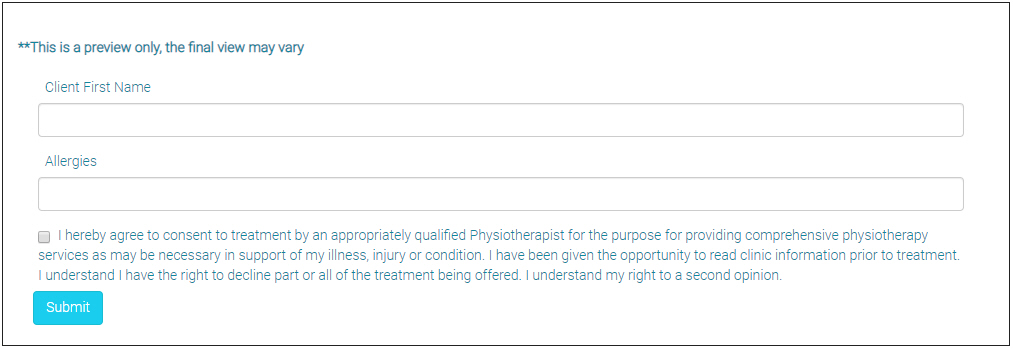
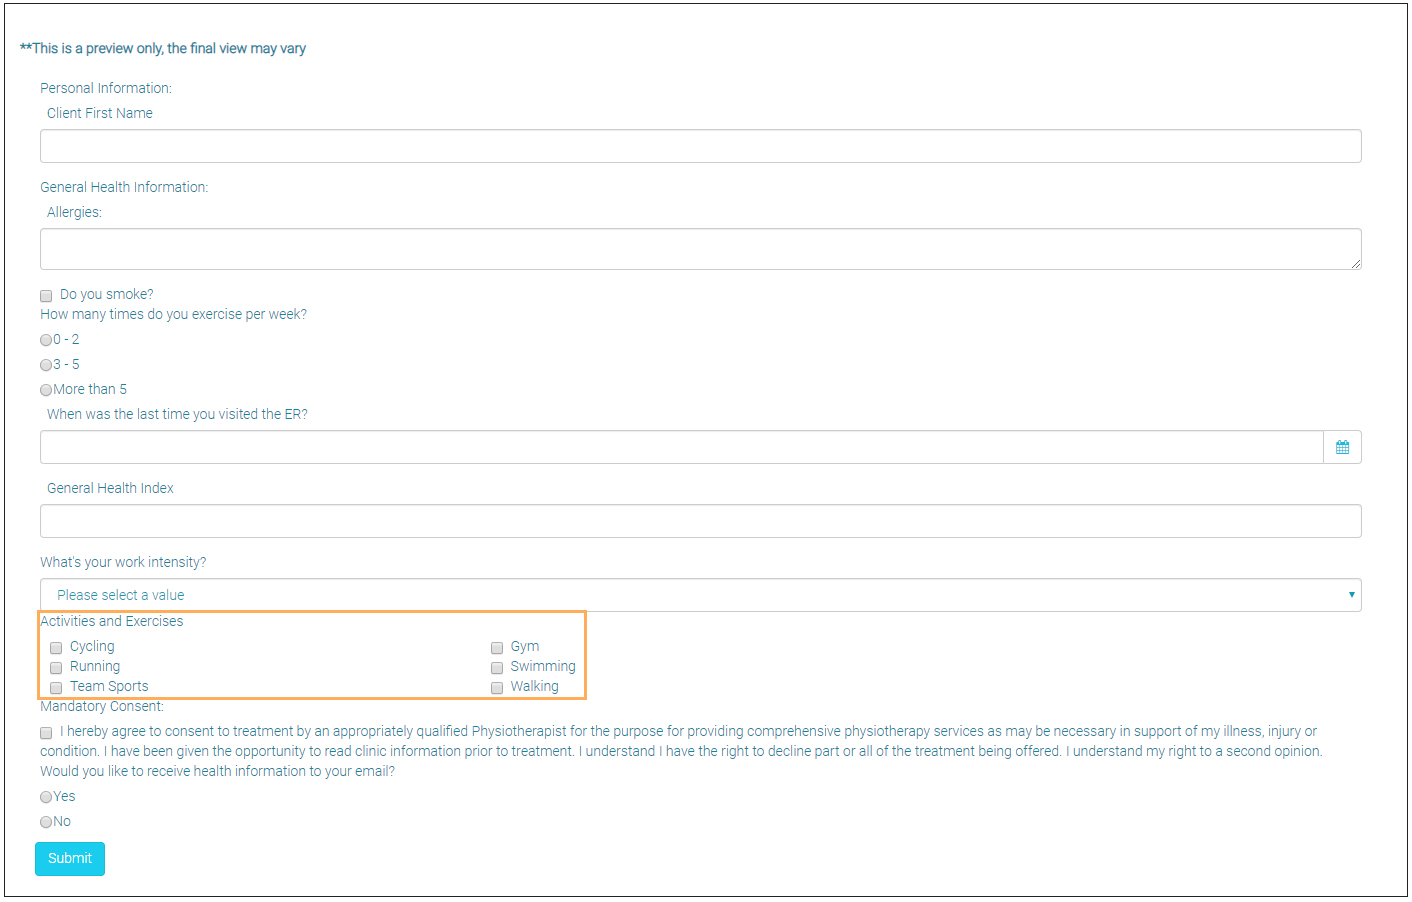
Note: this is the Preview Form for GPM Web
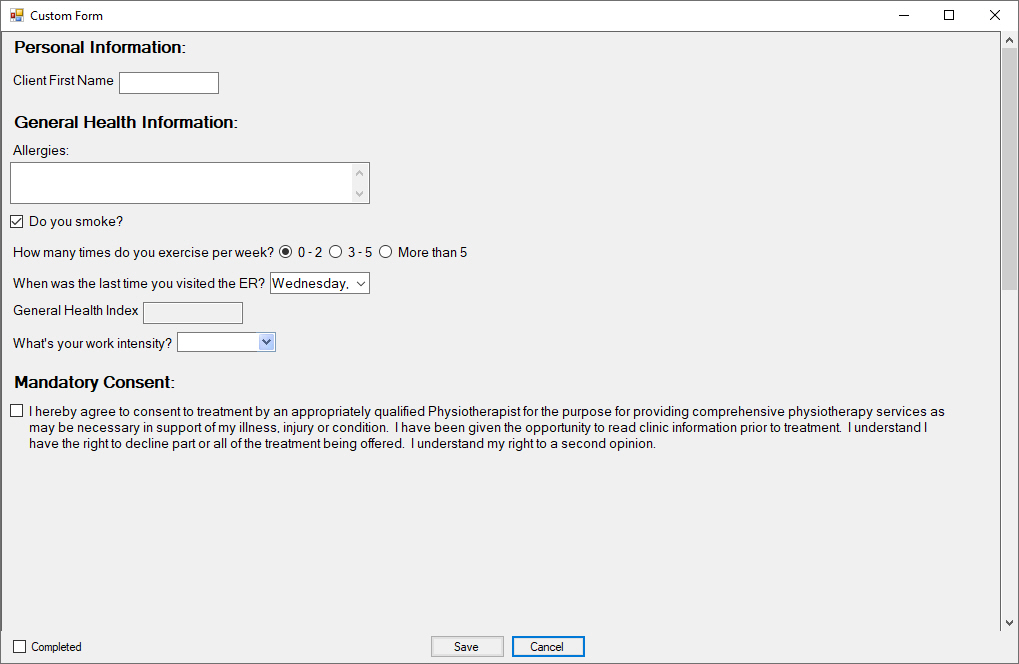
Note: this is the Preview Form for GPM
Creating a Smart Form from GPM
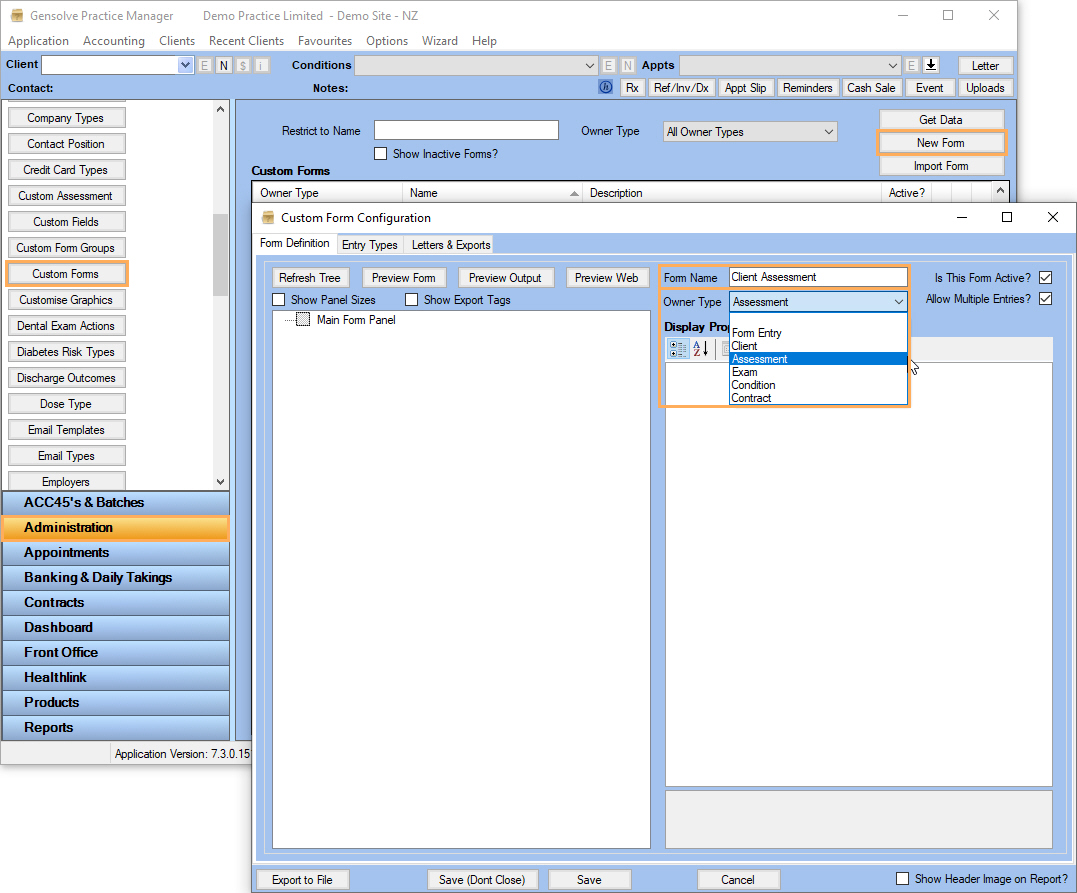
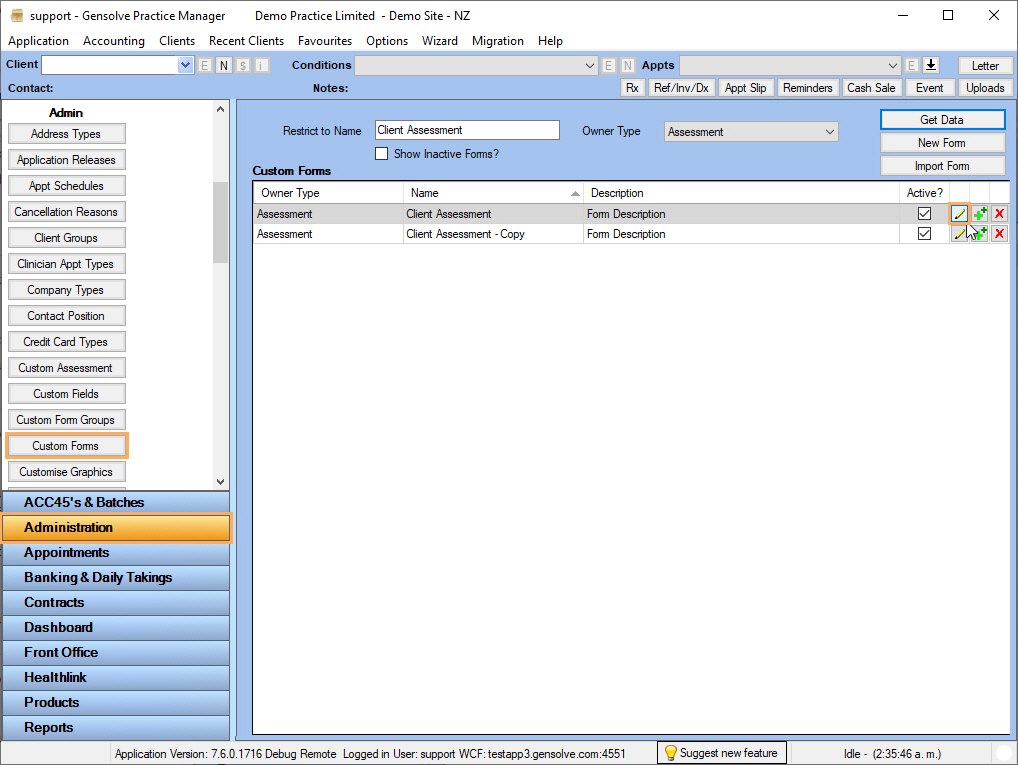
1. In order to create a Smart Form for GPM Web, on GPM go to Administration >> Custom Forms >> New Form
2. Enter a name in Form Name >> Select an Owner Type (For our demo we will choose Assessment)
Note: the different types of Owners will provide different System Fields. Refer to System Fields for more information.
-
Use Form Entry if you need to include system fields for Session Site and Session Vendor. Refer to System Fields for Form Entry Forms for more information.
-
Use Client if you need system fields from Client details and Clients General Health (e.g. Client Name, Client Email, Client Phone Number, Client DOB, Health Flags, etc). Refer to System Fields for Client Entry Forms for more information.
-
Use Assessment if you need to include system fields related to Client Details, Conditions, Contracts, General Health and Exams. Refer to System Fields for Assessment Entry Forms for more information.
-
Use Exam if you need to include system fields related to medical notes, such as: Body diagram, Goals, Current Symptoms, Treatment/Analysis/Plan, etc. Refer to System Fields for Exam Entry Forms for more information.
-
Use Condition if you need to include system fields linked to Client Conditions (e.g. Client Details, Condition Details, General Health).
-
User Contract if you need to include system fields related to Client Details, Contracts and General Health.
Adding different types of fields
There are 3 different types of fields that can be added to our forms. In this section we will add one of each.
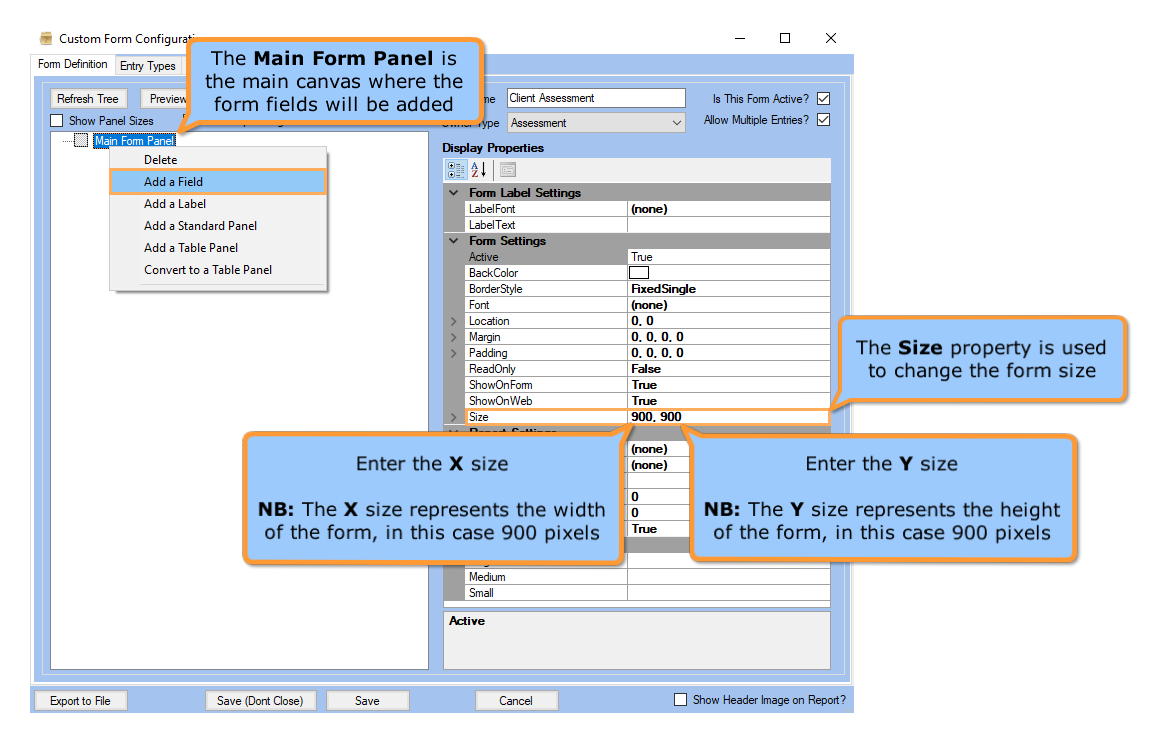
Click on Main Form Panel to view and edit its properties >> Right-click on it and select the Add a Field option
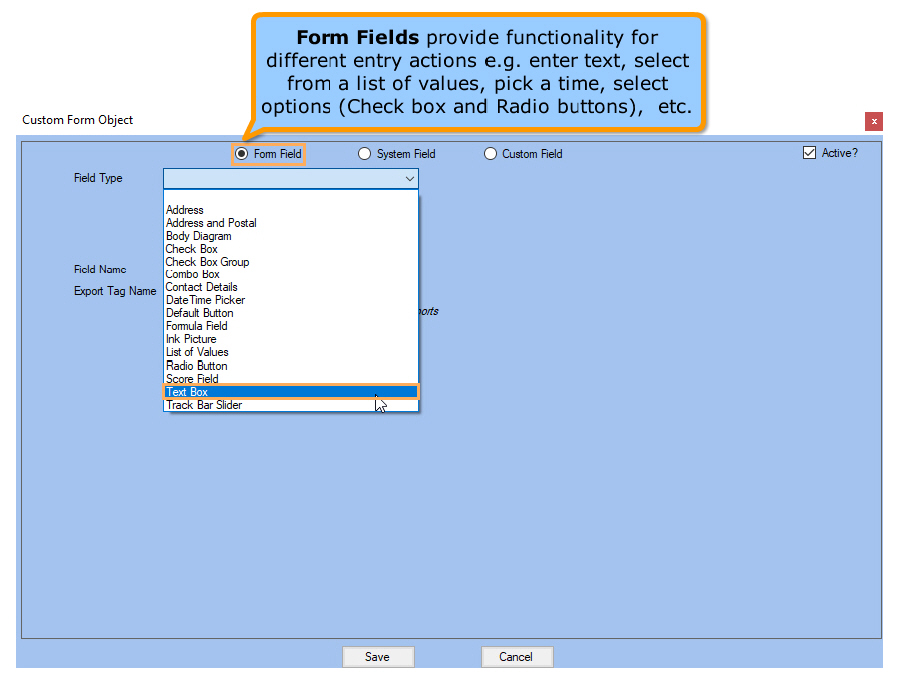
Form Fields
1. When adding a Form Field you can select from the available options on the drop-down menu, in this example we will use a Text Box
2. Enter a Field Name >> Click on Save
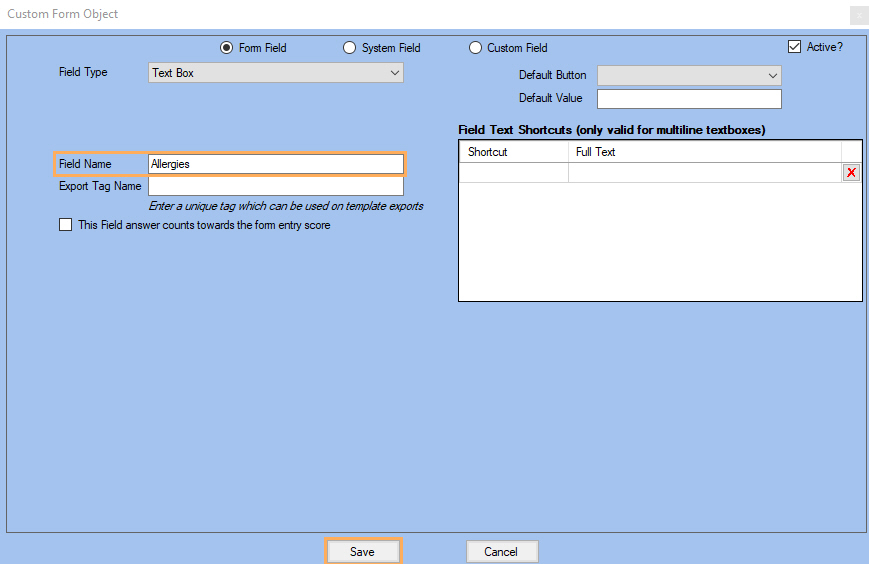
Note: For a basic use, Field Name is enough. Refer to Setting up a Default Button for more information.
3. After saving, the new form field will show up under the Main Form Panel.
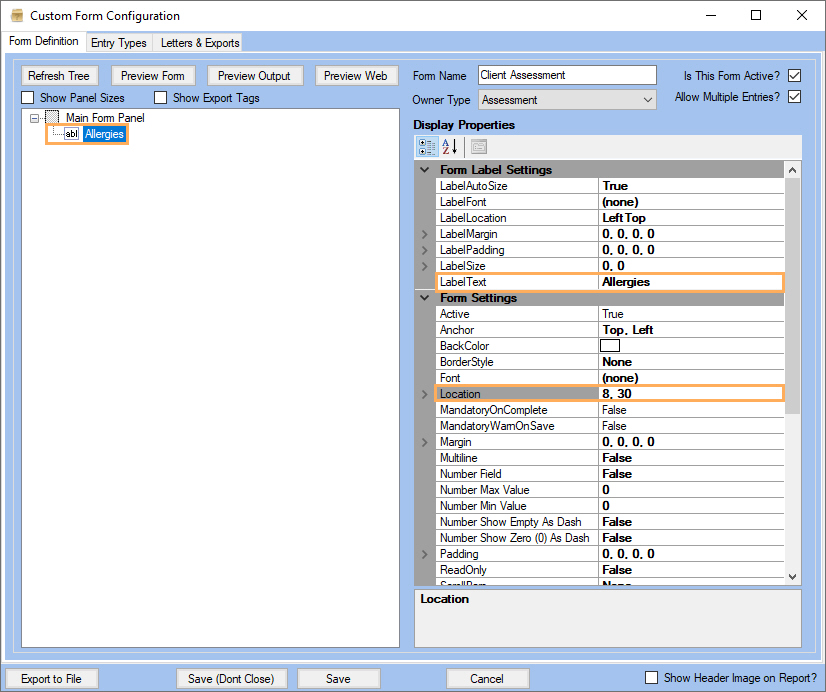
Note: Remember to set Label Text and Location properties on the right-hand side under Display Properties so that the form can be used in GPM as well.
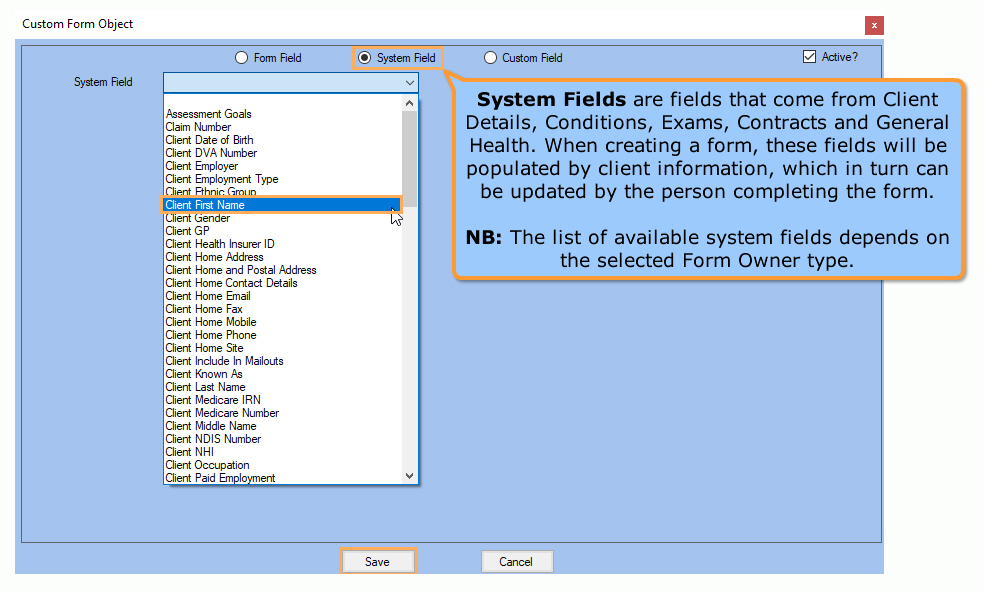
System Fields
1. Right-click on Main Form Panel and select the Add a Field option
2. When adding a System Field you can select from the available options on the drop-down menu. In this example we will use Client First Name >> Click on Save.
3. After saving, the new system field will show up under the Main Form Panel.
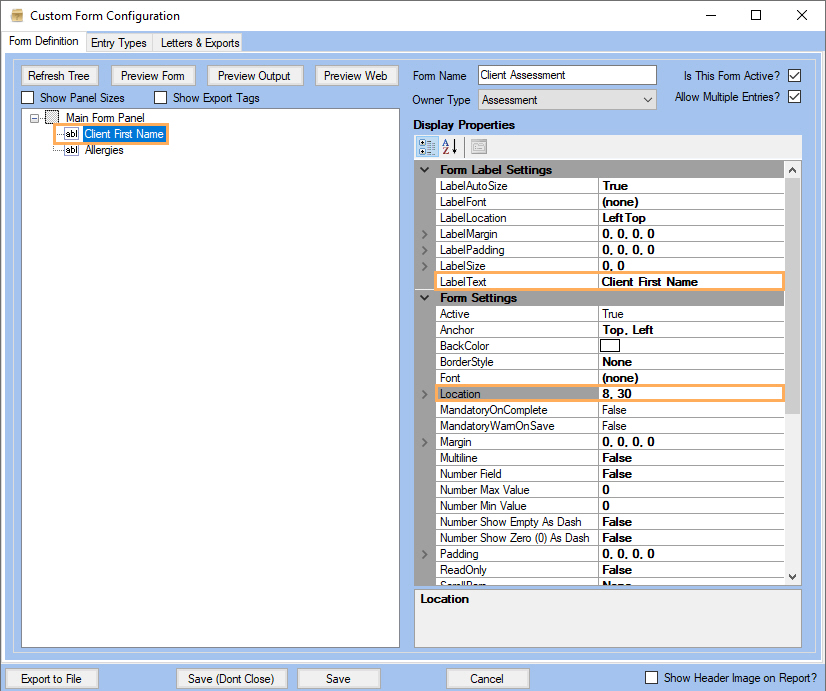
Note: Remember to set Label Text and Location properties so the form can be used in GPM as well.
Custom Fields
1. Right-click on Main Form Panel and select the Add a Field option
2. When adding a Custom Field you can select from the available options on the drop-down menu. In this example we will use an existing Custom Field to get Client Consent >> Click on Save.
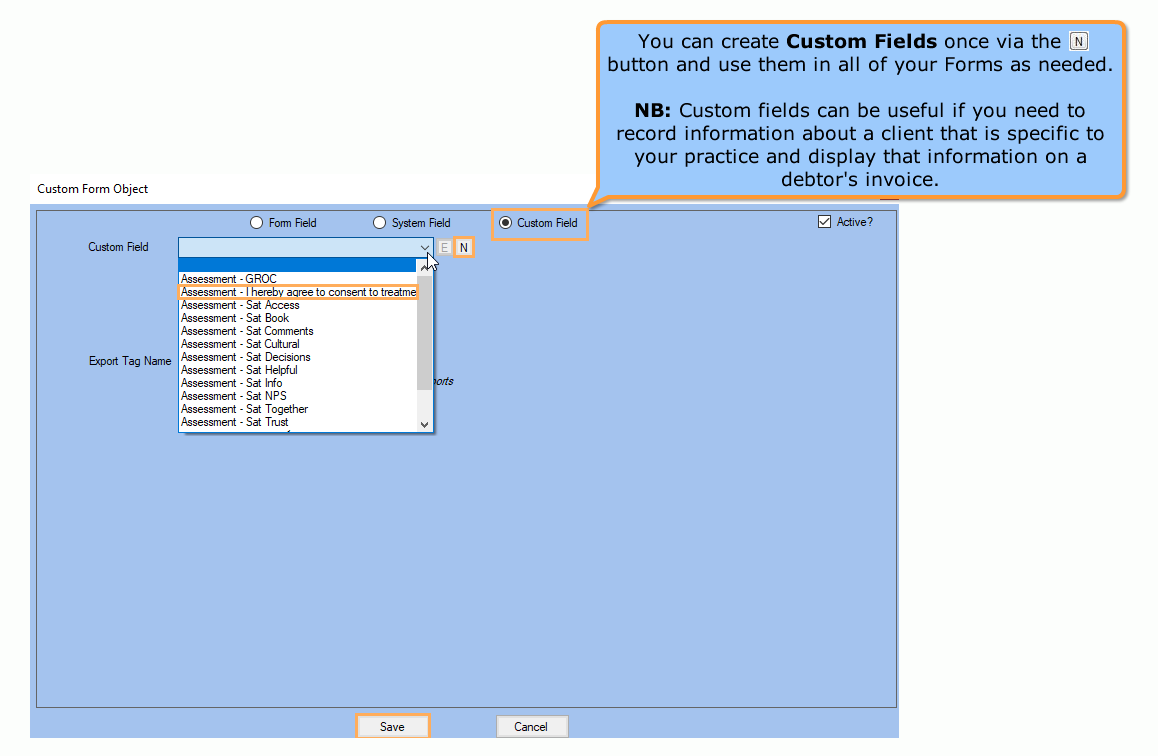
Note: Refer to Creating Custom Fields to learn more about them.
3. After saving, the custom field will show up under the Main Form Panel. You can drag-and-drop fields to organize them.
4. Click on Save (Don't Close) to save your progress and keep working on the form >> Click on Preview Web to see how your Smart Form looks.

Note: Fields will be displayed in GPM Web in the same order they are displayed under the Main Form Panel
Note: If you want to use your smart form right away on GPM Web go to the section Creating and completing your Smart Forms from GPM Web.
Common Fields: Text fields, Check boxes, Radio Buttons, Date Pickers, Scores and Lists of Values
Let's review some of the most common fields used in Smart Forms and how they work.
Note: If you closed your form and want to go
back to it, go to Administration >> Custom
Forms >> Get Data >>
Click on ![]() next to
your form name.
next to
your form name.
-
Text Fields and Display Properties
Text Fields
Follow the steps below to get a Preview Form of the GPM Forms.
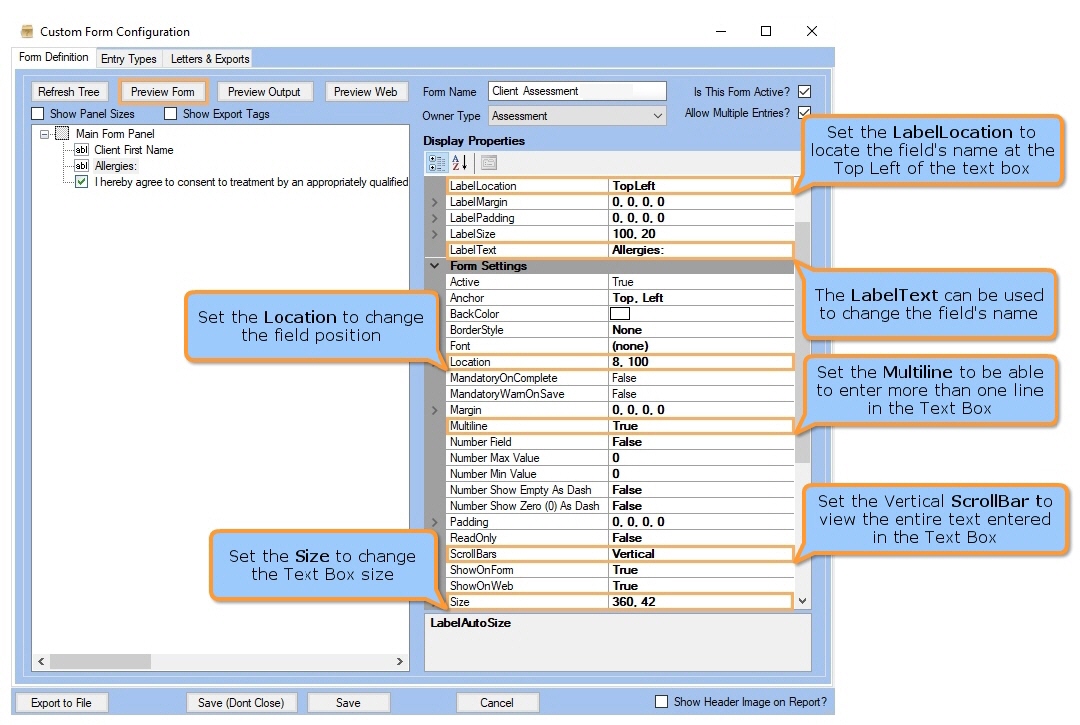
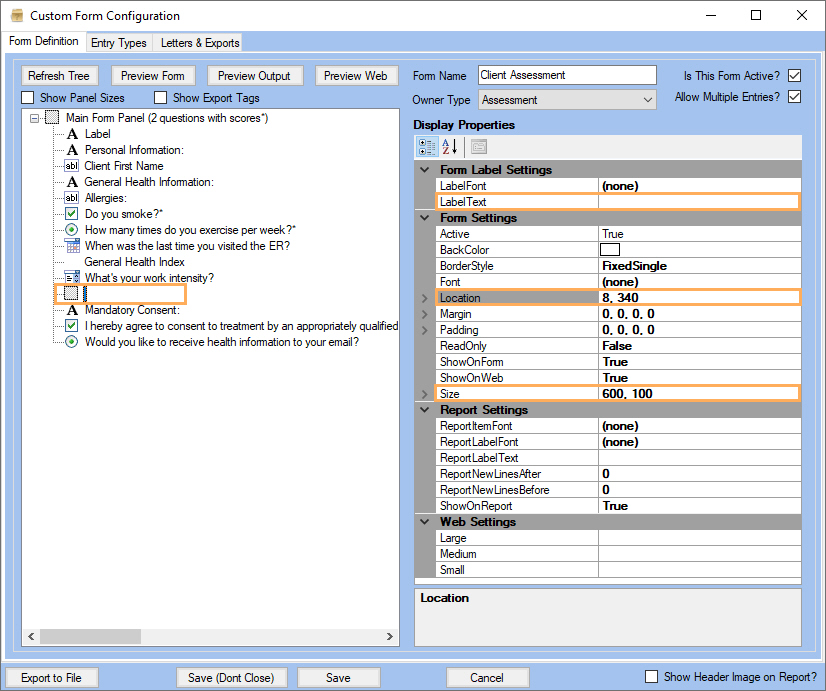
1. Select the System Field previously added.
2. Set the Display Properties as required (refer to the image).
Note: For more information related to field locations, refer to Changing the Location of a form object.
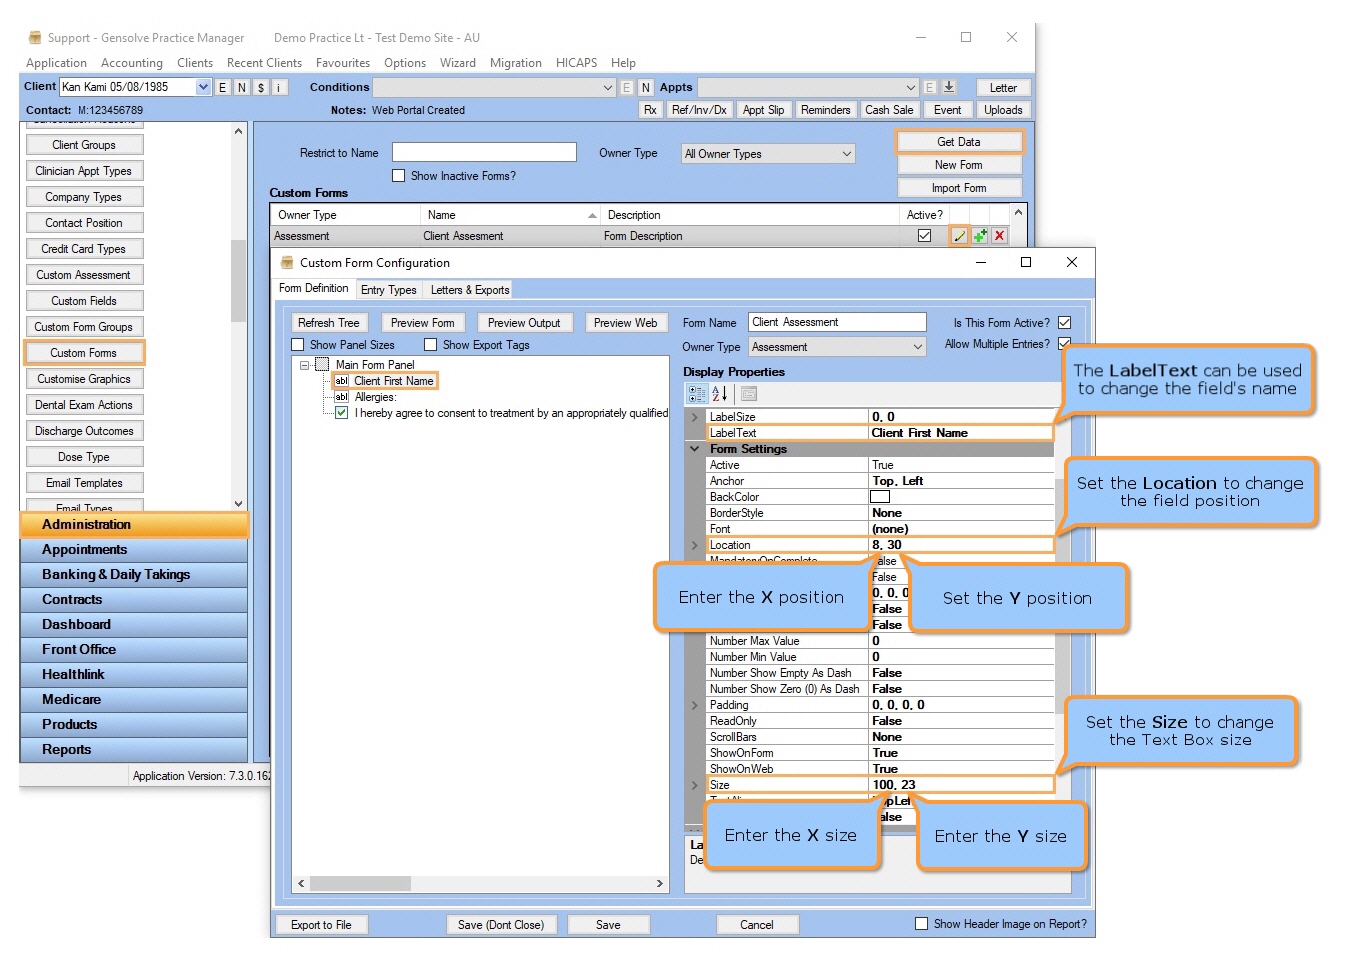
Note: Most of the Display Properties that can be configured apply only to GPM. LabelText is one of the most important ones to set for Smart Forms in GPM Web.
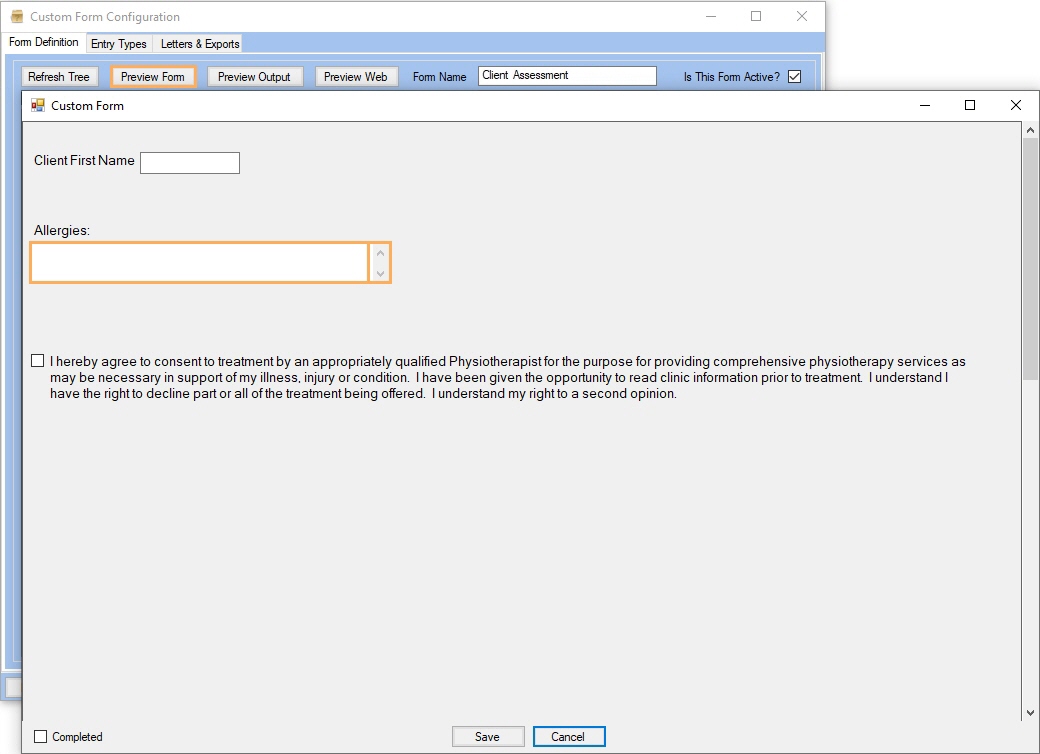
3. Click on Preview Form to view changes reflected in the form. After validating that the changes made are properly displayed, click on Cancel to continue.

4. You can also view the changes made to field locations by leaving the Preview Form window open while editing them. Click on Preview Form >> Move it to one side of the Form Configuration window >> Change a field location >> Click Save (Don't Close) >> Check in the Preview Form how the field's position changed in the form.
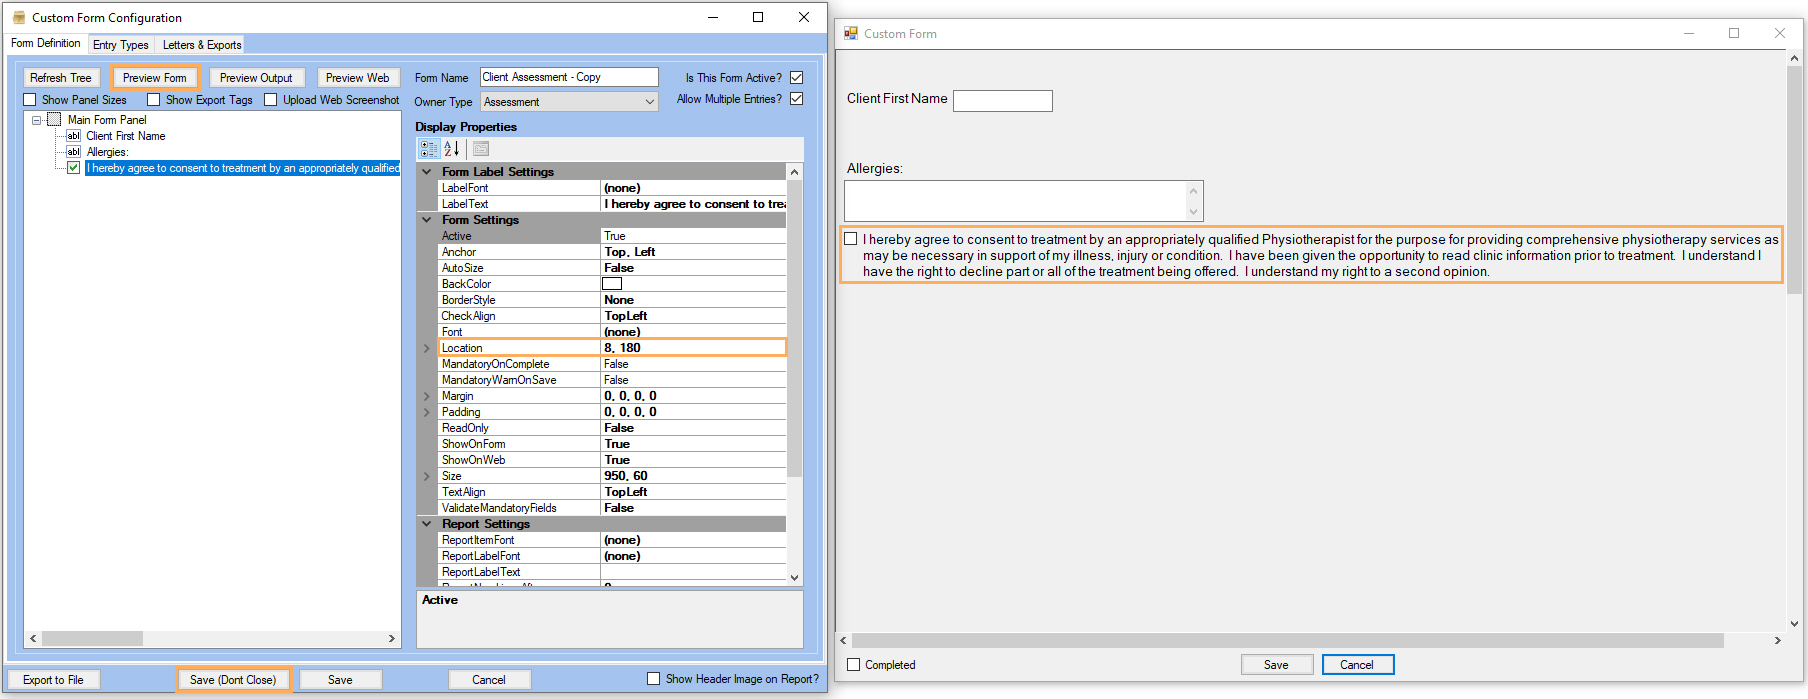
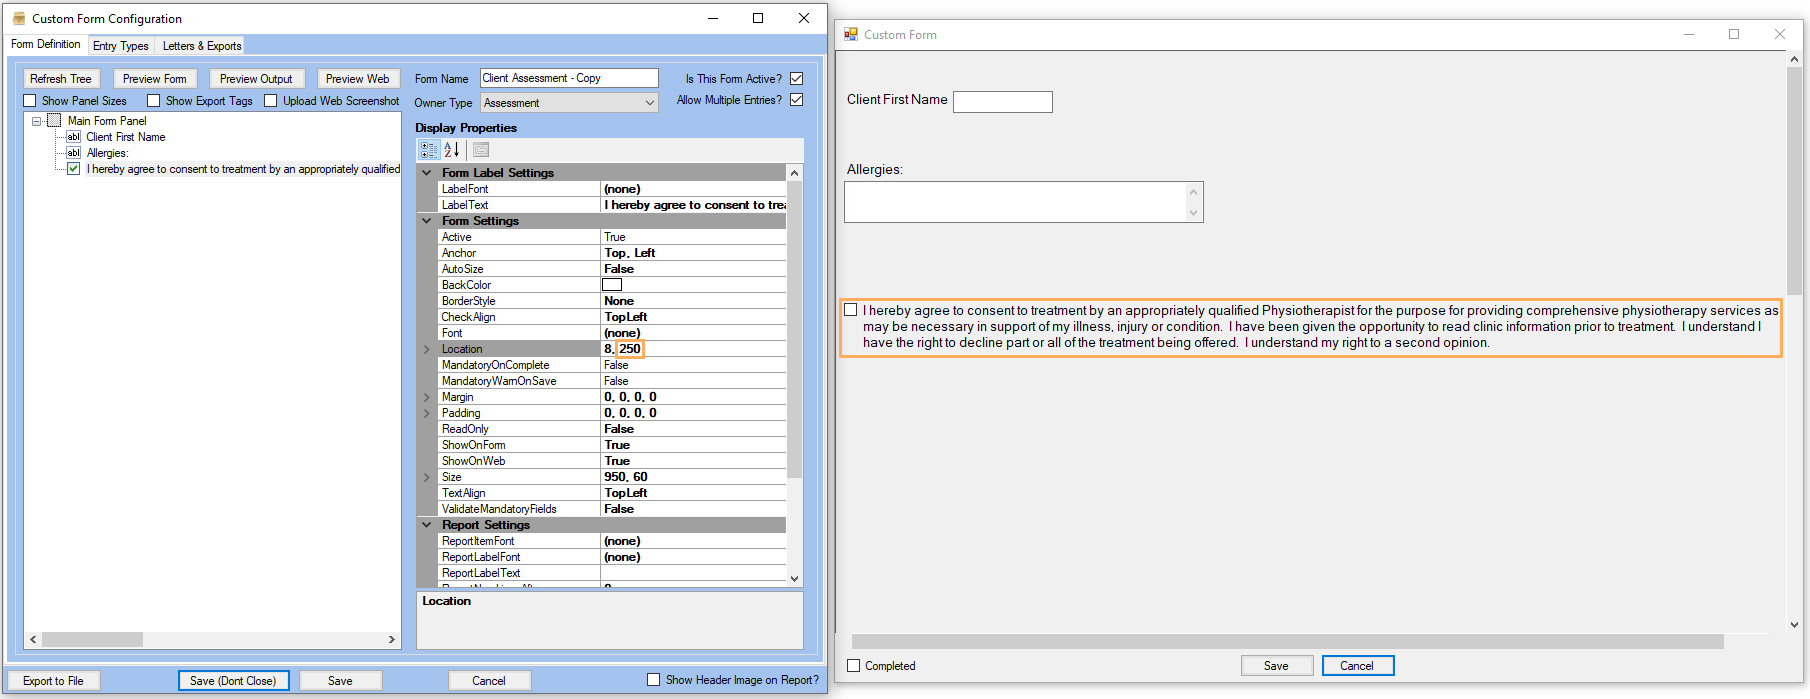
We moved the field 70 pixels in the vertical direction to demonstrate this functionality.
5. Set Display Properties for Form Field previously added.
6. Click on Preview Form to view changes reflected in the form. After validating that the changes made are properly displayed, click on Cancel to continue.
Labels
A Label is a sort of title where fields will be organized under it.
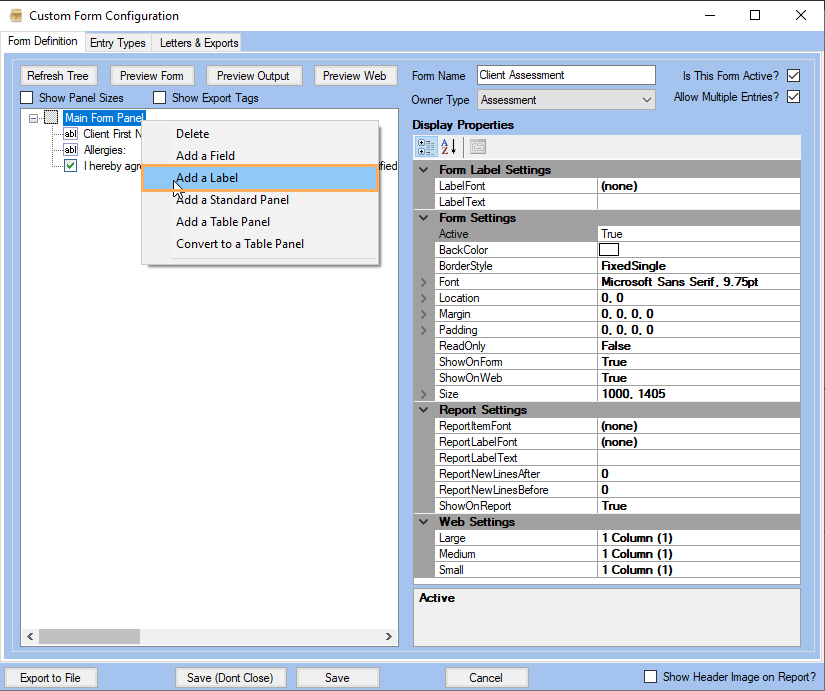
1. You can add Labels to your form to make it clearer and have a better organization. Right-click on the Main Form Panel and select Add a Label.
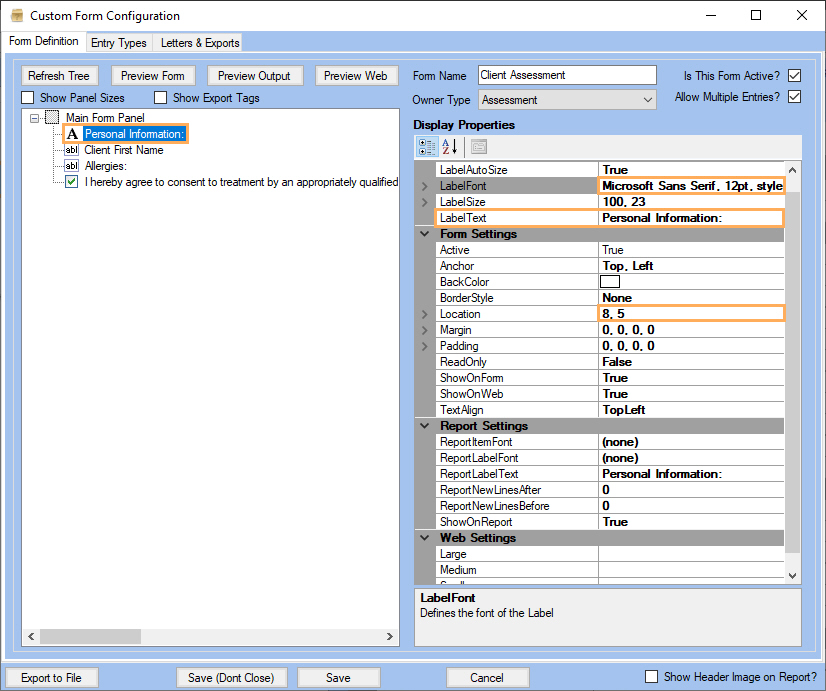
2. Set a LabelText. Also, set LabelFont and Location.
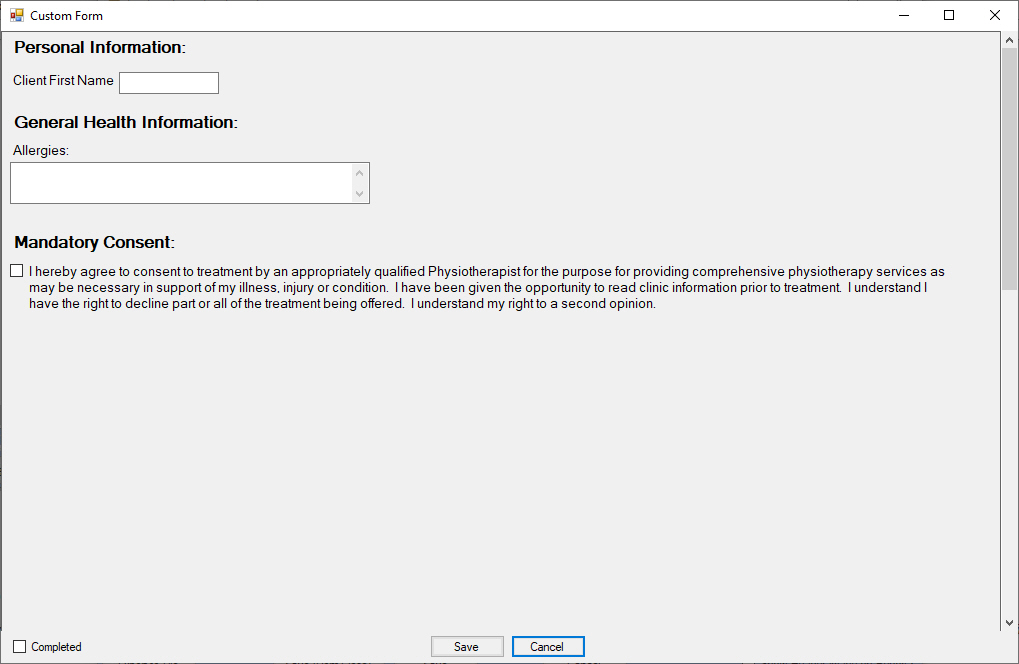
3. You can click on Preview Form and Preview Web at any point to see how your form is changing. Let's add a couple more Labels and see their previews.

Note: Labels work as sections. In order to add a field to a label/section, just drag-and-drop it under the desired label.
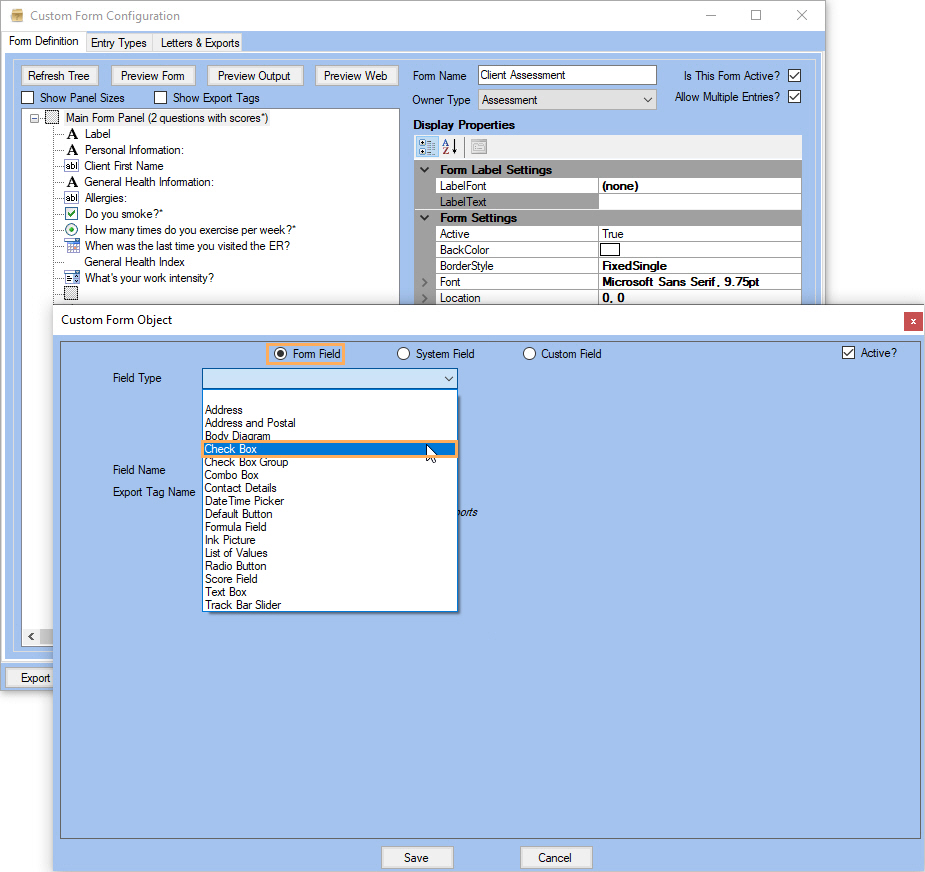
Check Boxes
Use this field if you want to provide an optional question on your assessment or a set of options with multiple possible answers to be selected (For multiple options select Check Box Group).
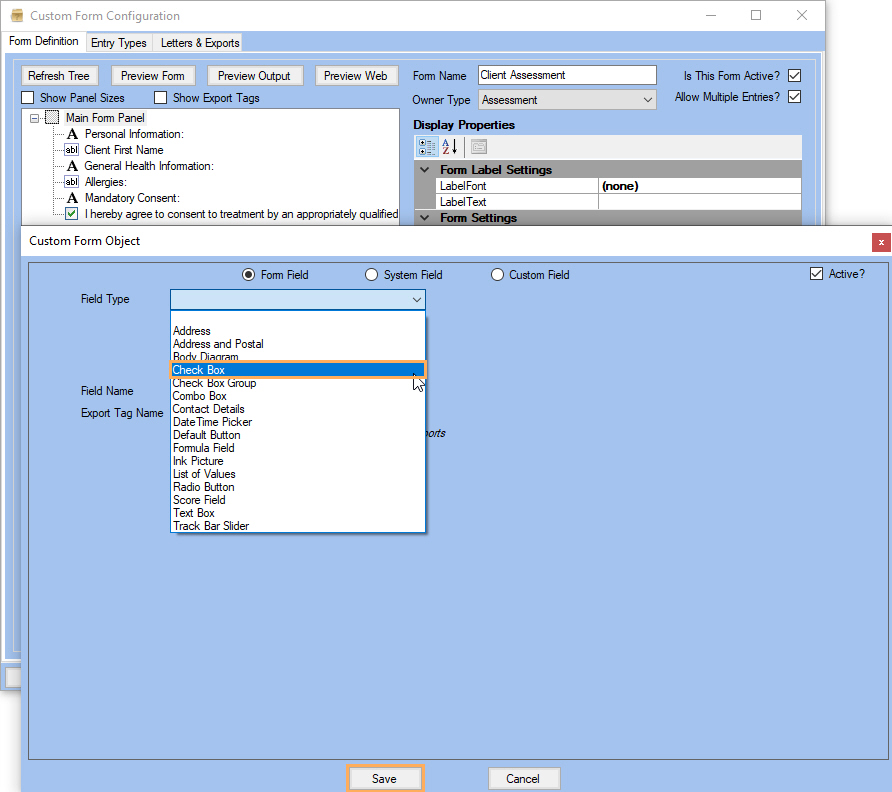
To do so, right-click on the Main Form Panel >> Select Add a Field >> On Form Fields, click on the Check Box option >> Give it a name (e.g. Do you smoke?) and click on Save.
For our example, we are going to drag-and-drop this new field under the General Health Information Label.
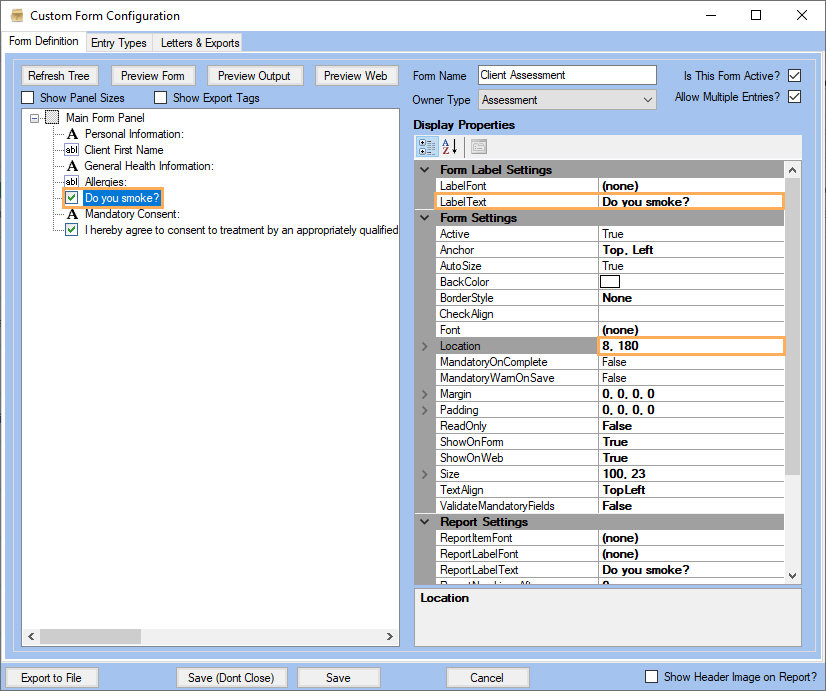
Note: Remember to set a label text and appropriate Display Properties if needed for GPM.
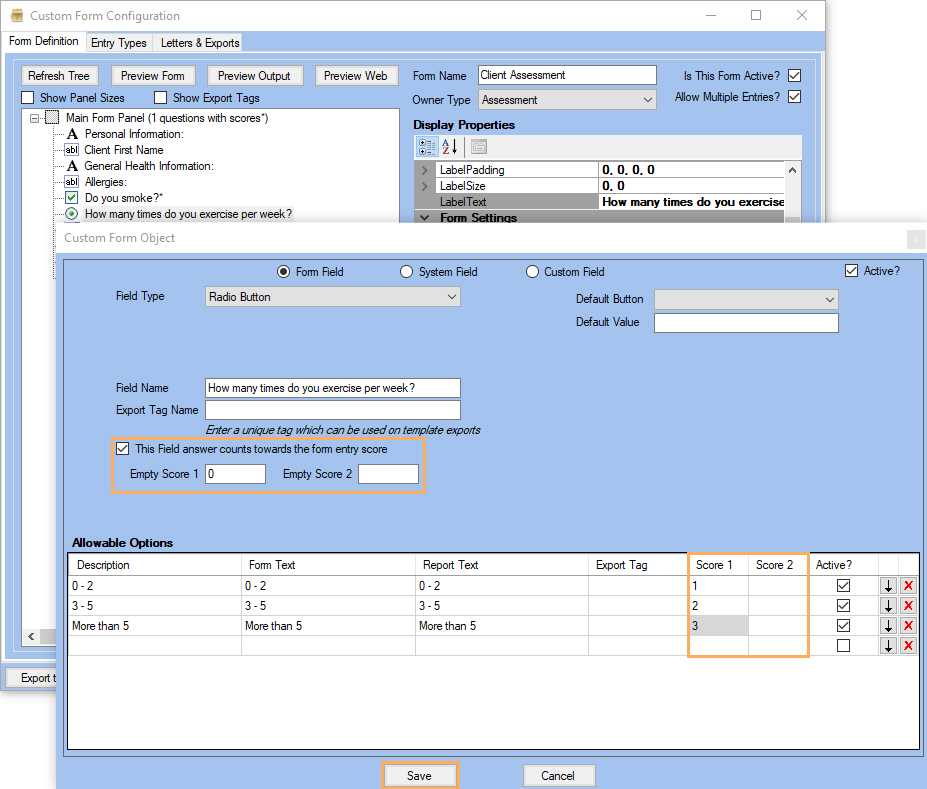
Radio Buttons
Use this field if you want to provide an optional question on your assessment or a set of options with only one possible answer to be selected.
To do so, right-click on the Main Form Panel >> Select Add a Field >> On Form Field >> Field Type, click on the Radio Button option >> Give it a name (e.g. How many times do you exercise per week?) >> Add options under the Allowable Options table and click on Save.
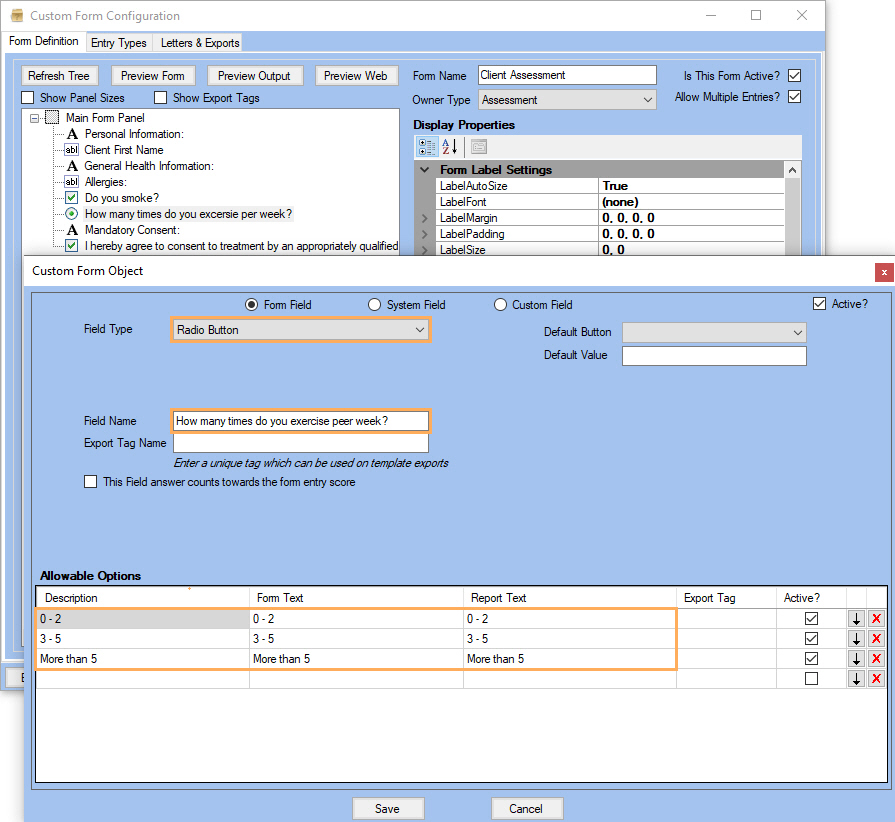
For our example, we are going to drag-and-drop this new field under the General Health Information Label.
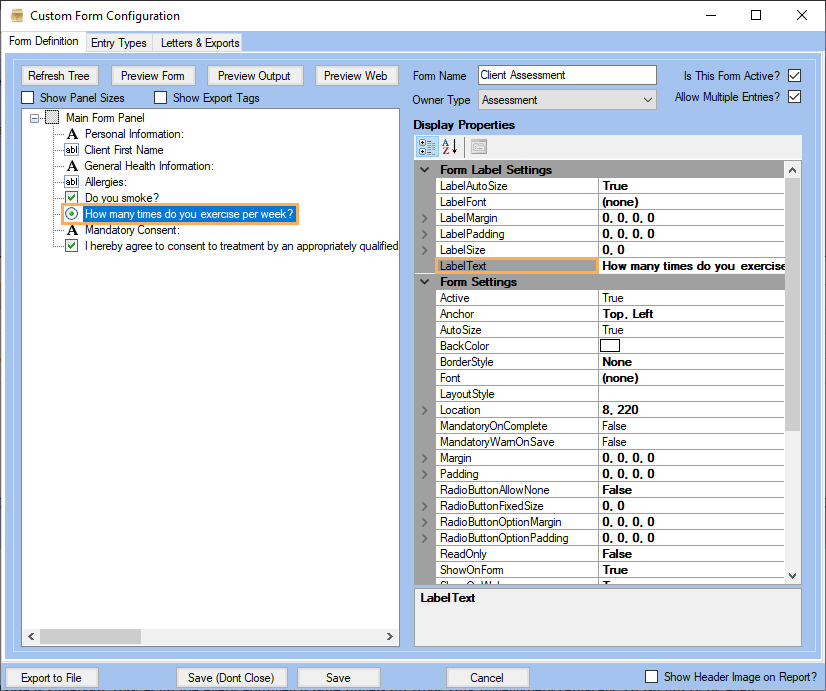
Note: Remember to set a label text and appropriate Display Properties if needed for GPM.
Date Pickers
Use this field if you want to provide a Calendar widget so the client chooses a date based on what your assessment requires.
To do so, right-click on the Main Form Panel >> Select Add a Field >> On Form Field>> Field Type, click on the Date Picker option >> Give it a name (e.g. When was the last time you visited the ER?) and click on Save.
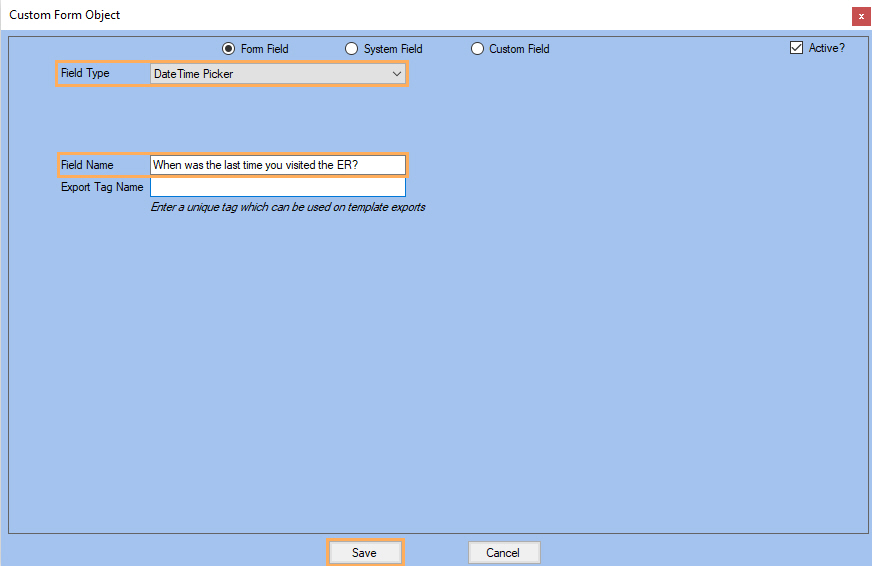
For our example, we are going to drag-and-drop this new field under the General Health Information Label.
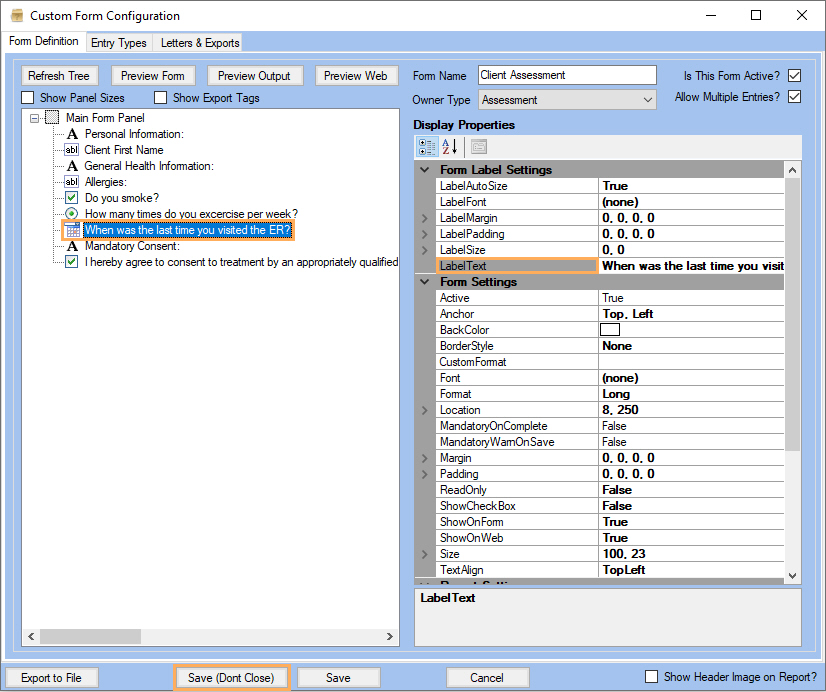
Note: Remember to set a label text and appropriate Display Properties if needed for GPM.
Score Fields
Use this field if you want to assign numeric values to fields in your form and then compute a score. For example, an assessment might comprise a set of questions that after having being completed will count towards a displayed score on the assessment. For the form we have been creating throughout this topic, we will create a score field (e.g. General Health Index) and assign numeric values to the Check Box and the Radio Button fields.
To do so, first edit the fields that will be computed in the score field. For our case those will be Do you smoke? and How many times do you exercise per week.
Right-click on the field and select Edit >> Fields that can be counted towards a Score have a check box called "This field answer counts towards the form entry score", tick this check box >> Assign a value for each option according to your needs >> Click Save

Note: The Score 2 fields are not mandatory and are soon to be excluded from GPM
Do the same for other fields, for our example we will do it also for the How many times do you exercise per week? field.
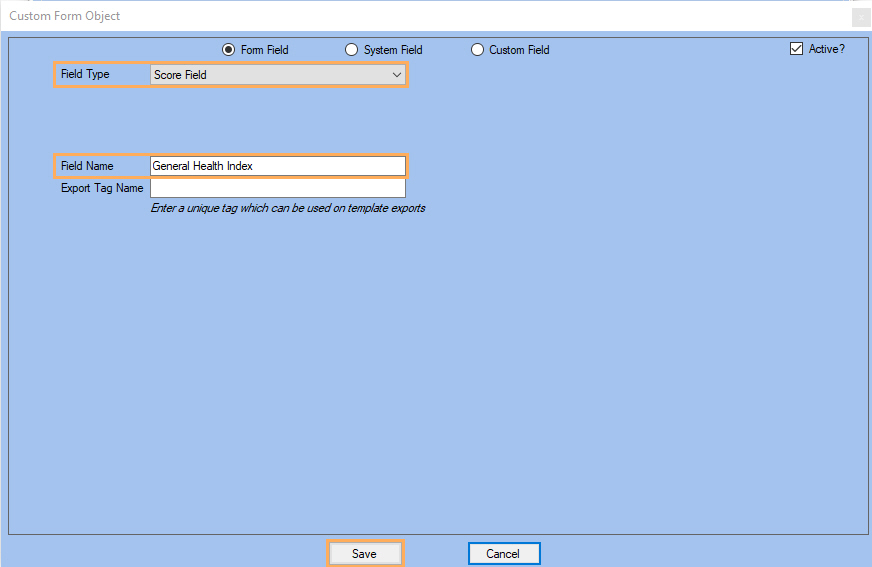
Now, to create the Score Field, right-click on the Main Form Panel >> Add a Field >> On the Form Fields section, for the Field Type drop-down, select Score Field >> Set a Field Name and then click on Save.
Finally, select the score field created and on the Properties panel, scroll down to Score Settings >> Click on the blank field next to ScoreableFieldsList >> Select the fields that you want to be taken towards your score field and click Save.
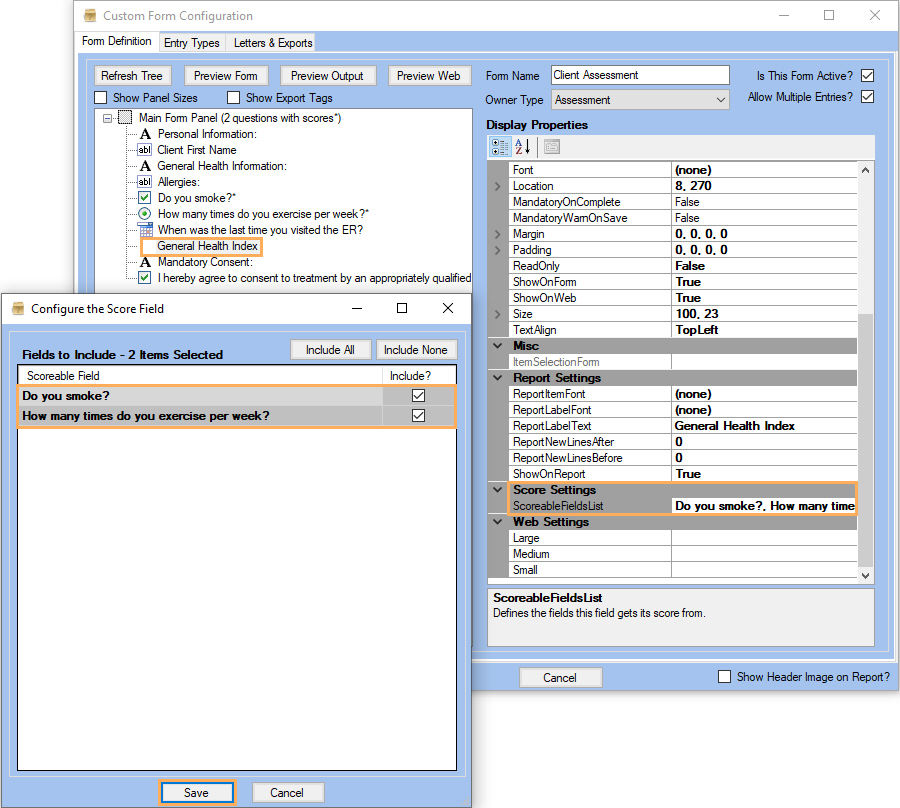
Now, when the scoreable fields are completed, the score field will count their numeric values to compute the desired score.
List of Values
Use this field if you want the client to select from a list of options that come from GPM (e.g. Ethnic group, Provider, Referrer).
To do so, right-click on the Main Form Panel >> Select Add a Field >> On Form Fields, for the Field Type drop-down select the List of Values option (For our example we will choose Work Intensity) >> Give it a name (e.g. What's your work intensity?) and click on Save.

For our example, we are going to drag-and-drop this new field under the General Health Information Index Label.
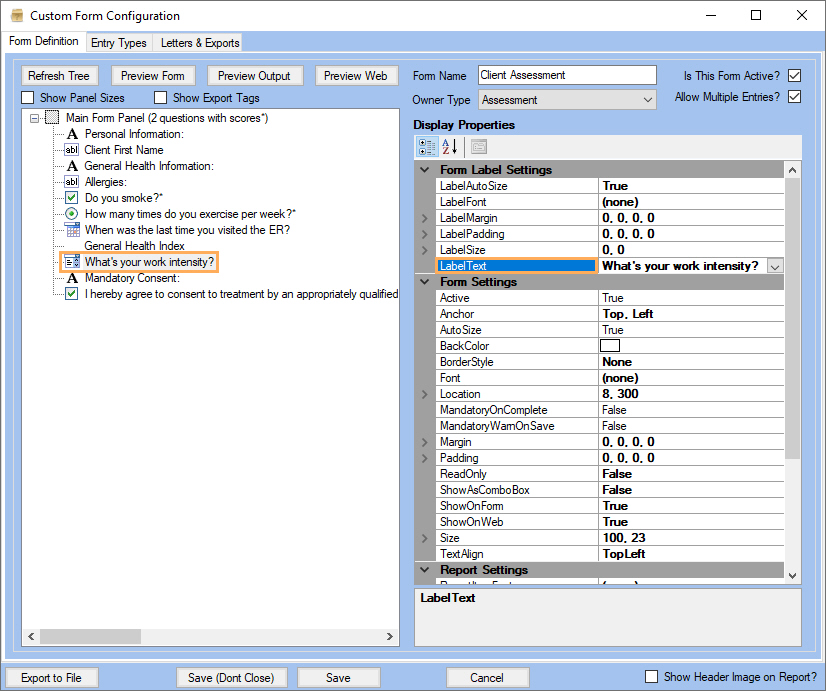
Note: Remember to set a label text and appropriate Display Properties if needed for GPM.
There are more Form Fields you can use to complement your Smart Forms. We invite you to try and test them out according to your needs. Let's preview how our form is shaping up with the fields we have added so far. Click on Preview Form and Preview Web.
Creating Custom Fields
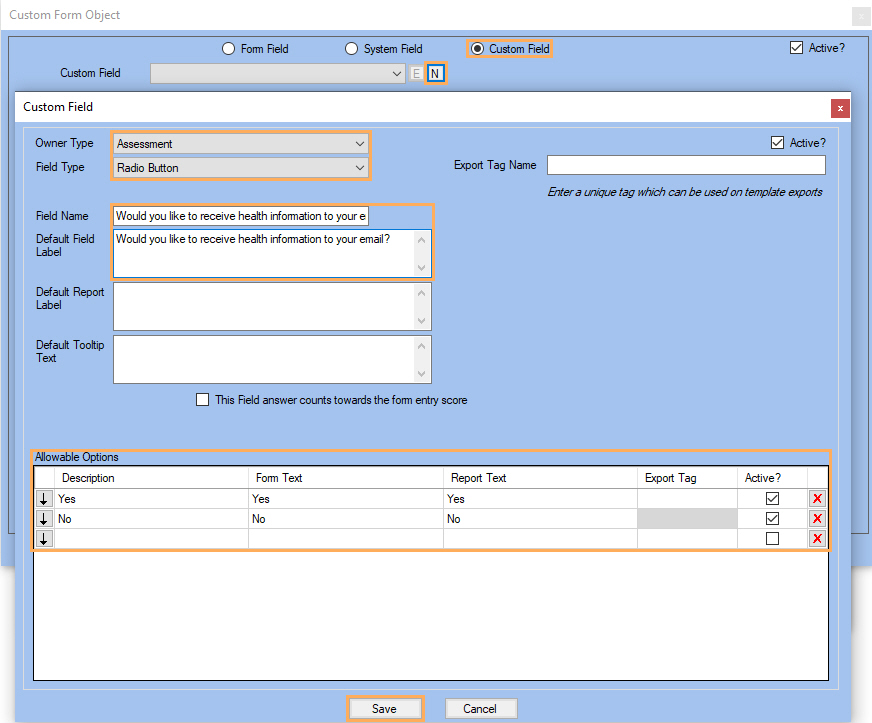
Custom fields are useful when there is a Form Field that you find yourself using very frequently and would like to create just one version of it and use it across your Smart Forms. For our example, we are going to create a new Custom Field to ask the client whether they would like to receive health information on their email or not before completing the form.
To do so:
1. Right-click on
the Main Form Panel
>> Select Add a Field
>> Click on the Custom
Fields radio button and click on the ![]() >>
Select a Owner Type
and a Field Type.
>>
Select a Owner Type
and a Field Type.
For our example, we are creating a Smart Form of Assessment type, so the Owner Type must be Assessment to be used on this form.
2. Enter a Field Name and a Field Label >> Under the Allowable Options section, enter options as you need (in case you are creating a Custom Radio Button field as well) >> Click on Save.
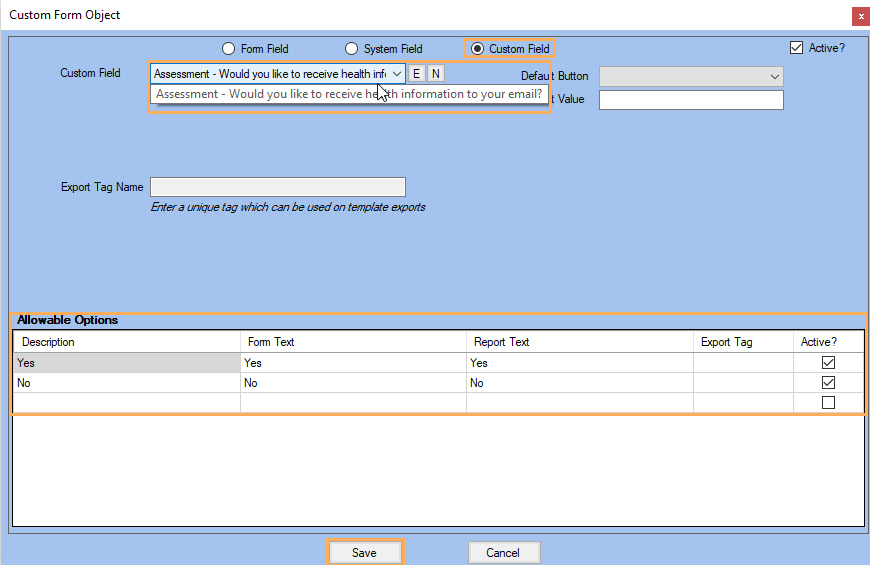
3. Now every time we create a new Smart Form of Assessment type, this Custom Field will be available >> Click on Save
4. For our example, we are going to drag-and-drop this new field under the Mandatory Consent Label. Remember that fields will be displayed in the Smart Forms in the same order they appear in the editor.
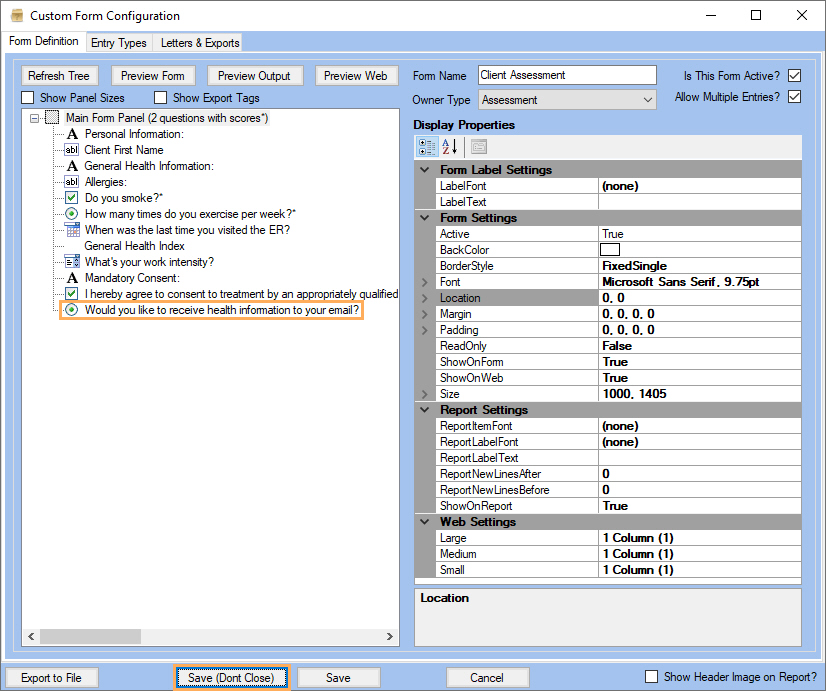
Note: Remember to set a label text and appropriate Display Properties if needed for GPM.
Creating and completing your Smart Forms from GPM Web
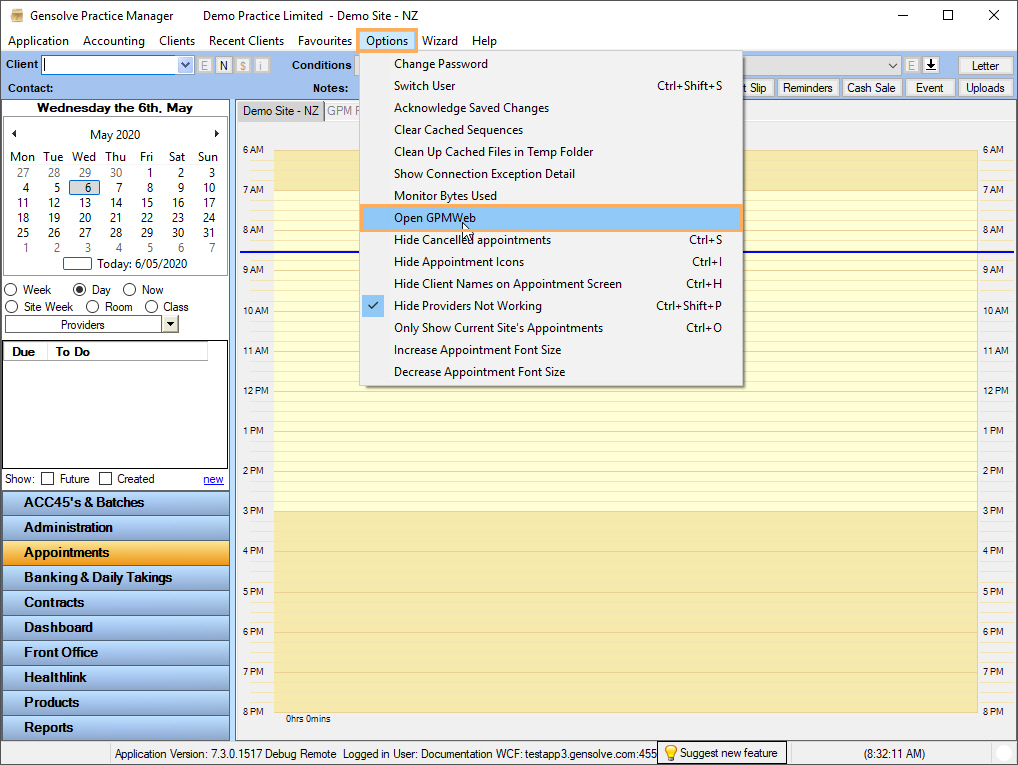
1. After having created your form in GPM, we are ready to use it in GPM Web. To do so, on the main form click on Options >> And select Open GPMWeb
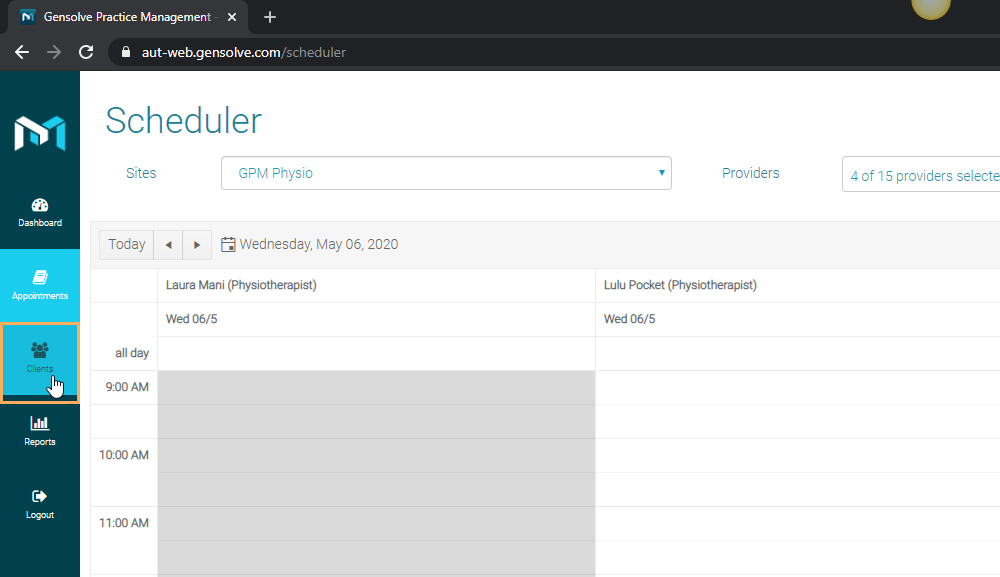
2. From the Scheduler, click on Clients
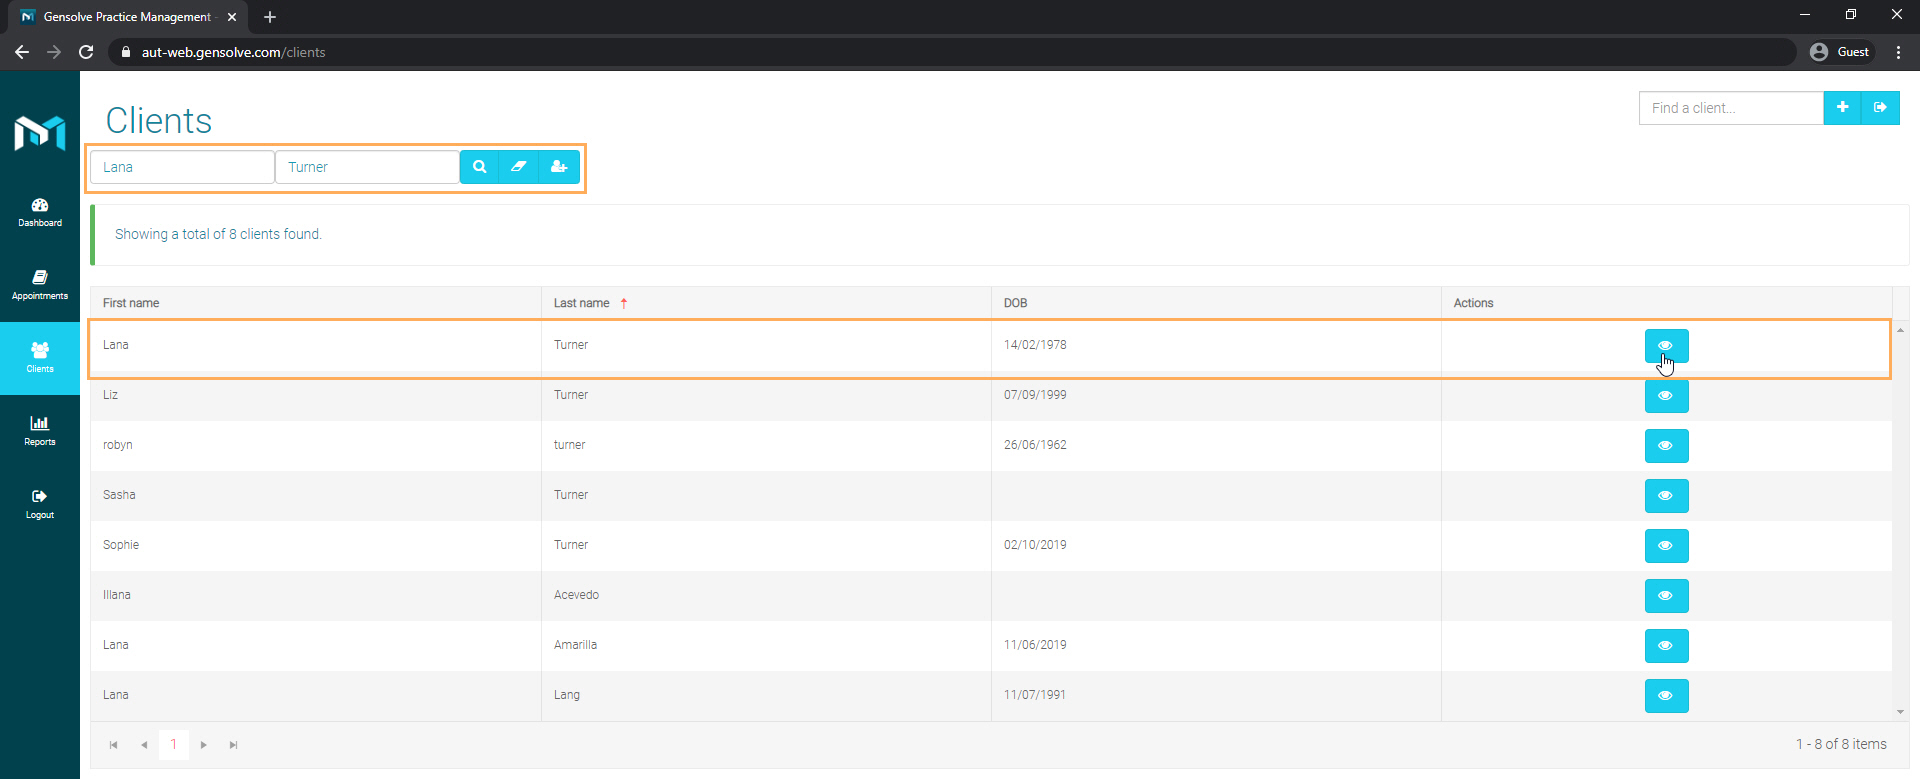
3.
Then, search the client for whom the Assessment will be done
to and click on ![]()
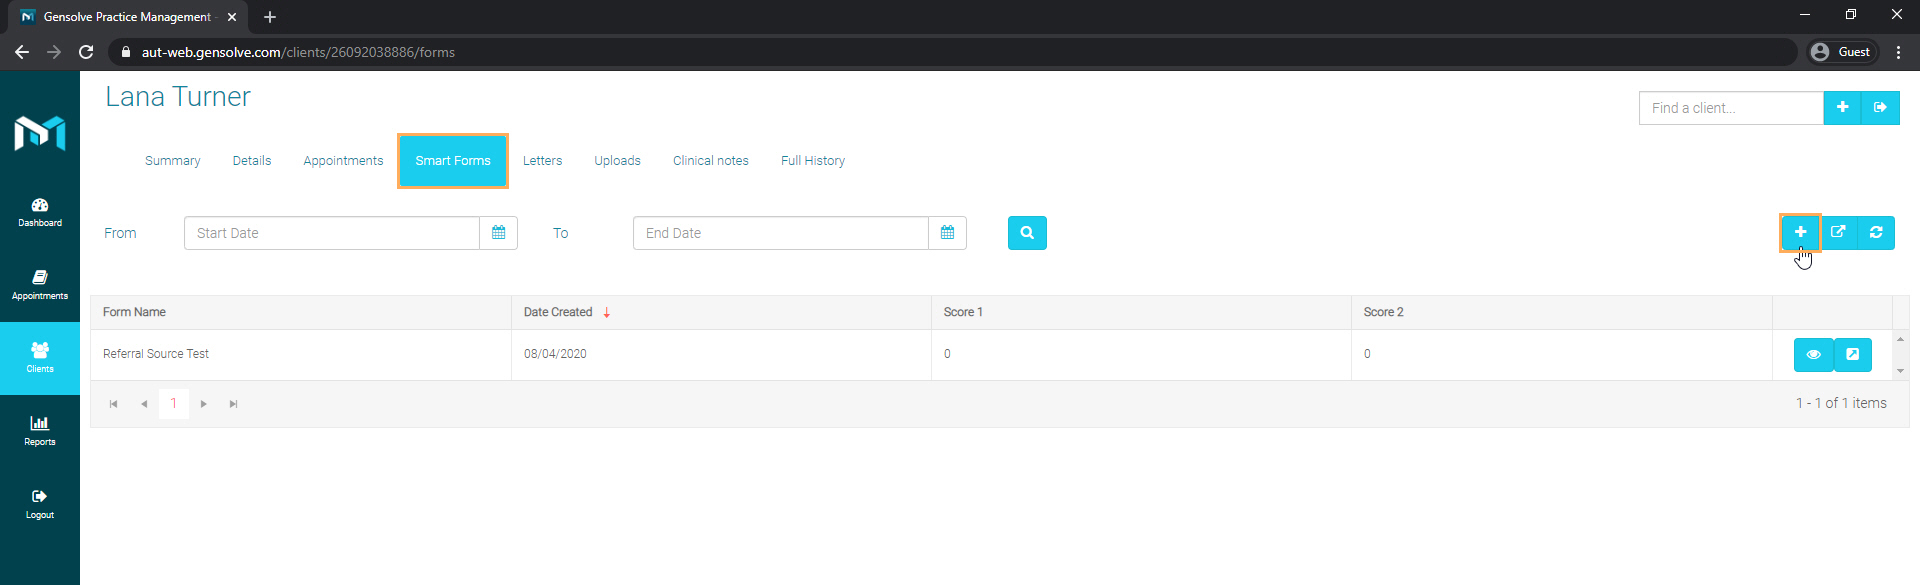
4.
Click on Smart
Forms >> Then click on ![]() to create a new form
to create a new form
5. Select the owner type (In our example case Assessment) >> For Select the form to use, look for the name of the form you just created >> Select the client condition and the provider type >> Click on Create New Form
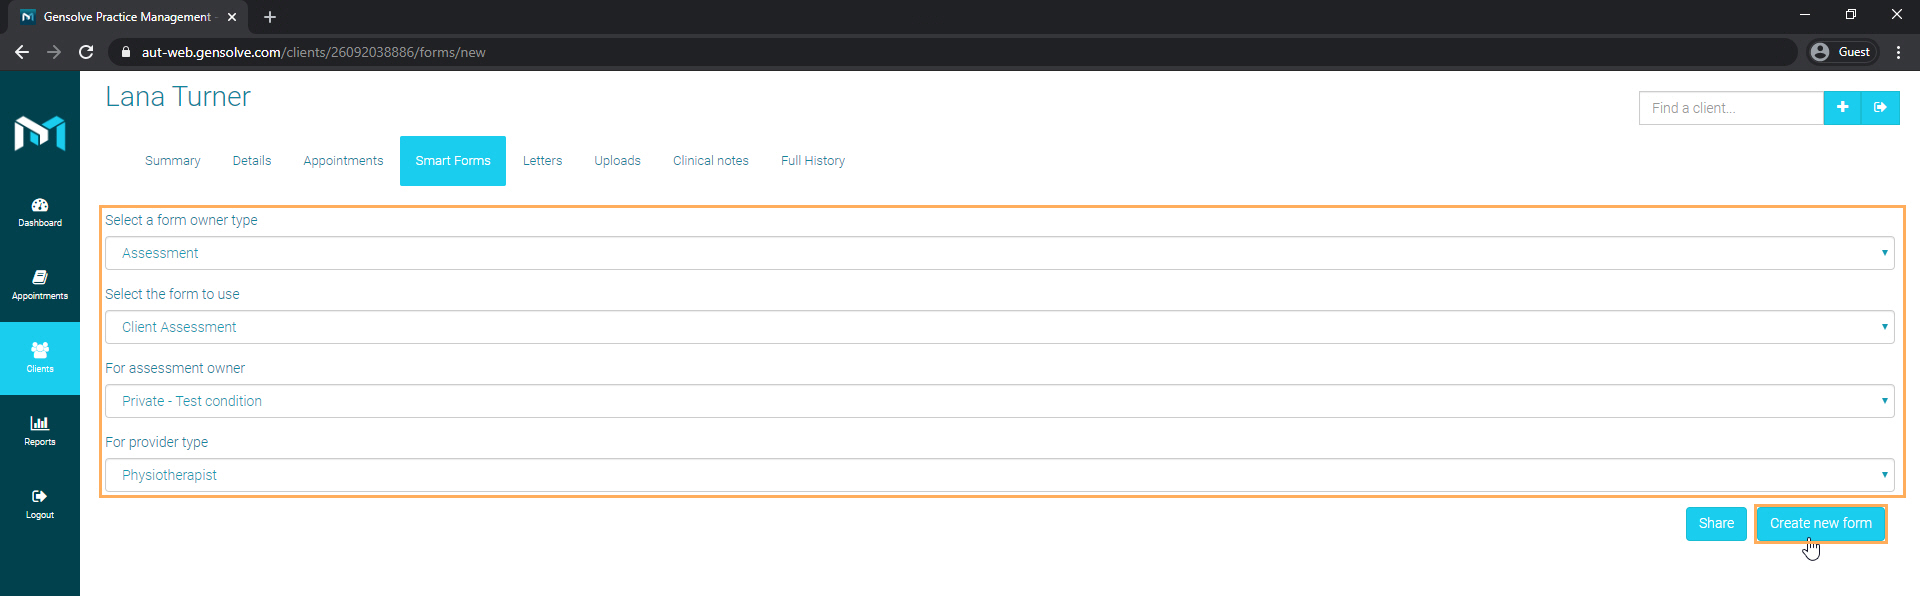
Note: You can also click on Share to send a link to the Form to your clients so that they can complete it on their devices.
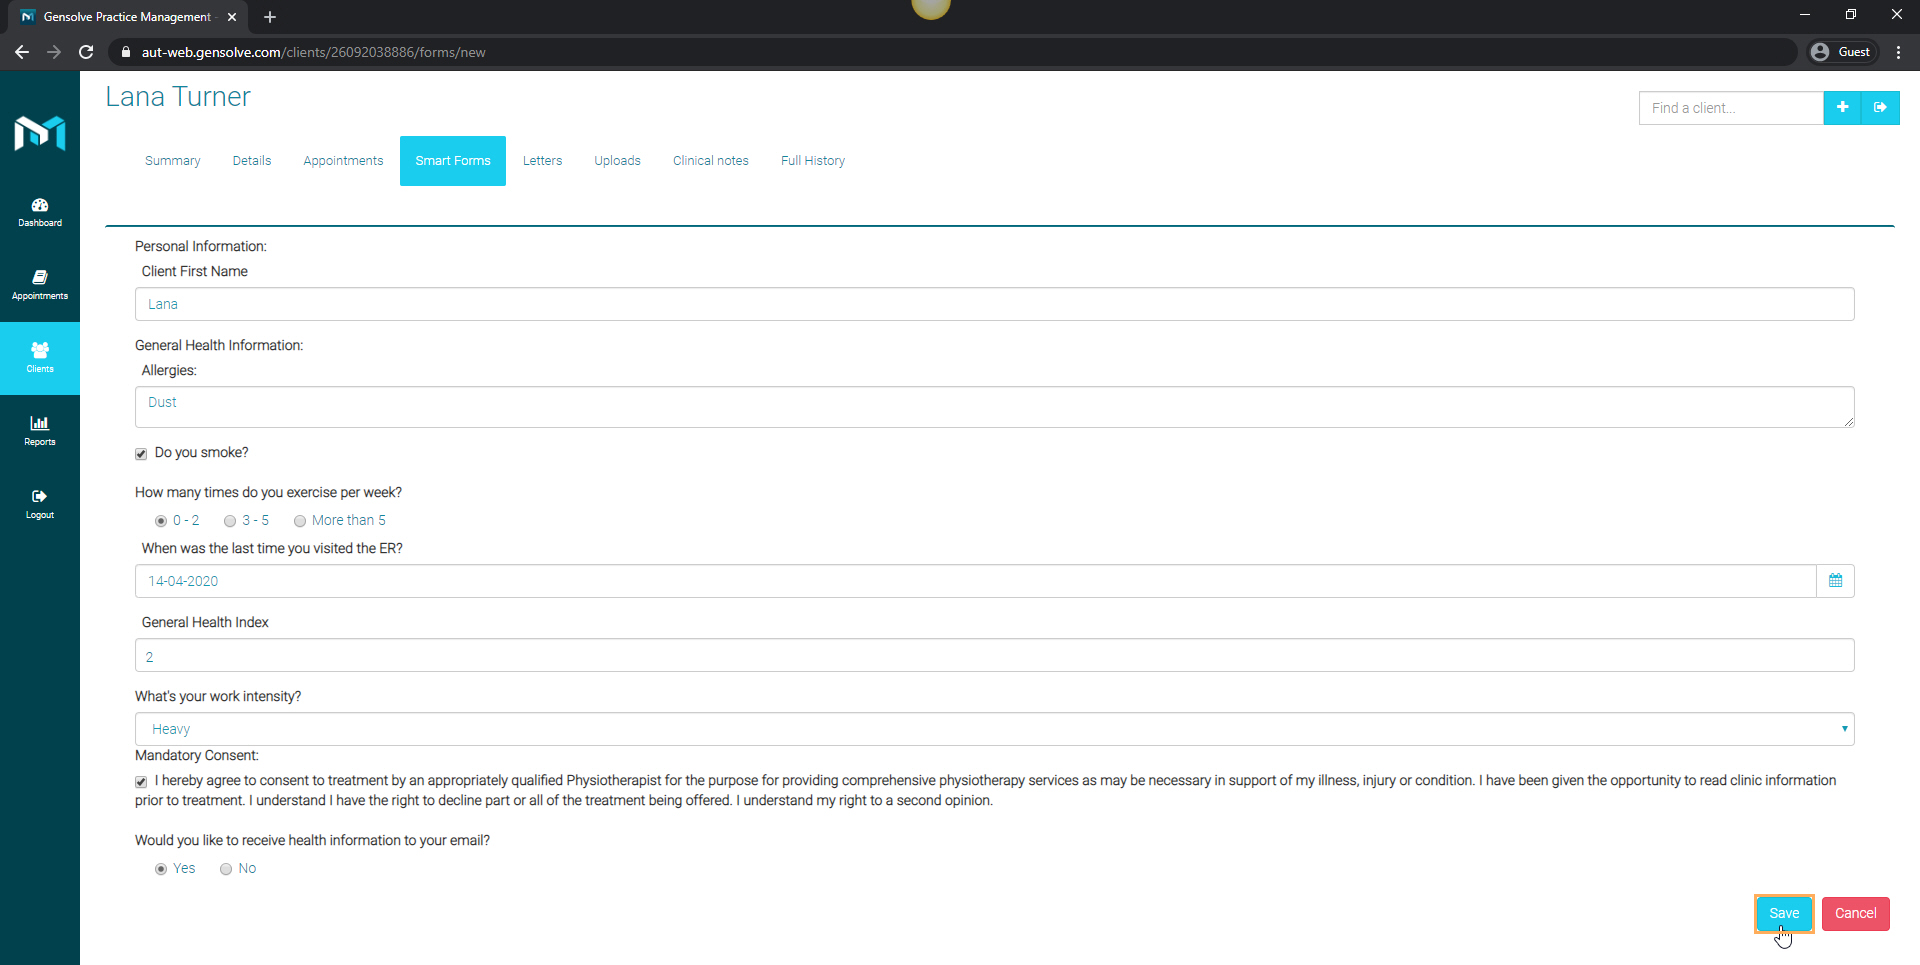
6. Your client will be able to complete the fields and then Save the information.
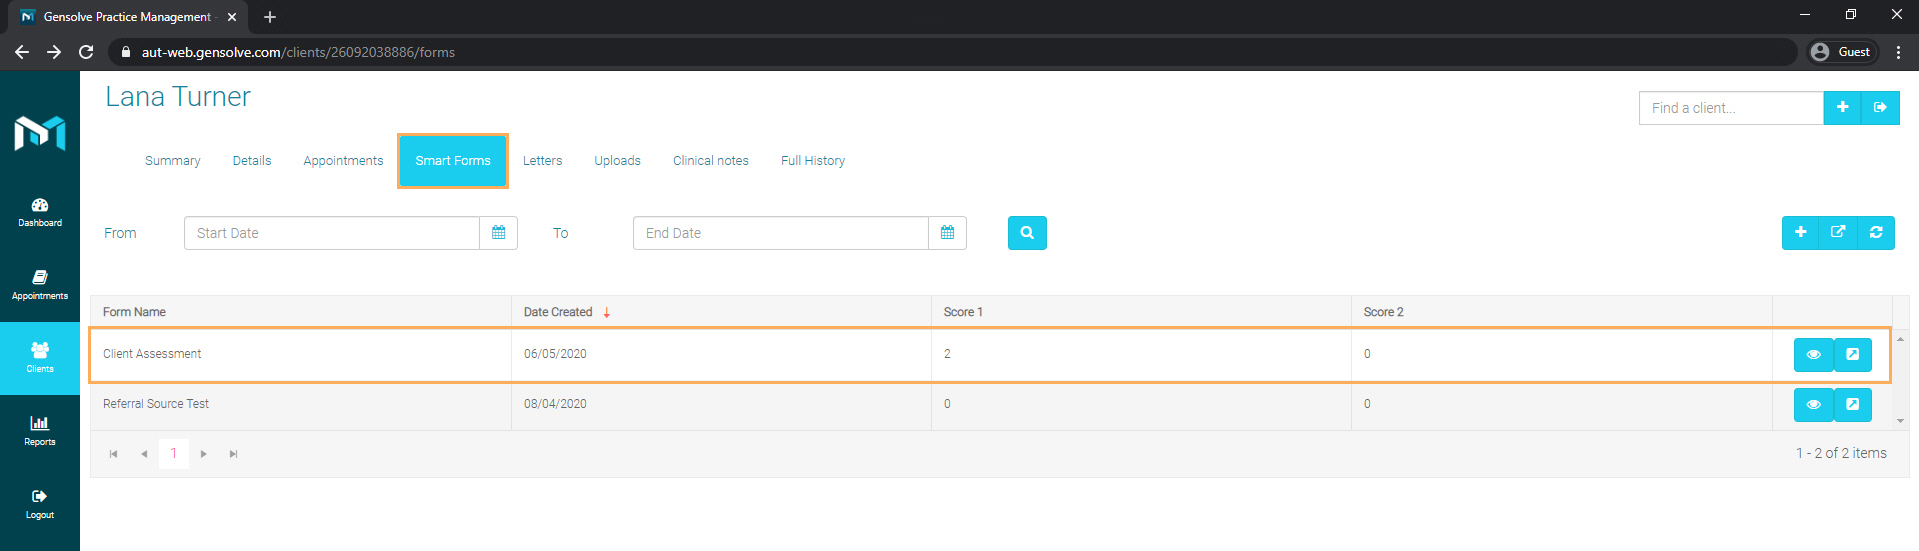
7. After the client or yourself selects Save, you will see the recently completed form on the Client > Smart Forms section or in GPM under Client > Letters & Uploads.
Note: To see how to send forms from GPM and GPM Web: Sending Smart Forms.
Multiple Panels and Web Settings
Panels are sections in which fields can be embedded. When fields are embedded in a panel, they take the Panel's Display Properties e.g. If the panel has given coordinates within the form, all of the fields inside this panel will take this position as well. Web Settings can be applied to distribute fields depending on device resolution i.e. split fields in 2 or more columns.
1. If you closed
your form and want to go back to it, go to Administration >> Custom Forms
>> On Restrict to
Name, enter your form's name >> Click on Get Data
>> Click on ![]() next to your form
name.
next to your form
name.
2. Right-click on the Main Form Panel >> Select Add a Standard Panel
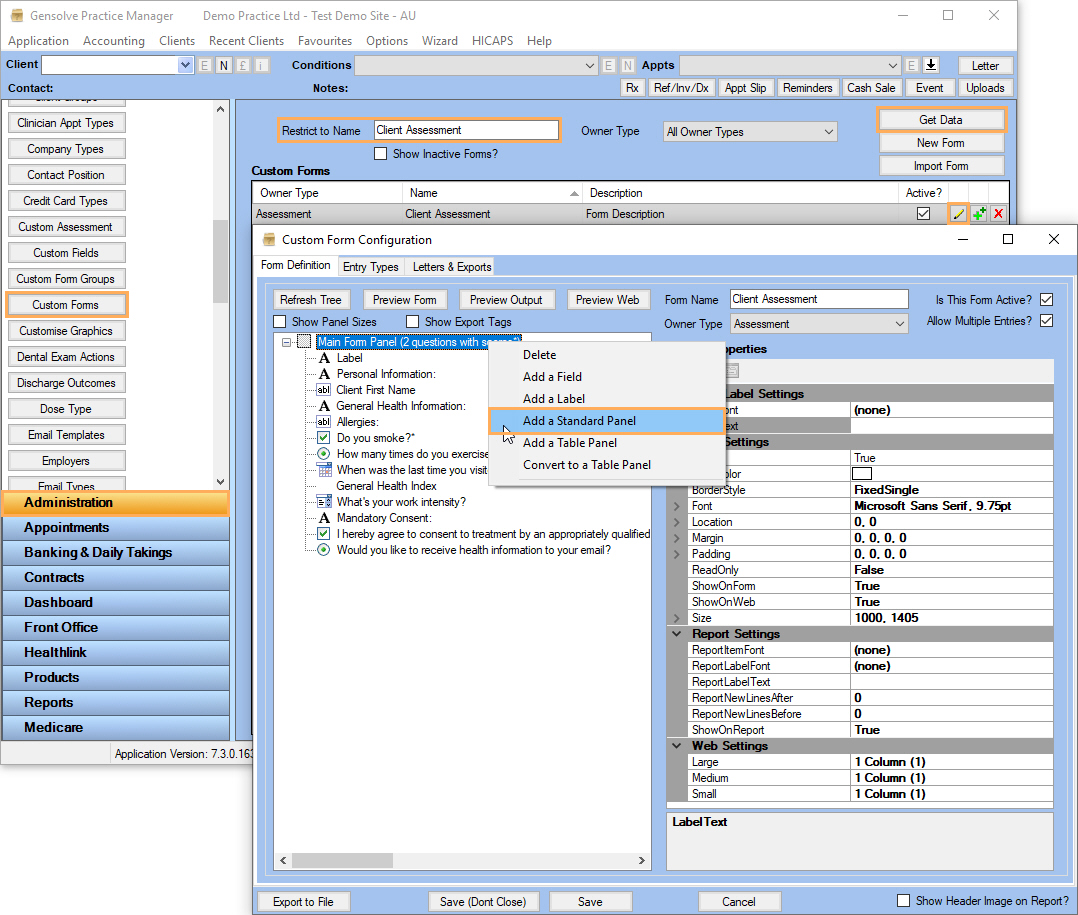
Note: Use Table Panel if you need to embed fields and set table-like display properties.
3. Drag-and-drop the created Panel above Mandatory Consent label >> Under Display Properties, set Location and Size according to your form layout. Label Text is usually left blank.
4. We will add some new fields, Check Boxes, that will go inside the new panel. Right-click on the new Panel >> Select Add a Field >> In Form Fields, click on the Field Type drop-down and select Check Box (Create many to illustrate Web Properties) >> For this example we will also create a Label to give the Panel a title
5. Set Display Properties for the new fields added, such as Location and LabelText. Under Display Properties, scroll down to Web Settings >> Click on blank field next to Large and select a distribution option (for our example we will select 2 columns)
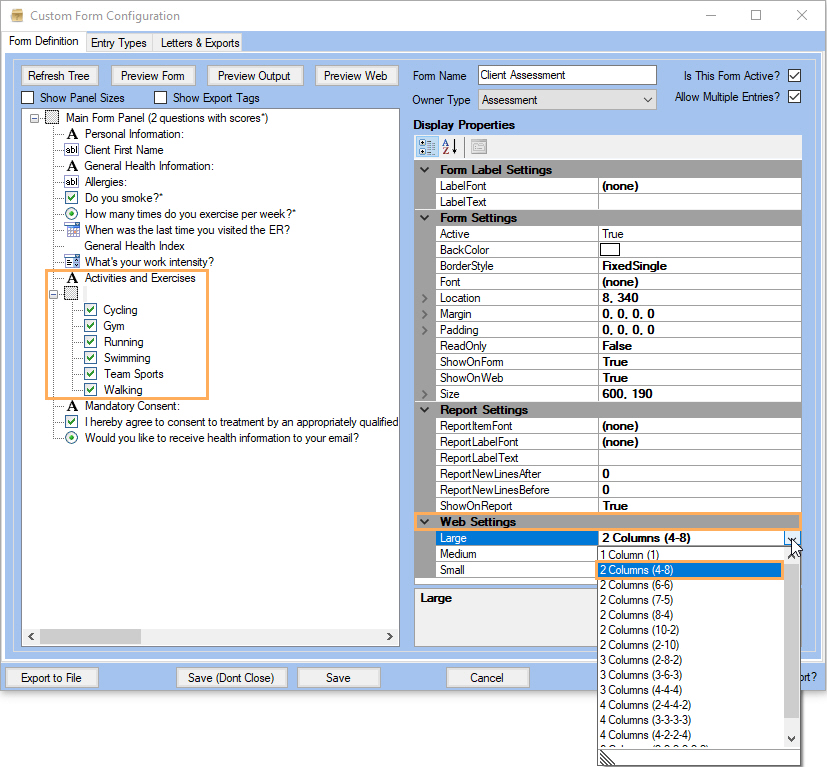
Note: The Web Settings allow you to distribute fields within a panel to a given number of columns.
6. Click on Preview Web and Preview Form
Smart Forms Uploads
1. You can choose
whether to upload completed client Smart Forms or not via
Administration >> Custom Forms >> Click on ![]() to edit the form in question.
to edit the form in question.
2. On the Form Definition tab >> Tick/Untick the Upload Web Screenshot checkbox >> Click on Save.
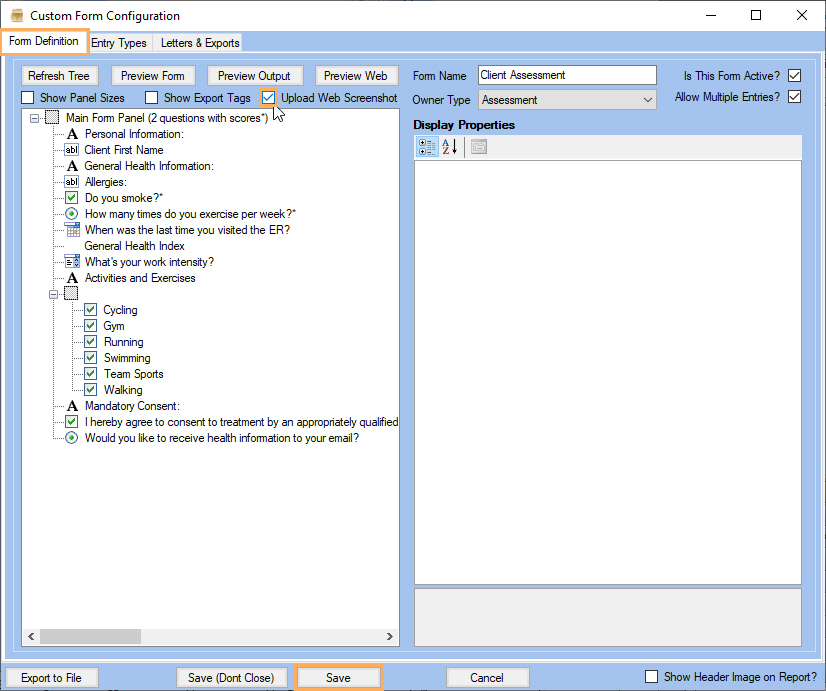
These uploads will be stored as HTML data instead of a PDF upload. If you want the form to be stored as PDF and not HTML, then do not tick the Upload Web Screenshot checkbox.
3. Once the Smart
Form is completed by a Client, click on ![]() to edit the Client >> Click on the Letters
& Uploads tab
>> Click on
to edit the Client >> Click on the Letters
& Uploads tab
>> Click on ![]() next to the
form in question to see the uploaded form file.
next to the
form in question to see the uploaded form file.
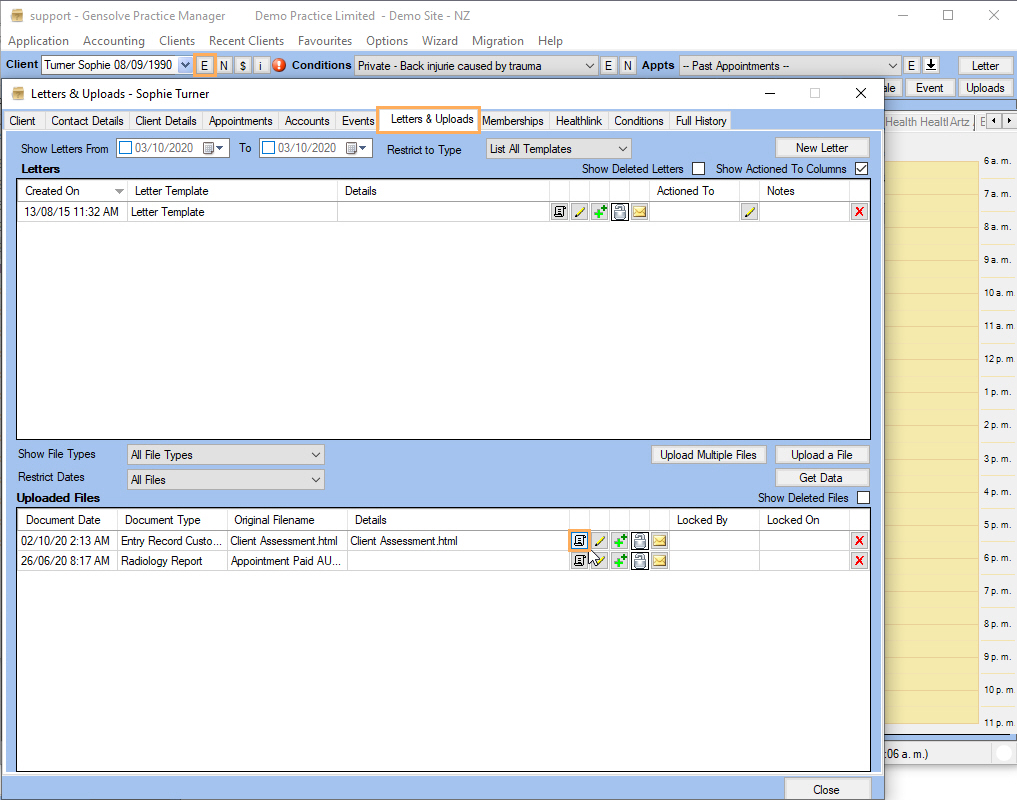
4. The completed form saved as an HTML file will be displayed in the default browser.
Note: For more information about sending forms, please refer to Sending Smart Forms.