![]()
Sending Custom Forms
The Custom Form functionality in GPM allows you to email a link to your patients so they can electronically fill in a form on a desktop computer, tablet or mobile device.
If you have your own domain name you are able to send these emails directly through GPM. If you do not have your own domain name you can send the link manually by copying it from GPM and pasting it into your own email system such as Outlook or Gmail.
Form Entries can be managed via Form Entries located in Front Office or via the clients Full History tab
Please see our support link below if you have your own domain name and would like to enable email functionality:
Creating an Email Template
To send the Custom Form link to your patients you need to have an Email Template created. This contains the content of the email asking the patient to click on the link and fill out the form.
1. The Email Template can be created under Administration >> Email Templates >> New Email Template
2. The Type needs to be set to Custom Forms, and the Form URL tag needs to be inserted into the body from the right hand side list of Available Tags. Here is a basic example for a Custom Consent Form:
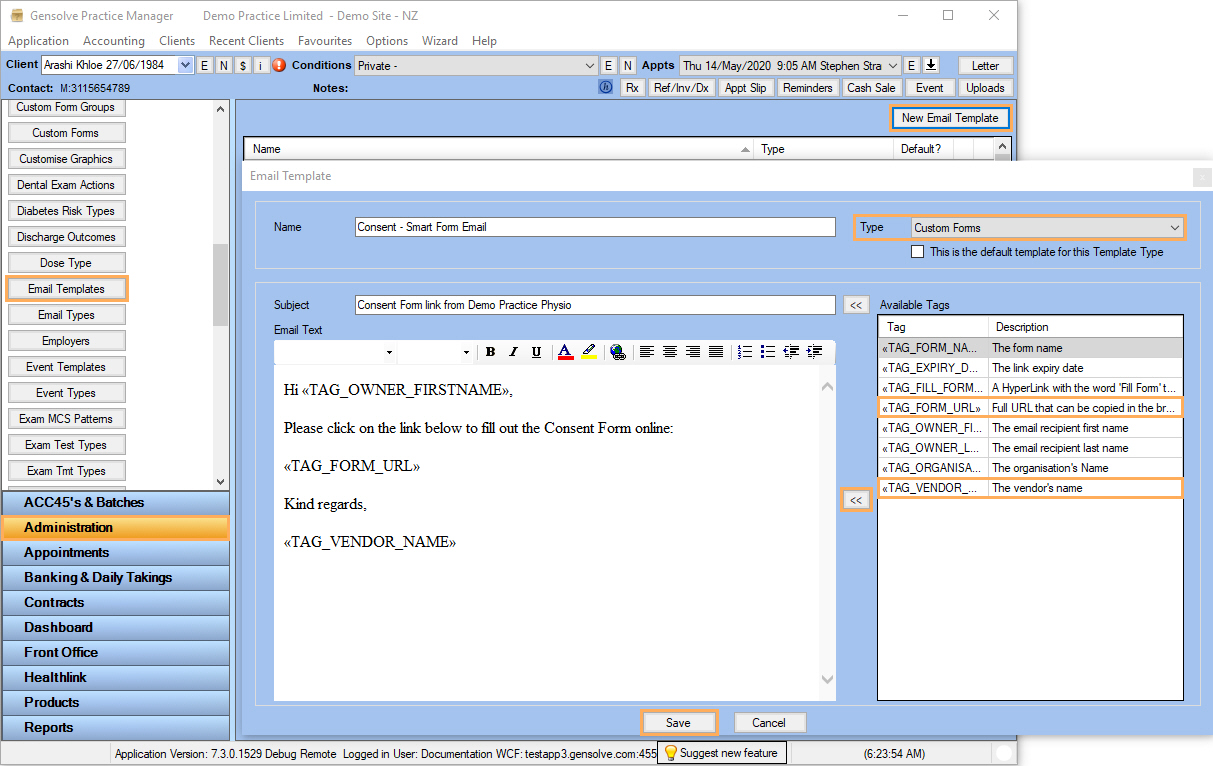
3. Click on Save
Now that we have the Email Template created we can go ahead and test the functionality by sending an email containing the Custom Form link to ourselves. You can do this in the GPM application itself, or via GPM Web.
Sending a Custom Form email through GPM
1. If the client has an appointment already in the system you can right-click on that appointment and choose New Form Entry.

2. If the client does not have an appointment in the system you can edit the client in GPM, then under the Full History tab click on Form Entry.
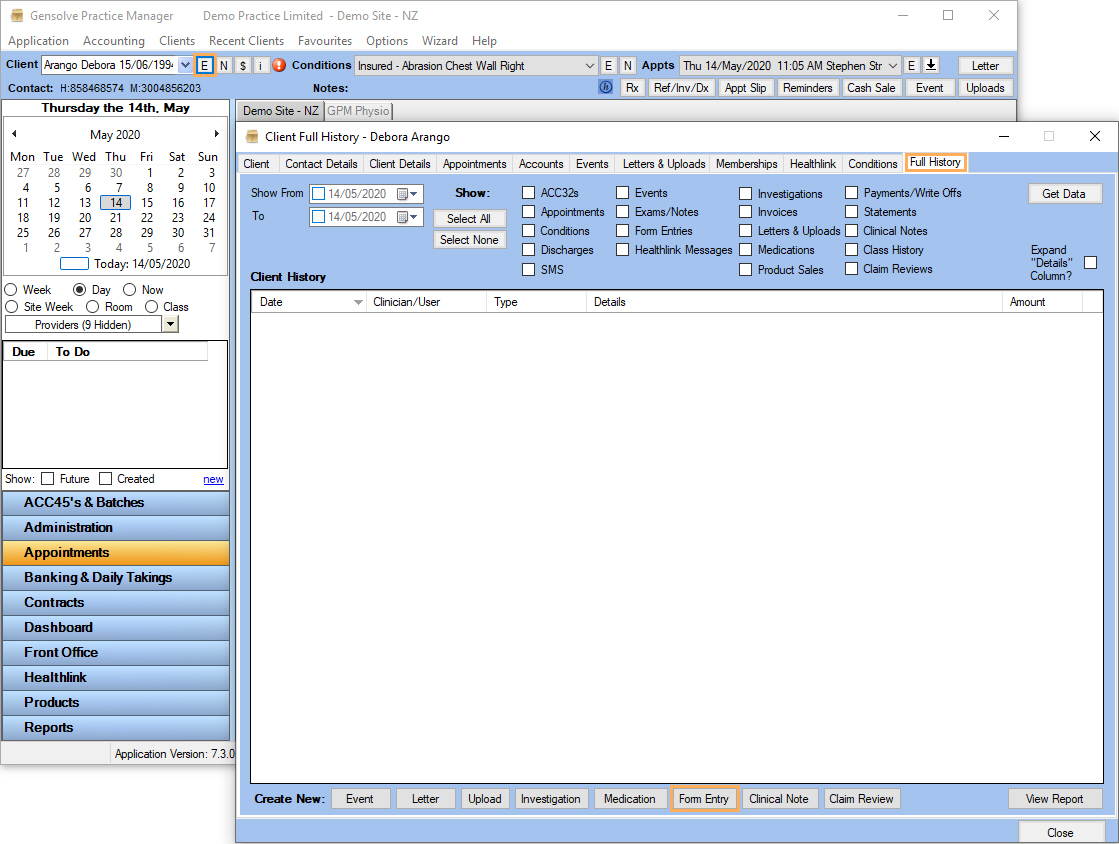
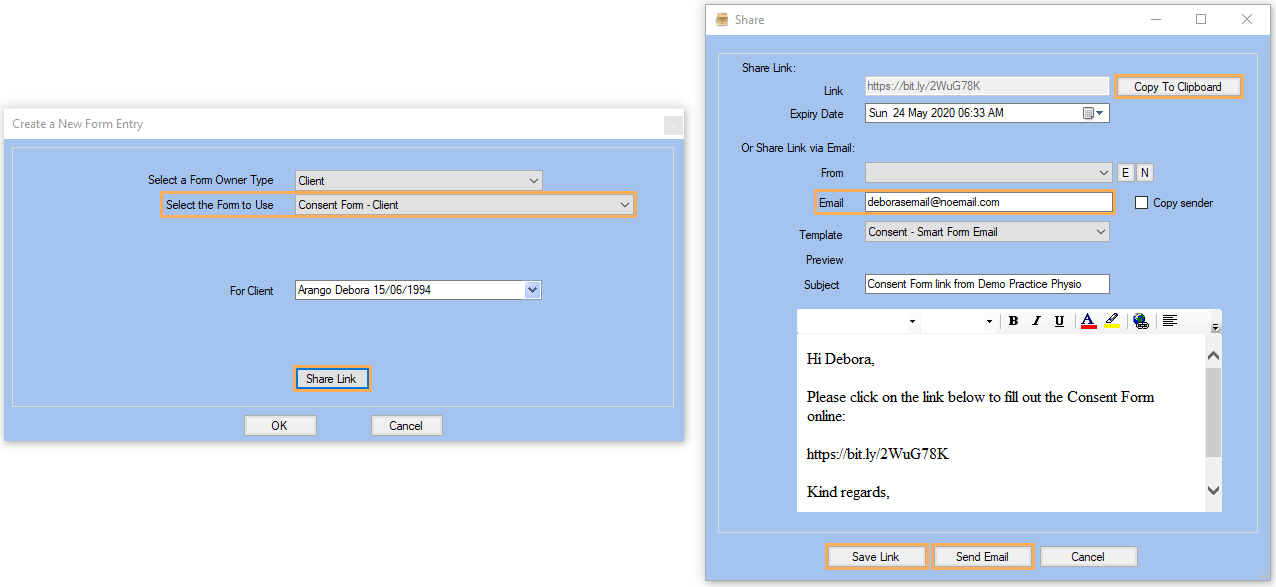
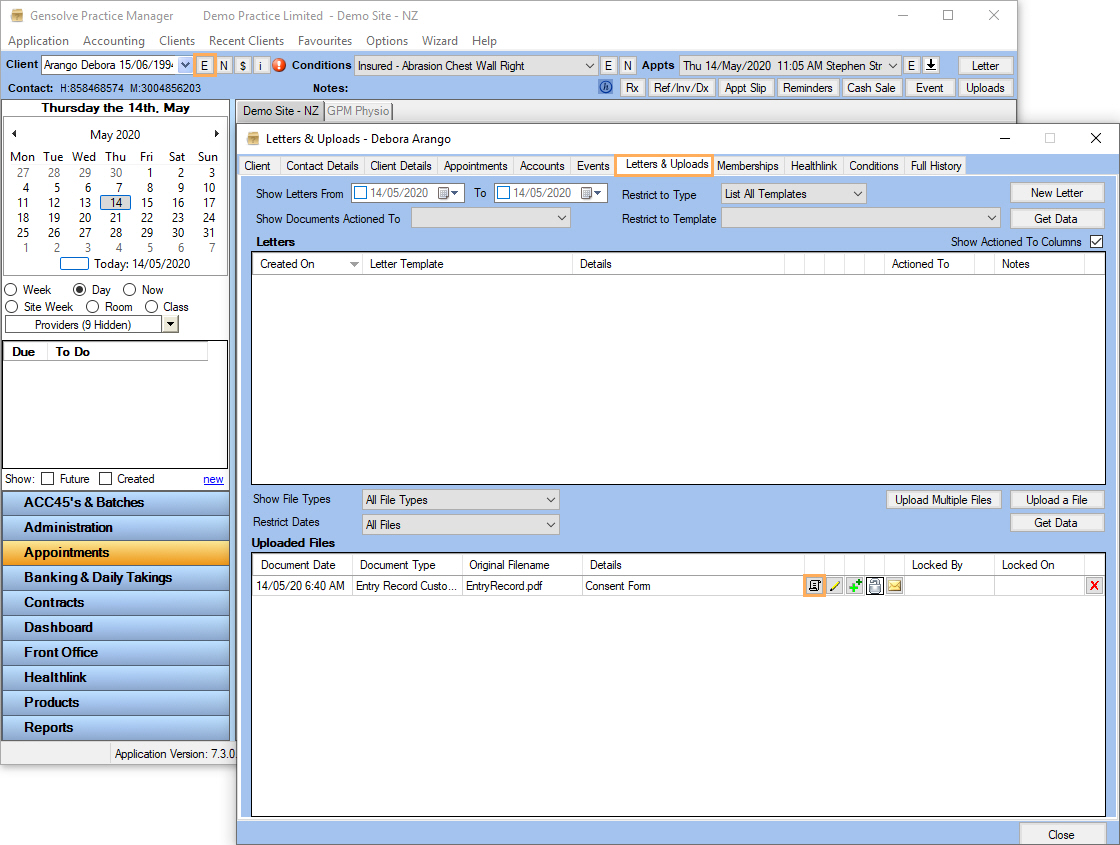
3. From here you will select the Custom Form from the list, the condition if applicable and click Share Link. You should see a Gensolve window similar to the image below appear. For testing purposes, you can enter your own email address.
4. If you are set up to email through Gensolve you can go ahead and click the Send Email link, then wait for the email to come through.
5a. If you are not set up to email through Gensolve, then instead of selecting the Send Email button, first click on the Copy To Clipboard button and then the Save Link button so that the Custom Form can be enabled behind the scenes. If Save Link is not selected as well, the link will be Invalid.
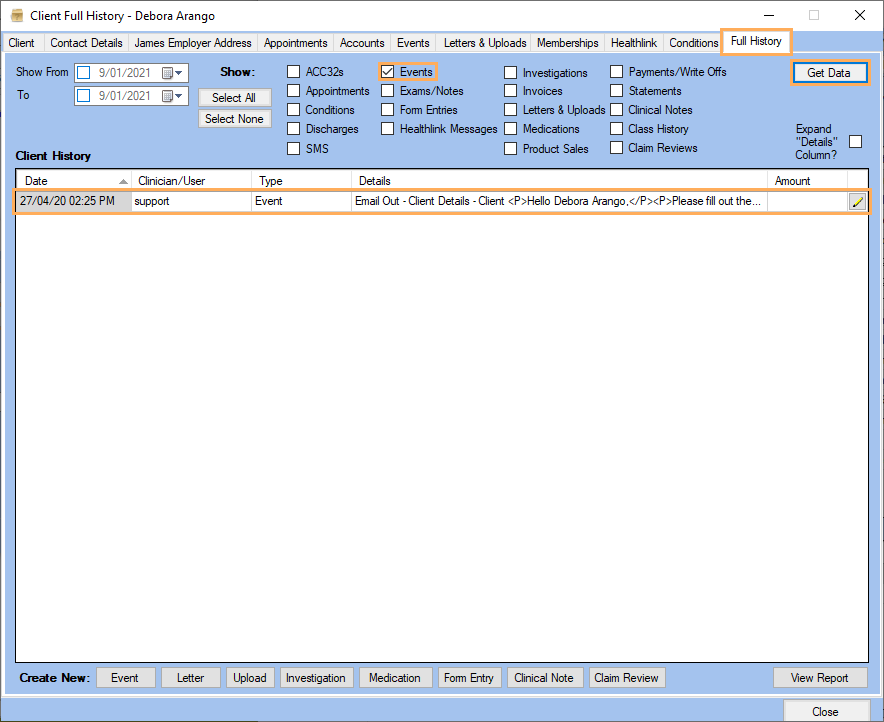
Note: Once the form has been sent, an 'Email Out' event will automatically be created. You can see this event in the Full History tab by ticking the Events checkbox and then clicking on Get Data or via Front Office >> Events >> Set the proper filters >> Get Data.

5b. From there go into your email program, create a new email and paste in the link (Ctrl + V) that you copied with the Copy to Clipboard button, then add in some instructions to the client requesting that they click on the link and fill in the form.
6. Once the client has clicked on the link, filled in the form and saved it, a copy of the saved form will be stored under the client’s Letters &Uploads >> Uploaded Files as an HTML file (see Note below)/PDF or under the client's Full History >> Tick Form Entries box >> Get Data.
Note: If you wish the form to be saved back as an HTML file under the client's Letters & Uploads, please check the following: Save an HMTL snapshot when completing custom forms.
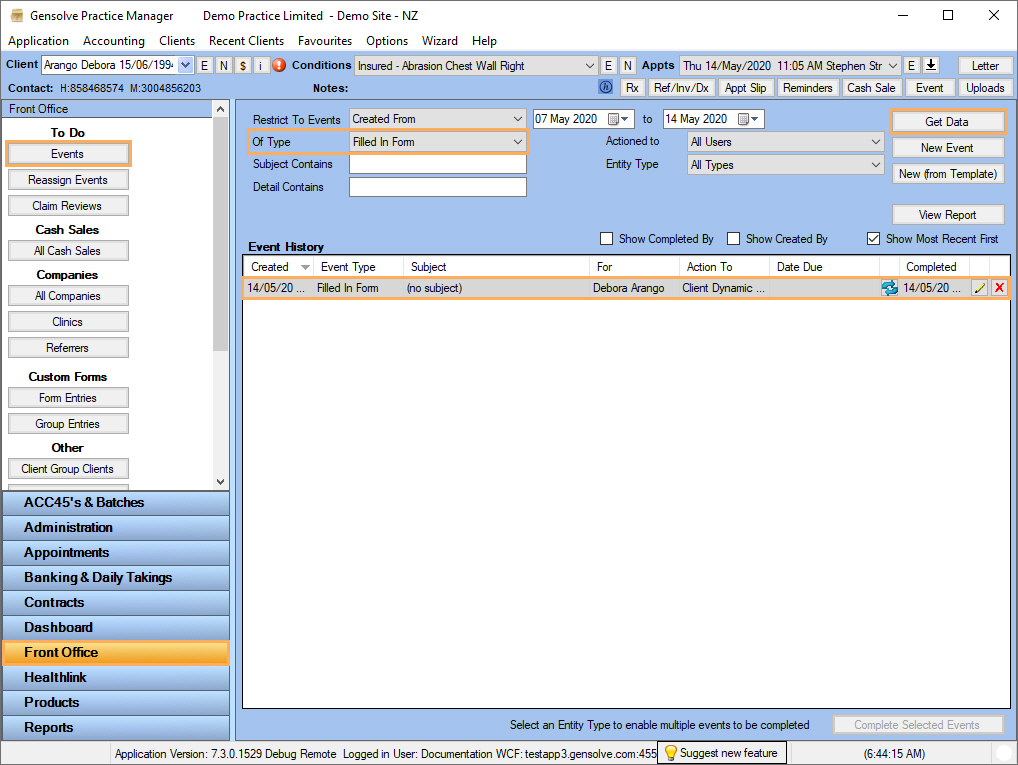
7. You can also search for clients who have recently filled in the form under Front Office >> Events. Just pick the date range and set the Of Type to be Filled In Form >> Get Data.
Managing Custom Form Entries and Completions
Note: You can view a client's Form Entries by clicking ![]() against the Client File
>> Full History >> Tick Form Entry, as described above.
against the Client File
>> Full History >> Tick Form Entry, as described above.
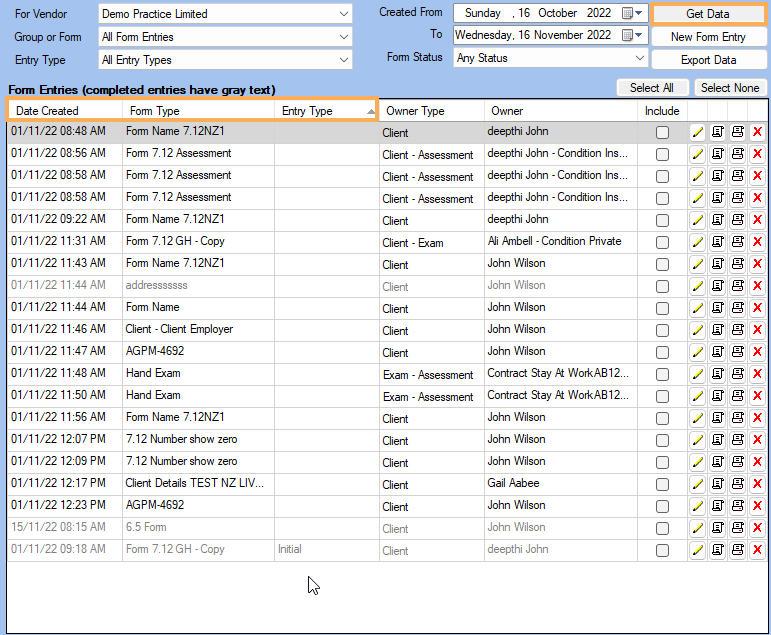
However you can also view Form Entries for all Clients. This allows for the monitoring of Form Entry and Completion of your Custom Forms by Clients.
- Click on Front Office >> Form Entries
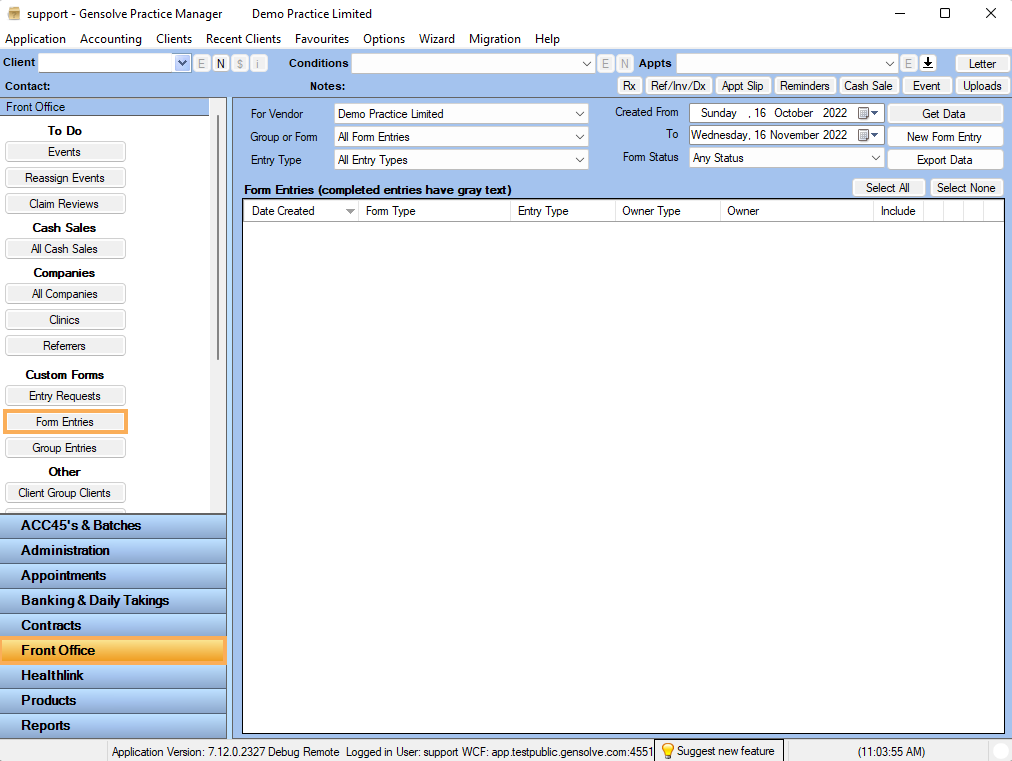
- You can filter via Vendor (if applicable), Group or Form, Entry Type, Creation Date, and Form Status.
- Vendor - Allows to view Form Entries for each Vendor (if applicable to your organisation)
- Group or Form - Filter by Form or Form Group
- Entry Type - Description of what the form is related to
- Created From and To - Date restriction the form was sent
- Form Status - Allows viewing of the status of the Form. Completed or Incomplete.
Note: By using the Form Status filter, set to Incomplete administration staff can manage Incomplete Forms and take appropriate action. Completed forms when setting Form Status to Any or Completed will appear with grey text.
- Click on Get Data once you have selected the appropriate filters. You can then view the Form Entries based on your selections.
- The Table can be sorted by Date Created, Form Type and Entry Type; click on the Column Header to sort by that column.
![]()