![]()
Setting Up to Use Xero
Prerequisites: Before you can use Xero with Gensolve, please ensure you have asked Gensolve support to turn on Xero Auth2.0 for your Gensolve organisation and that you have created a Xero account (https://www.xero.com/) and followed this step-by-step setup guide.
Note: Gensolve can only support the connection to one Xero organisation at a time. Sending transactions to multiple Xero organisations is not supported.
Accounting & Financial Disclaimer: The use and integration of Xero as an accounting solution for your practice is an accounting and financial decision. It is important that you seek accounting and financial guidance in determining if integrating Gensolve and Xero will provide that solution. The below steps are not designed to provide accounting or financial advice in any way. Gensolve Support is unable to provide accounting or financial advice. The examples provided below are not in anyway advice on how charts of accounts, services, products or clearing accounts should be setup. For your specific requirements please contact your accountant or bookkeeper.
Configure your Organisation in Xero
- Log into your Xero as normal. Note: To access some steps below you must have Xero administrator access.
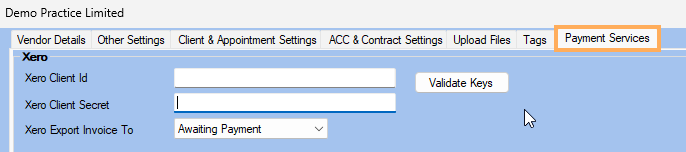
- Open Gensolve and navigate to Administration >> Vendors >> Payment Services
-
Using your web browser, log in to the Xero Developer Portal (https://developer.xero.com/). If you are already logged in to Xero, you can open another web page, navigate to the Xero Developer site and click Login. It will use your Xero login details to go straight into the Xero Developer setup. You may be asked log back in or authenticate via an email or other means. Note: If you are unable to complete this step, you do not have the required Xero access. Please contact your Xero Administrator for more information or Xero Support.

- Enter the Credentials and
click on Log In if not
logged in to Xero
already, or you may require special permissions to login to Xero Developer as your login
for Xero has
limited access.
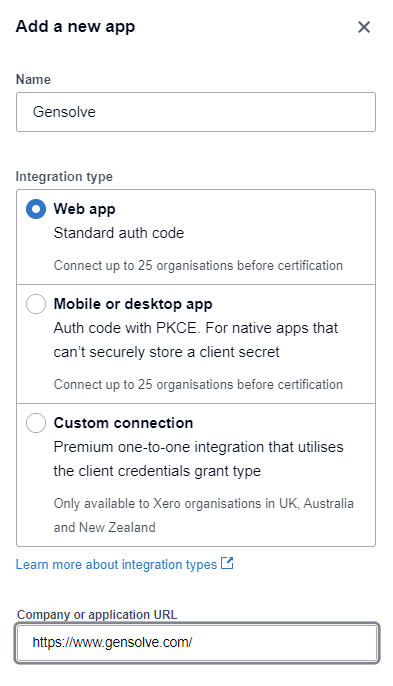
- Go to My Apps >> New app

Note: Please be aware that Xero often updates their screens in Xero Developer, as a result the below Xero screen shots may have changed slightly and the menu options changed locations.
-
Enter the Name as Gensolveas per the below image
-
Select the Integration type as Web app
-
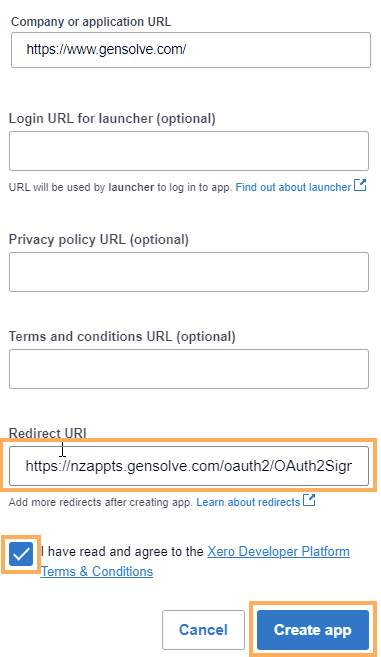
Enter the Company or application URL as https://www.gensolve.com/
-
Ignore the Optional Fields, these are not used.
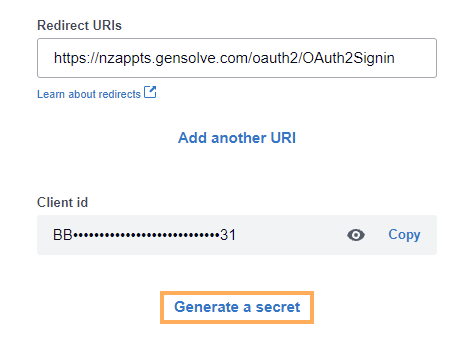
- Scroll down to the Redirect URI enter: https://nzappts.gensolve.com/oauth2/OAuth2Signin
- Tick to Accept terms and conditions and click Create App
-
Click on Configuration
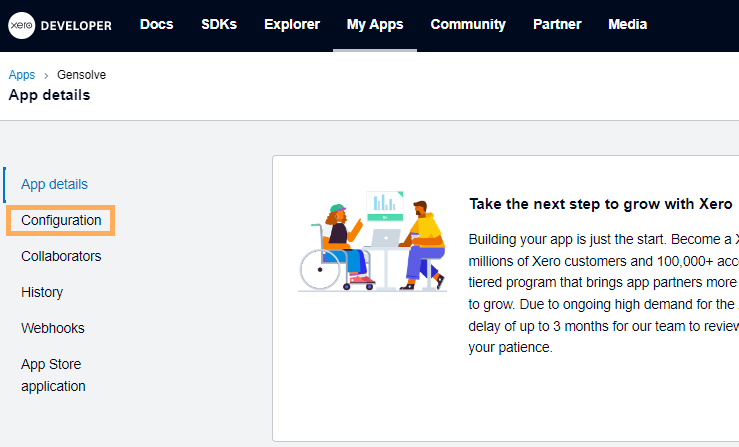
- Click Generate Secret
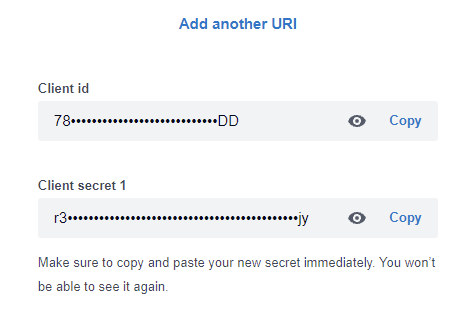
- Click Copy next to the Client id and paste it into your open Gensolve, Administration >> Vendors >> Payment Services screen. Return to your Xero page and click Copy that's next to your Client Secret 1 and paste it into your open Gensolve screen, into the Xero Client Secret box. Note: as per the below Xero screen do not navigate away from the screen until you have pasted both keys into Gensolve.
Configure Vendor Settings in GPM
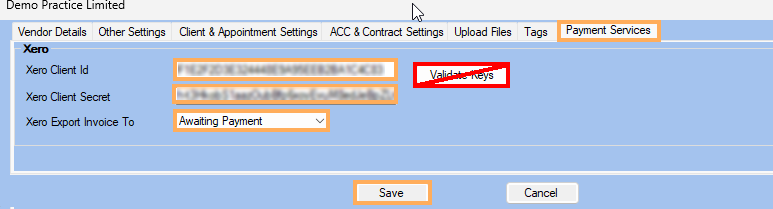
- Paste the Xero Client ID and Xero Client Secret into the Vendor >> Payment Services Note: DO NOT click Validate Keys yet.
- For new integrations, choose as to whether invoices are exported to Xero as Awaiting Approval or Awaiting Payment, based on your Xero preferences
- Click Save.
- In your internet browser, close the Xero Developer tab (It auto saves your App and Keys - The Save button will be greyed out, as it has already saved everything for you)
- In GPM navigate back to Vendors >> Payment Services tab (as it closed when you previously hit the Save button) to now select the Validate Keys button.
- A new message will pop up: Select OK
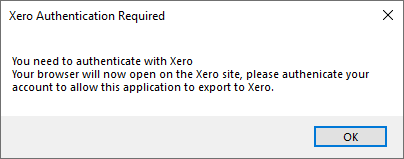
- A new web browser page will open.
- Select the company to integrate with in your Xero if you have more than one, and click on Allow Access.
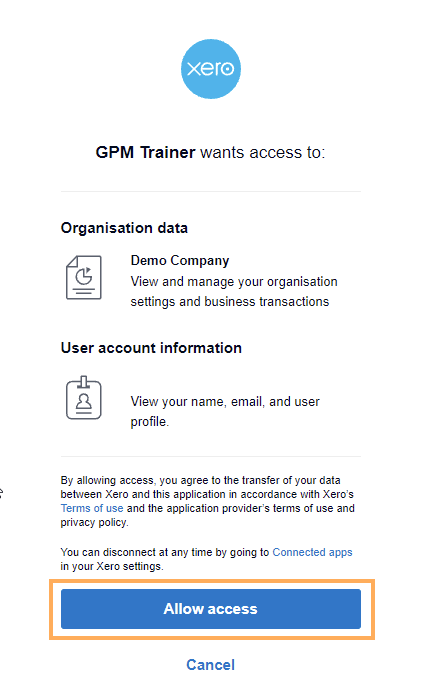
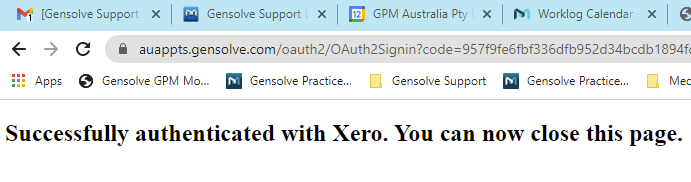
- After a short while the web page will say you have successfully authenticated with Xero. You can close the web page.
- In GPM
you will see the following screen pop up. Click OK, and
Save

Configure Chart of Accounts in GPM - GL Mapping
Note: The below steps involve knowledge of accounting and bookkeeping concepts. If you are unsure it is highly recommended you involve your accountant or bookkeeper in the below accounting setups. Please see the Disclaimer at the top of this document.
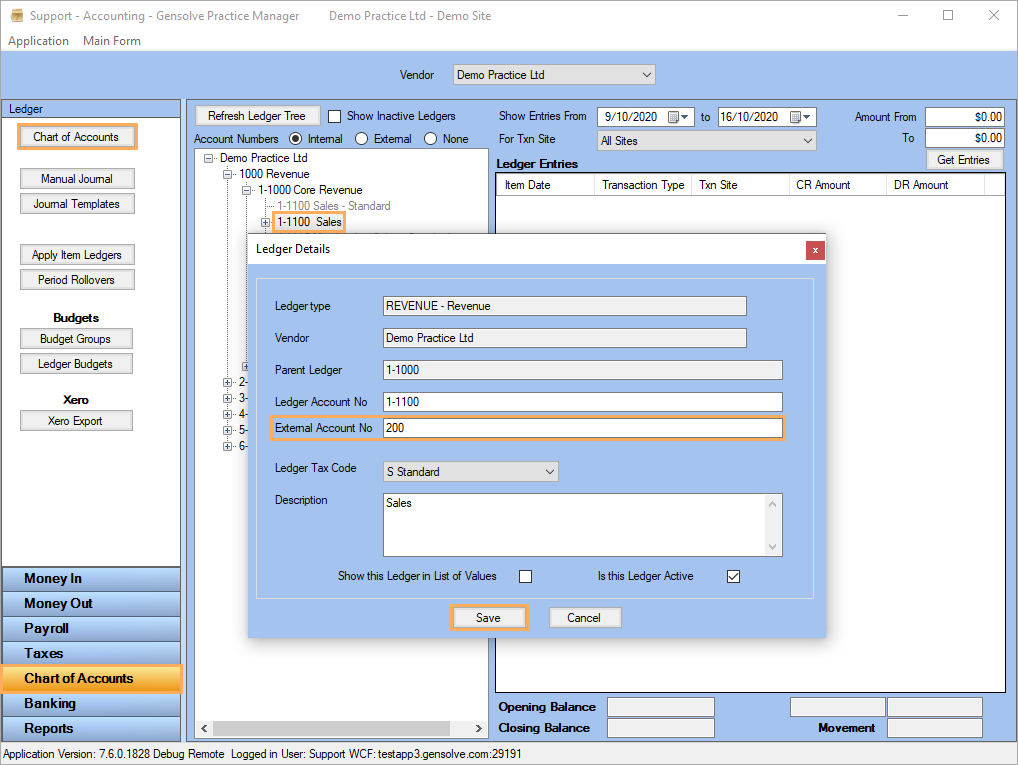
You will now be able to match the GPM's Ledger Account Numbers with the Chart of Accounts of your Xero Account. Follow these steps to complete mapping,
- Go to Accounting Form >> Chart of Accounts
- Right Mouse click on a specific ledger >> Edit Ledger
- Enter the matching Xero Ledger Account number into the External Account No box
- Click on Save
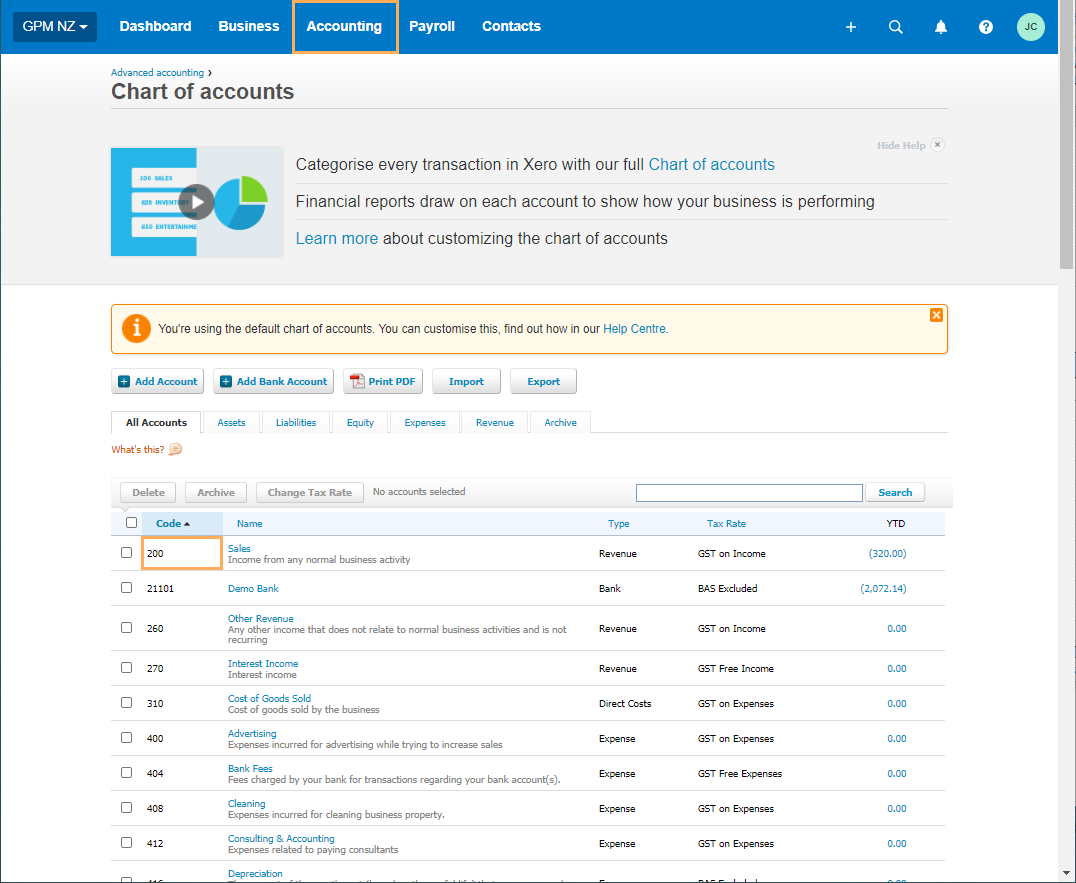
- Go to your Xero Account
- Go to Accounting >> Chart of Accounts
- Ensure these Codes are in accordance with the ones configured in
GPM.
Note: You may need to create new accounts. Please seek Accounting advice regarding how to best structure your Chart of Accounts.
- If required, edit each account settings and click
Save

Apply Item Ledgers in GPM
If a charge has already been used on an appointment before you set the ledgers, it will not be linked to the ledger on the service/product charge.
To link to the new ledger/s please follow the steps below and apply your changes from within GPM:
See also Accounting Ledgers.
- Go to Accounting Form >> Chart of Accounts
- Go to Apply Item Ledgers
- Filter the data and click on Get Items to Process
- Click on Process
Now
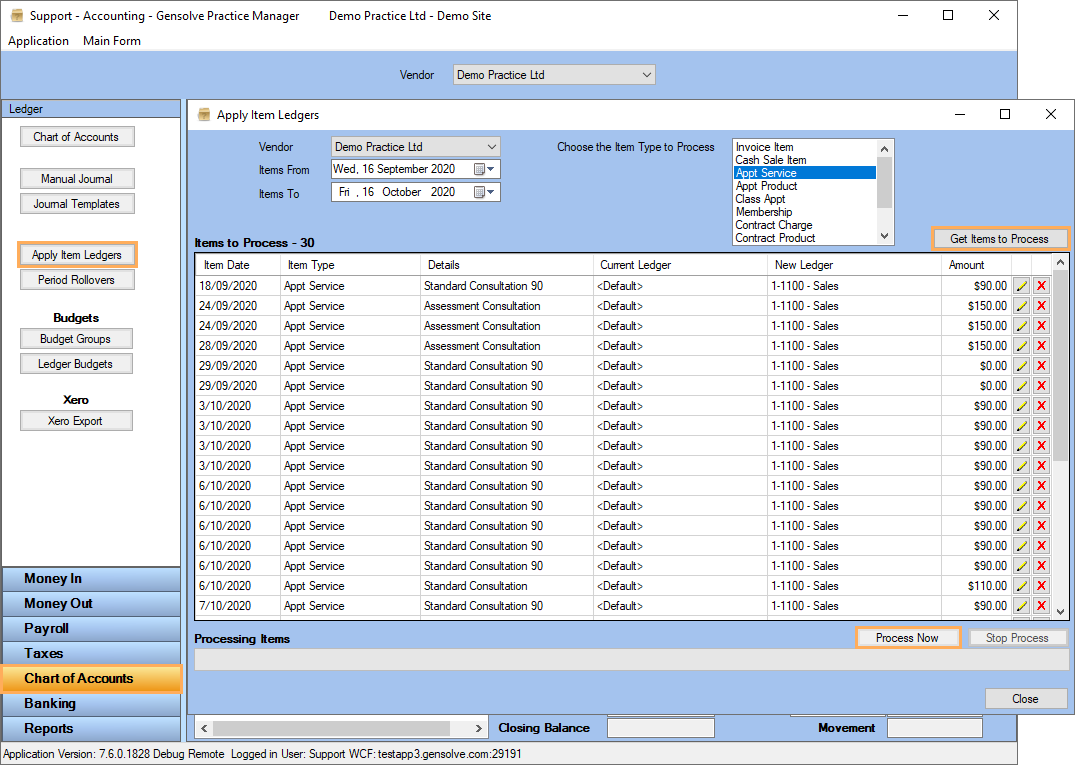
Note: The ledgers set up previously will now be linked to their corresponding Service/Product charge.
Configure Service Charges in GPM
Follow these steps to assign a sales ledger to your service charges from within GPM:
See also How to Create a New Service Charge.
- Go to Administration >> Service Charges
- Click on
 to open the Appointment
Service Charge details window
to open the Appointment
Service Charge details window - You will notice there is a field called 'Xero Code' - There is no need to use this unless you are wanting to setup a Tracking Category in Xero related to your Service Codes. More information can be found in the Tracking Items in Xero article. You do not need to enter anything in this field, proceed to the next step.
- Go to Visibility and Ledgers tab
- If required, click on Add to add a sales ledger to the service charge
- Click on Save
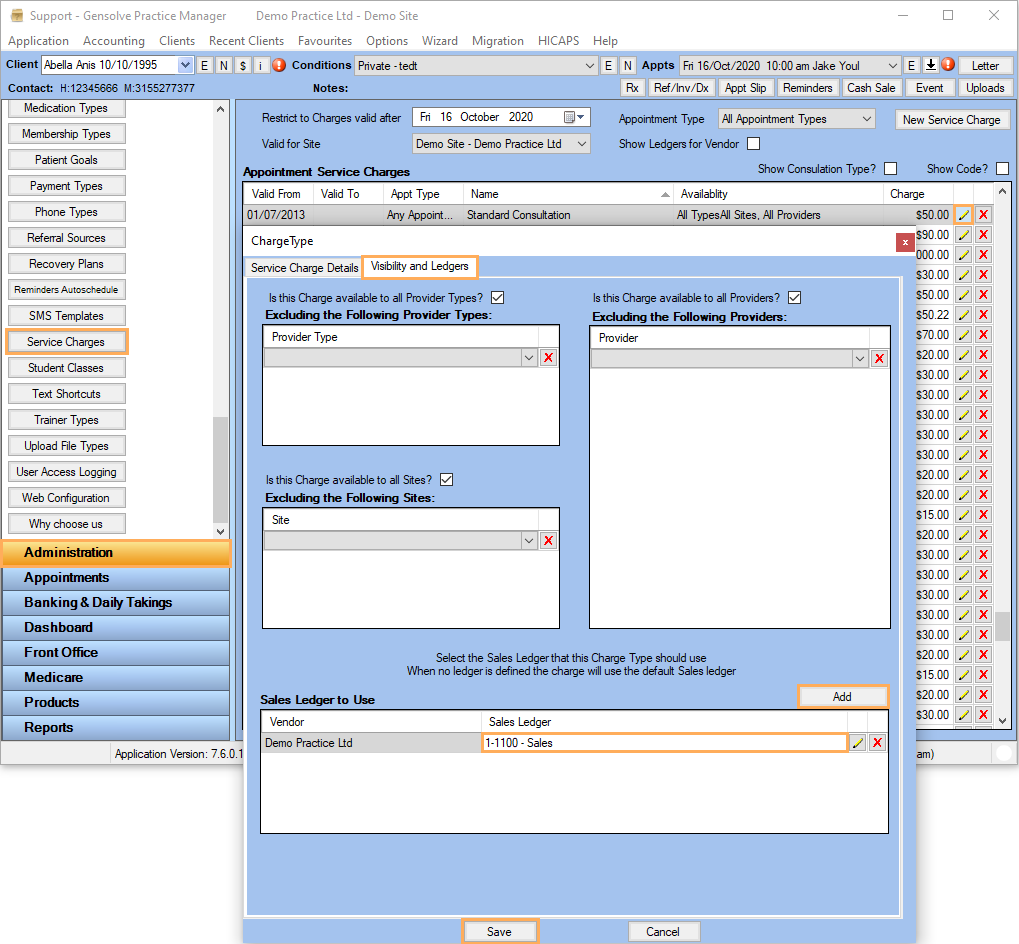
Note: When a sales ledger is added and its number has been matched with the Xero ledger code, each charge related to this service will be exported successfully
Configure Products in GPM
Follow these steps to enter the Product Code and assign a sales ledger to your products from within GPM:
- Go to Products >> Products
- Click on to open the Product details
window
- Enter a Product Code
- If required, select a specific sales ledger at bottom
- Click on Save
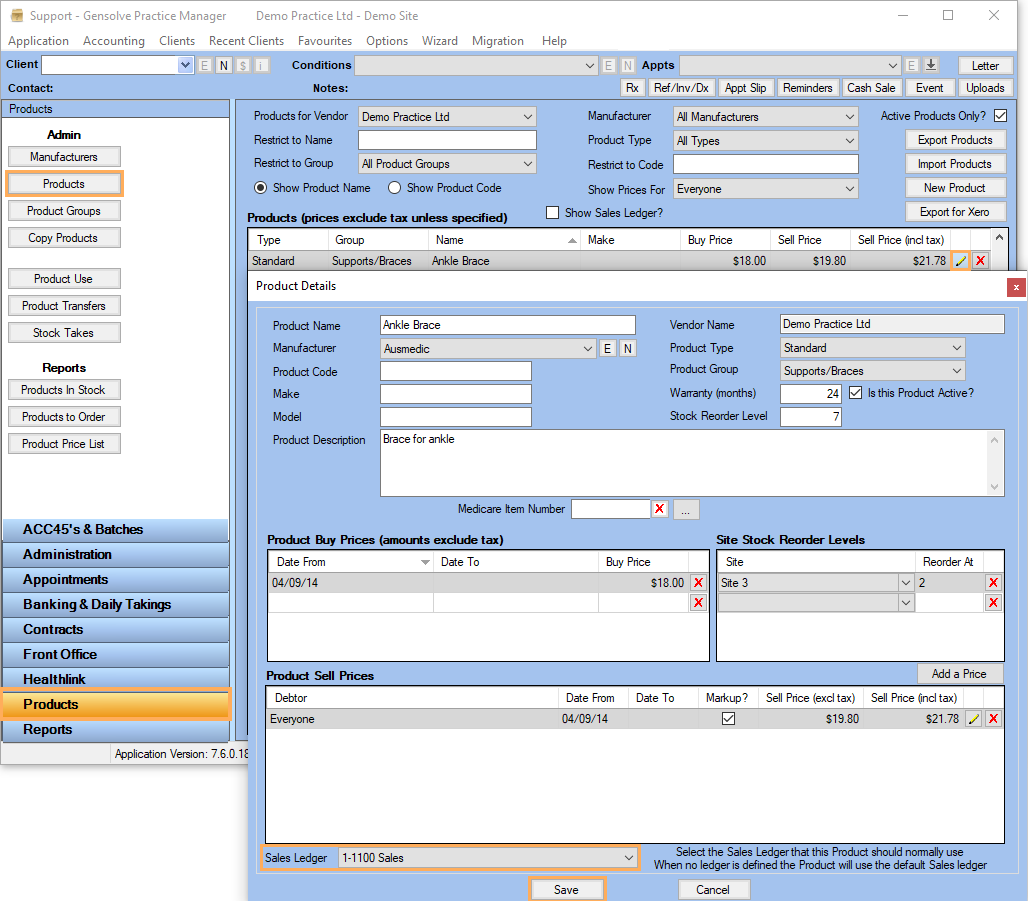
Note: When a sales ledger is added and its number has been matched with the Xero ledger code, each charge related to this product will be exported successfully.
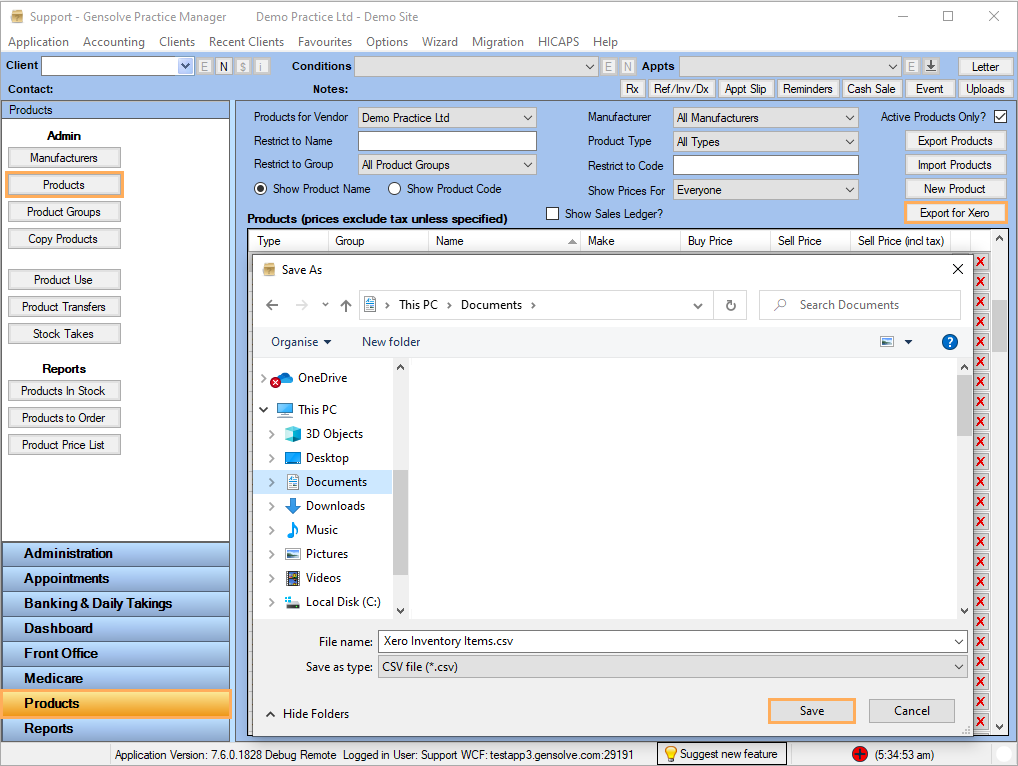
Import your Products List into Xero
Once you have configured your products in GPM, you will need to import them to your Xero Account.
Note: The "Export for Xero" spreadsheet does NOT include Inactive Products.
Follow the below steps:
- Go to Products >> Products
- Click on Export For Xero
- Select a location in your PC to save the .csv
document.
- Go to your Xero Account
- Go to Business >> Products
and services
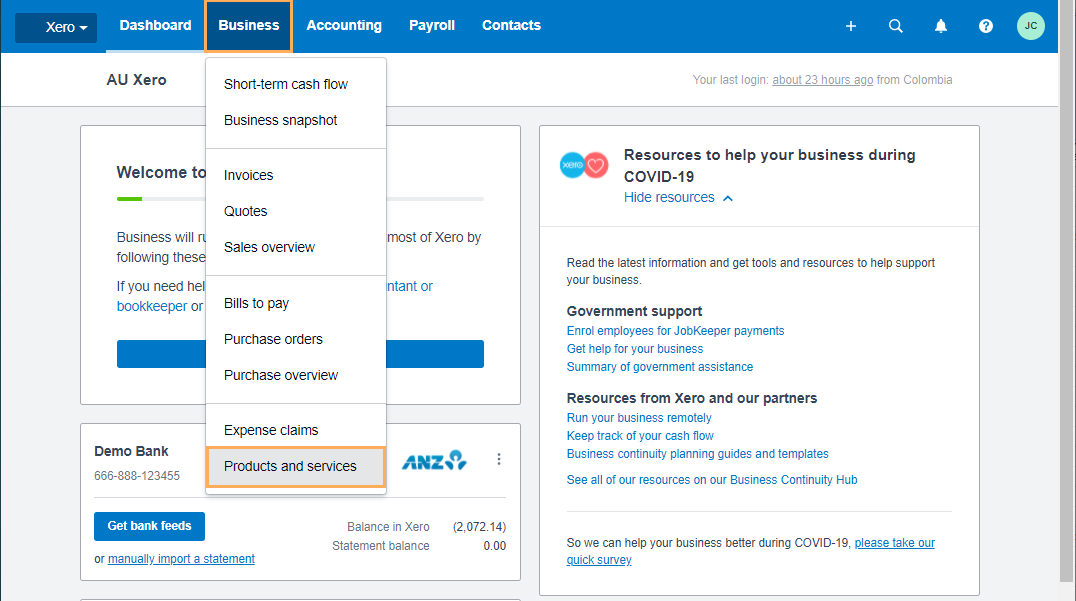
- Click on Import and
select Items
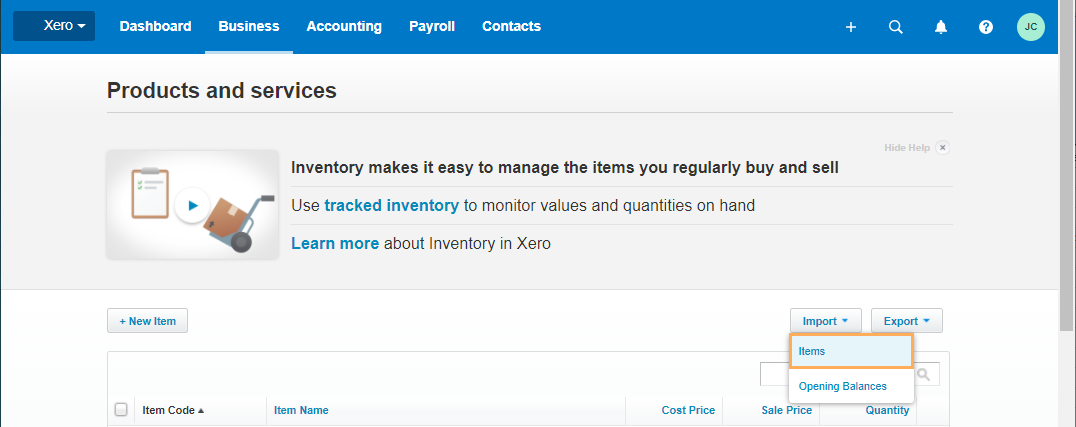
- Choose the Import the Updated Template File option
- Click on Browse and locate
the .csv document saved above
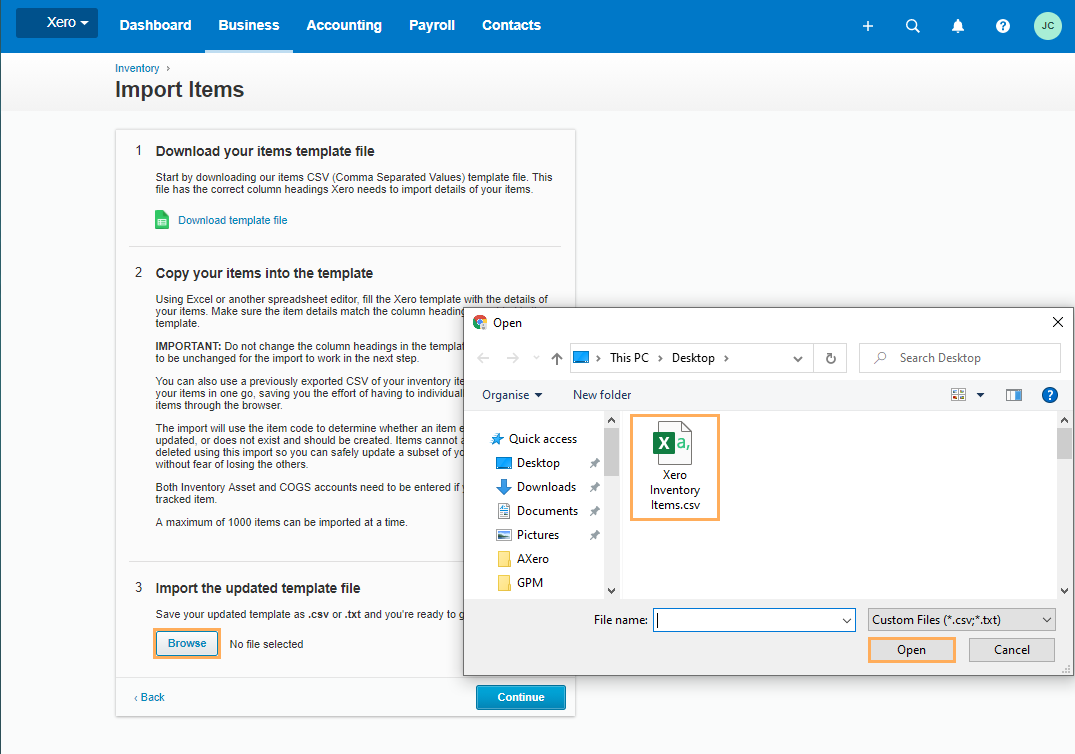
- Click on Continue
- Click on Complete
Import
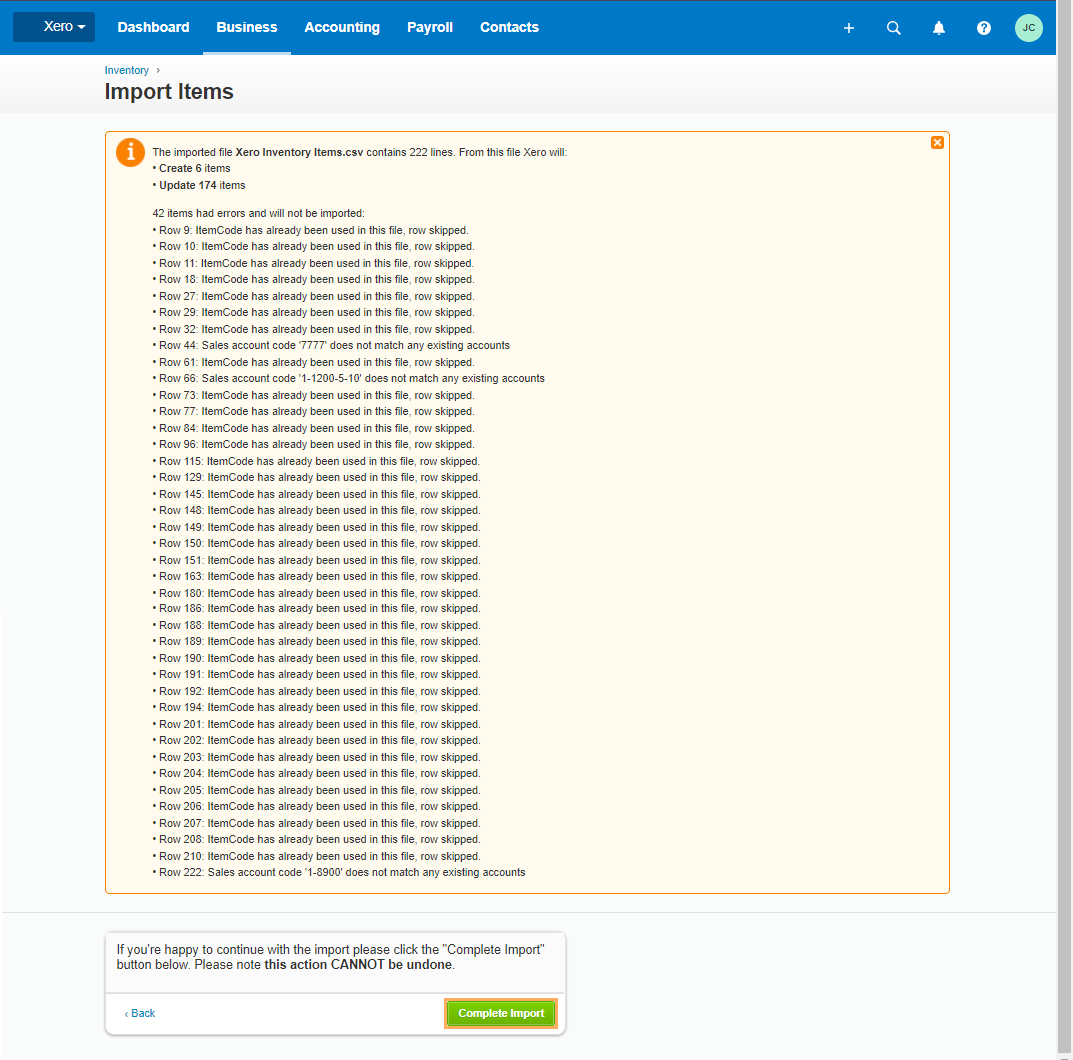
Note: If you get errors when importing products in Xero, follow the steps described in Configure Chart of Accounts in GPM and Error: Account Code is not a Valid Code for this Document in order to match the ledgers with the Chart of Accounts in Xero.
Note: Repeat this process anytime you make changes to your product list in GPM.
If you have any issues importing your inventory, please refer to Help Centre-Import Inventory or Help Centre-Inventory in Xero