![]()
Sending Emails from GPM
You can send an email directly from within Gensolve Practice Manager using the Gensolve Email Sender
Refer to the sections below to learn more about sending emails in GPM
Internet Domain Verification
IMPORTANT
- New practices: you will need to register your internet domain before using the Gensolve Email sender.
- Existing practices: you will need to register your internet domain. See How to Delete Previously Verified or Registered Email Address from GPM for assistance on removing previously verified email addresses.
- If your practice does not have an internet domain, you will need to acquire one (for example using Google Apps).
- Your Domain Administrator, ie with whom you have registered your Domain name will need to be involved in the verification process.
If you are sending emails from within GPM using the Gensolve Email Sender which is Amazon Simple Email Server (SES), you will first need to verify your internet domain (eg. mygensolvepractice.com). gmail.com or xtra.com etc are generic and cannot be used as your own internet domain/s. Your internet domain must be unique.
This process is only required once and is necessary to prove the ownership of the email addresses used when sending emails.
Each Vendor within a practice can verify up to a maximum of 2 domains.
Follow the steps in this tutorial to ![]() How
to Verify a Vendor's
Internet Domain.
How
to Verify a Vendor's
Internet Domain.
Sender Policy Framework
If your domain is configured to use SPF this will also need to be updated to allow emails sent through GPM to be trusted.
You can check if your domain is using SPF by entering your domain on a site such as:
https://easydmarc.com/tools/spf-lookup
GPM sends emails through the Amazon Simple Email Service (SES).
If SPF is configured you will need to make a request to whoever manages your domain to modify your domain SPF TXT record and add:
include:amazonses.com
before the '~all' or '-all' at the end.
Example : Updated SPF record for a domain that uses Gmail is:
v=spf1 include:_spf.google.com include:amazonses.com ~all )
Setting Up
In order to send emails from within GPM using the Gensolve Email Sender, you will need to update the System User settings:
- Go to Administration >> System Users
- Click on
 to edit the selected system user
 - Click on Email Settings tab
- Tick the option Use Gensolve
email sender for outgoing Emails.
You must tick Bcc sender when sending e-mails otherwise you will not have a record of sent emails. These sent emails will show in your Inbox. - Tick Use my own signature if you want the signature defined in the settings to appear on the emails sent from GPM
- Enter three rows ahead of the email signature
Note: You can attach an image to the system user's signature. For more information see: How to Add an Image to my Email Signature.
You can now click on the email icon ![]() within GPM
to open the Gensolve
Email Sender form.
within GPM
to open the Gensolve
Email Sender form.
For example, you can send an email to a client
by clicking on the ![]() next to the client's email field:
next to the client's email field:
The Gensolve Email Sender form will open. Notice that the To: field has already been populated with the client's email address.
Note: If Emails cannot be sent. See Email
Addresses Marked as Spam
Creating an Email Template
When sending emails with attachments such as invoices or statements, you may want to specify a template.
The email template enables you to show details of the attachment (eg, Invoice number, Invoice due date...)
Follow the steps in this tutorial to Create an email template.
Once created, the email template will appear in the drop-down list on the Gensolve Email Sender form.
Sending an Email with an Attachment
You can attach a report or a document from Gensolve to an email by clicking on the icon where it is available.
For example:
- Sending a client's letter via email:

- Sending an invoice to a debtor: follow
the steps in this tutorial to ![]() Send
a report via email
Send
a report via email
Note:
The name of the file attached to the email can be changed by right-mouse
clicking on the attachment:
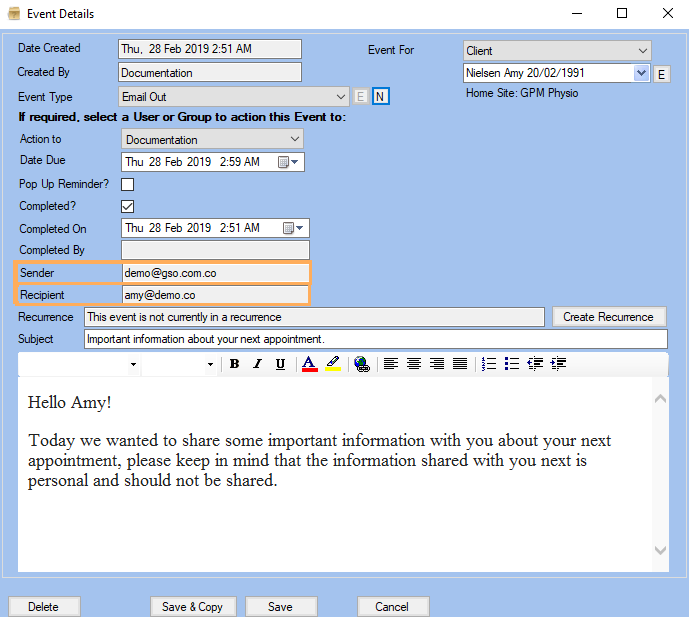
View email events
You can view Sender & Receipt address emails when an email event has been recorded.
1. Edit a client.
2. Click on the Events tab.
3. Filter by date and edit the selected email.