![]()
Tracking Items in Xero
The use of Tracking Categories in Xero will allow you to review and compare different areas of your organisation and improve your reporting.
Note: It is NOT mandatory to setup Tracking Categories. Gensolve Support does recommend setting up the 'Attribute To' Tracking Category to remove export warnings received after a successful export to Xero.
Create a Tracking Category in Xero
You will first need to configure Tracking Item Categories in your Xero account as follows:
- Log in to your Xero Account (https://www.xero.com/nz/)
- Go to Accounting >> Advanced
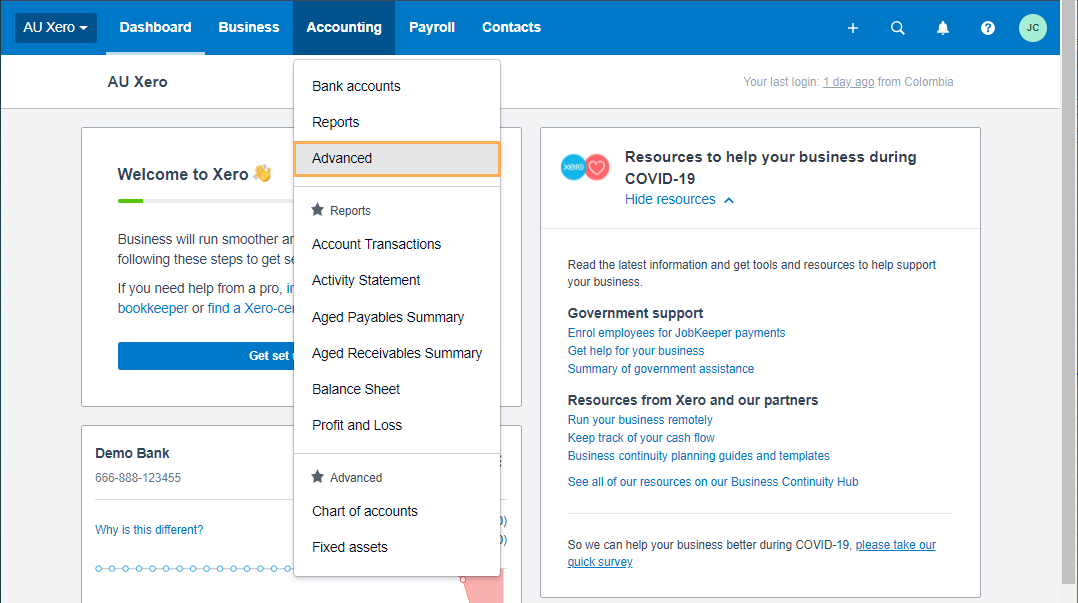
- Click on Tracking
categories

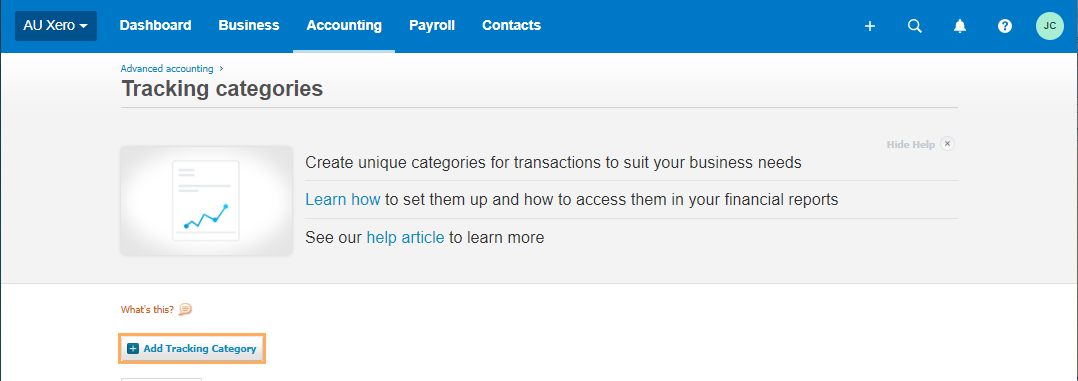
- Click on Add Tracking Category
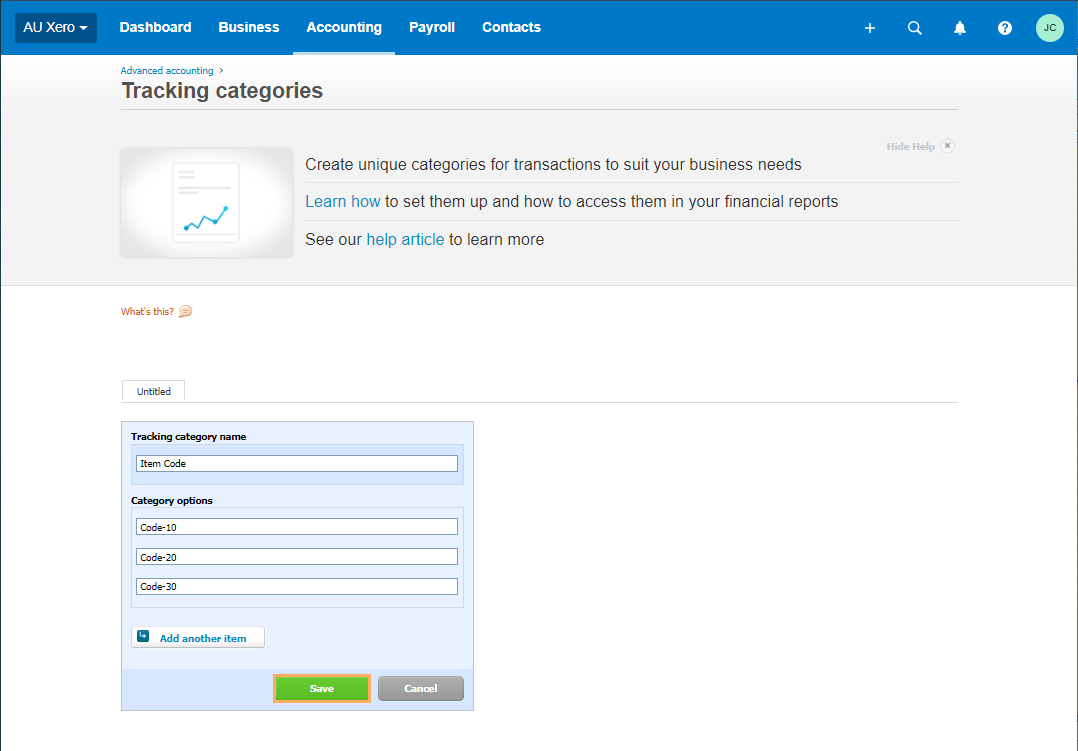
- Enter the Tracking category name. Note it must be typed exactly as Item Code .
- Under Category Options, enter the specific Category Options (e.g. CODE-10, CODE-11, etc)
- Click on Save
Examples
1. Xero Item Code for Service Charges
You can use GPM to assign Xero Item Codes to your services charges (and keep track of those charges within your Xero account).
Create a Service Charge with a Xero Code
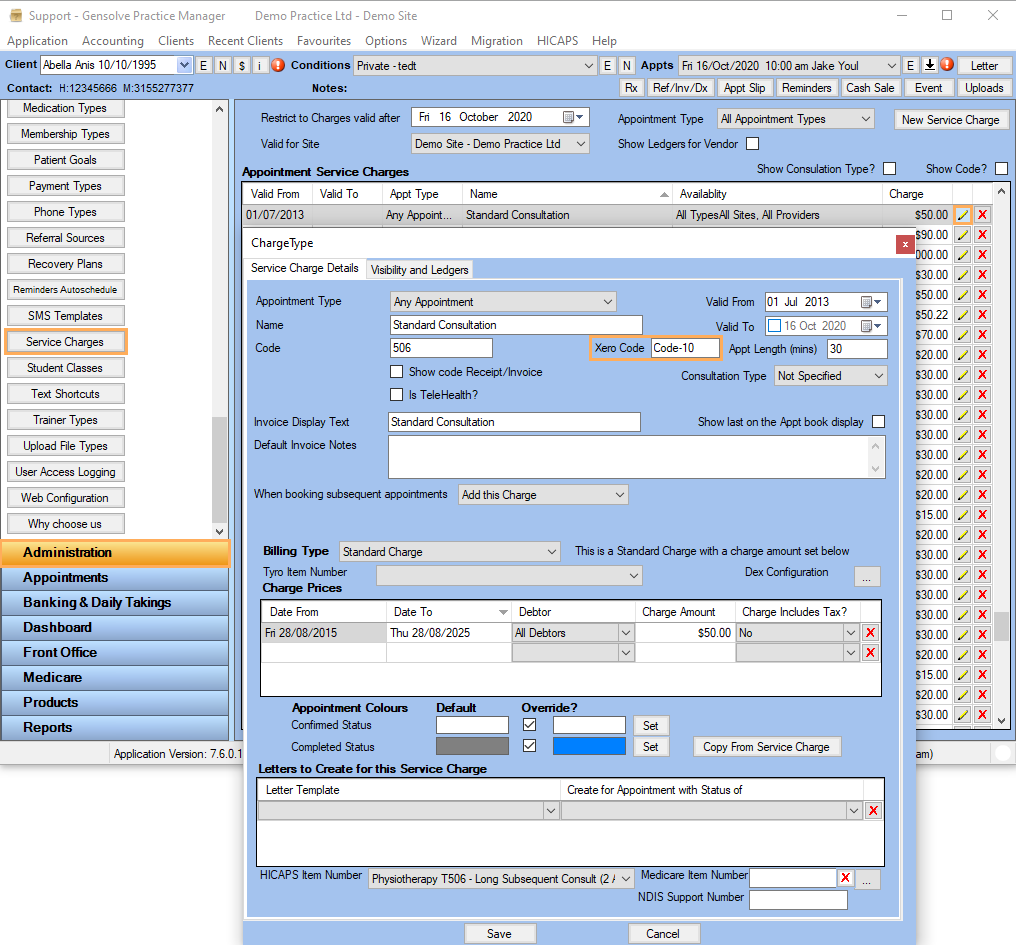
Once you have created a Tracking Item Category in Xero, you will need to create/edit your service charges in GPM to include the Item Codes created in Xero.
To do this,
edit a service charge and enter the Tracking code in the Xero
Code field as shown below:
For more information see: How to Create a New Service Charge
Create a New Appointment and generate an Invoice
Create a new appointment and associate to
it the service charge created/edited above.
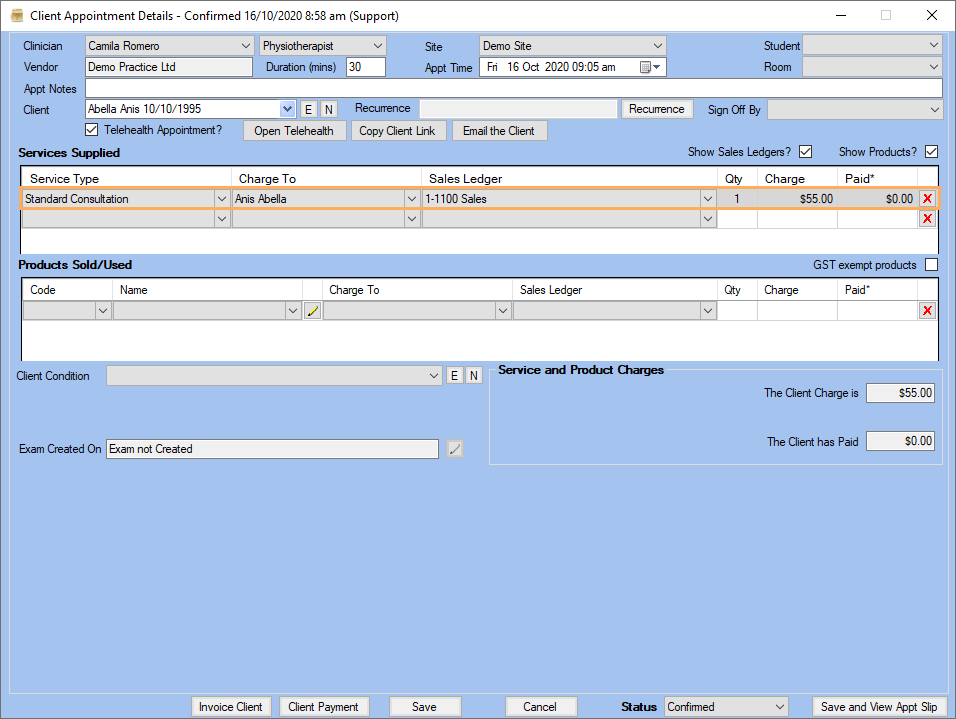
For more information see: How to Create an Appointment
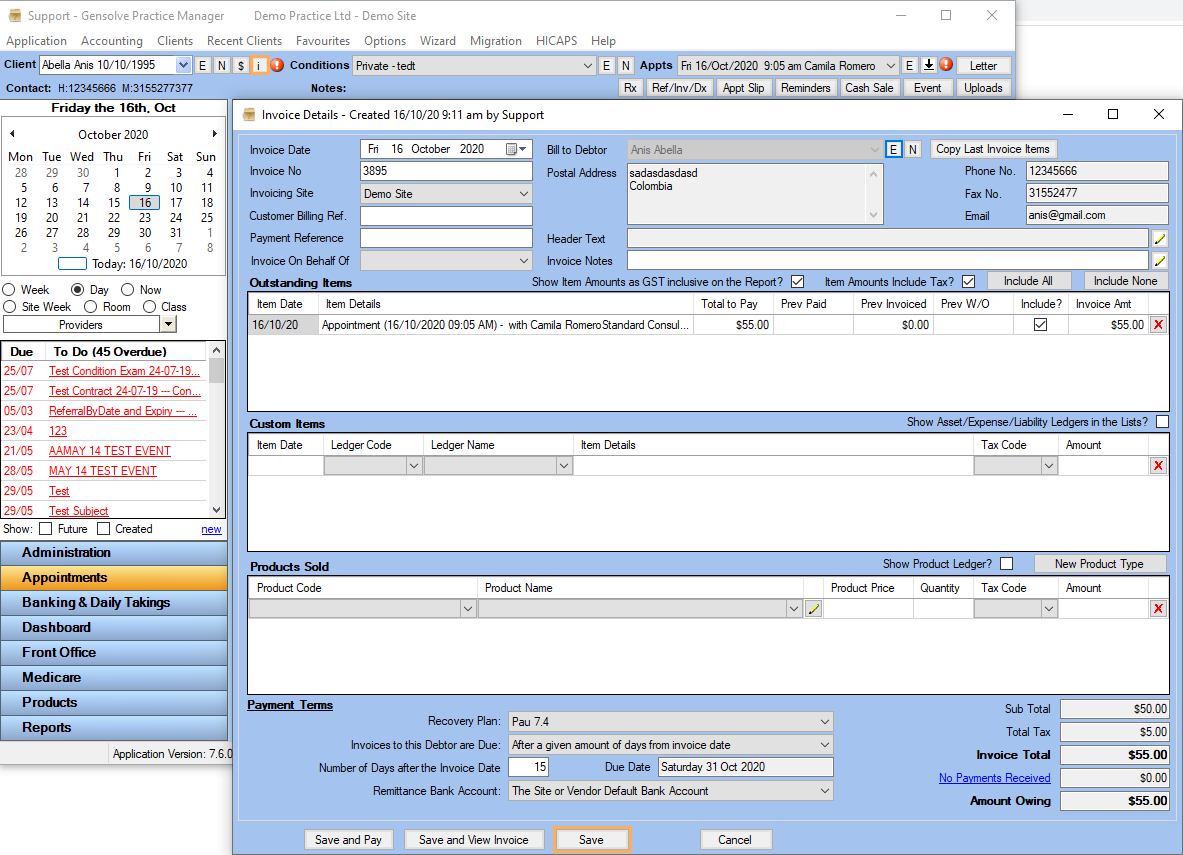
Click on Invoice
Client to generate the invoice for the appointment charges. The
Invoice Details is shown below in the Outstanding
Items panel for the selected Debtor.
Export the Invoice to Xero
You
can now export the invoice to your Xero Account.

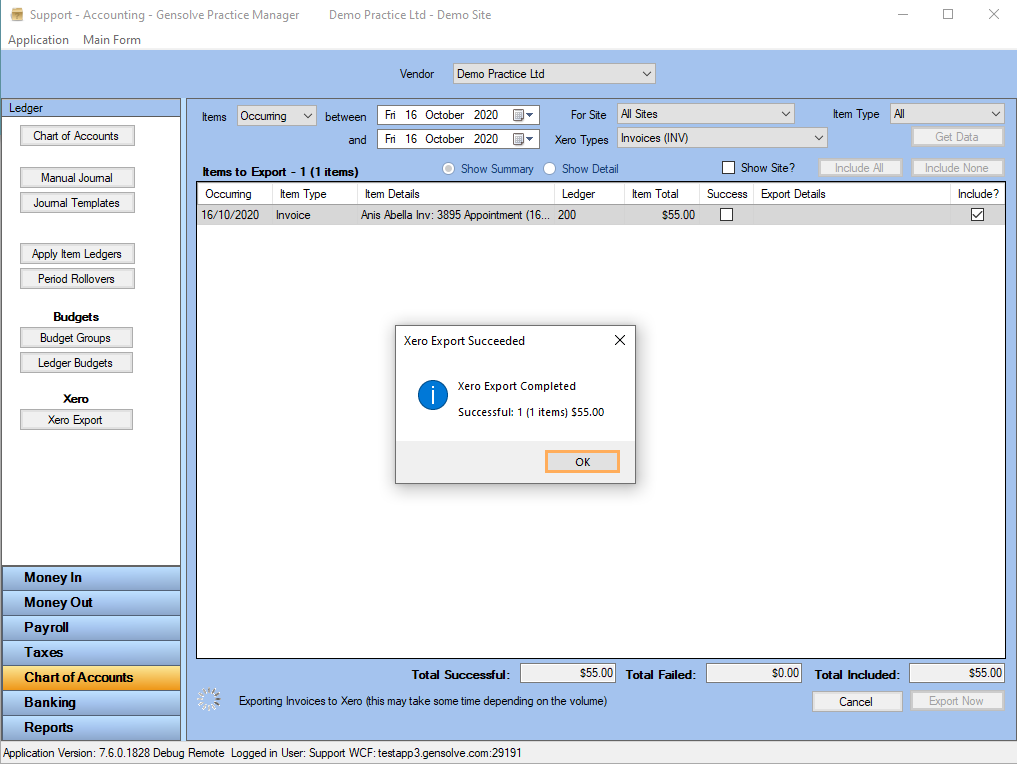
For more information see: Send Data to Xero.
View/Edit the Item Code in Xero
Once the invoice has been exported, you will be able to see and edit the Item Codes in your Xero account as follows:
-
-
- Locate the invoice you have just exported and click on
it to see its details.

For more information see: View Invoices in Xero.
- Locate the invoice you have just exported and click on
it to see its details.
-
-
2. You will notice that the Tracking Category (Item Code) will be a new editable column in the Invoice Details Window.
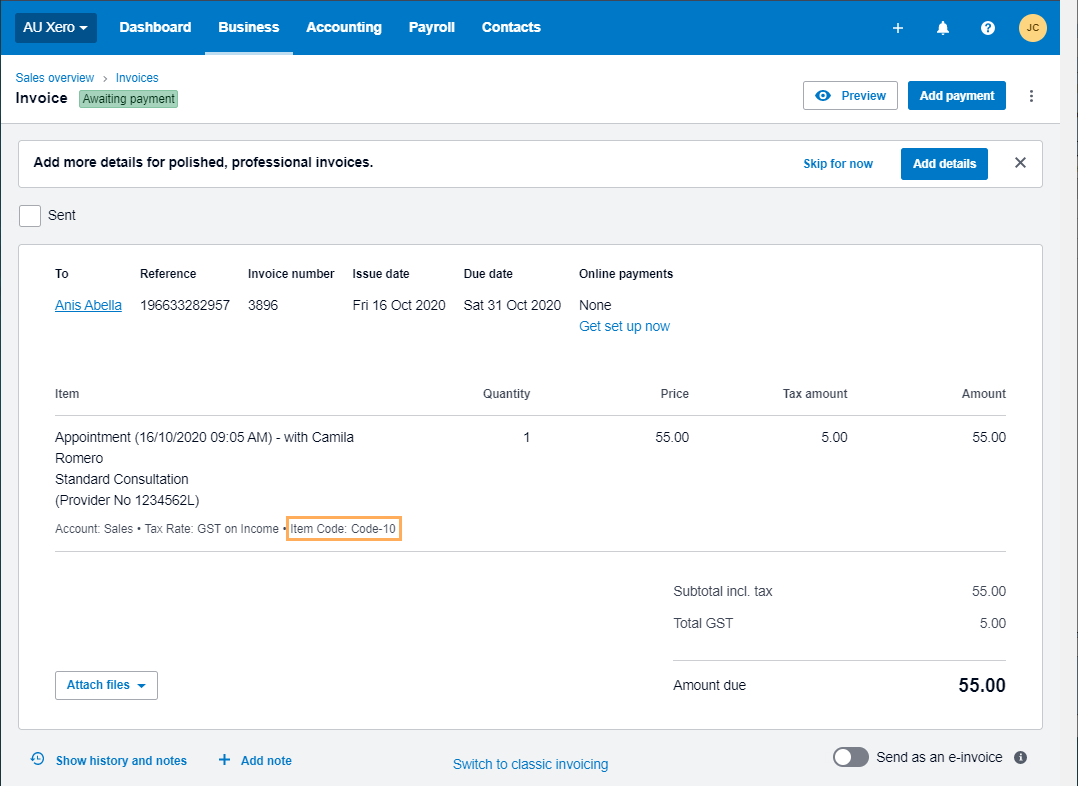
Note: The Item Code will only appear if you have entered a Xero Code in the respective Service Charge in GPM.
Note: If you have any issues using Tracking Categories in Xero, please refer to the Help Centre_Tracking Categories.
2. 'Attribute To' Settings
In Gensolve Practice Manager, the items to be exported will be linked to the user who last updated them.
To avoid any failures when exporting, you should create an 'Attribute To' tracking category with all the users in charge of the transactions.
-
- Create a Tracking Category in Xero and name it Attribute To. Ensure it is created EXACTLY as this with the capital letters.
- Include all users in charge of the transactions under the Category Options.
Note: You will be able to see/edit the user(s) linked to each item from GPM as follows:
-
-
- Locate the item to be exported (Accounting Form >> Chart of Accounts >> Xero Export)
- Click on
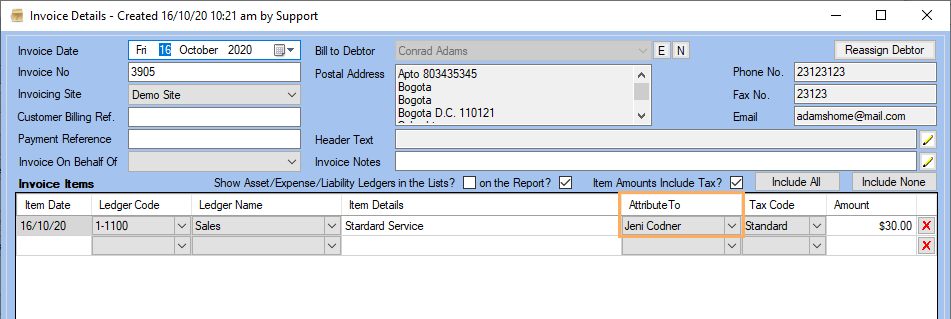
 to open the Item Details Window
 - Find/Edit the specific user under
the 'Attribute To' column
-
-
- You
will notice that the Tracking Category (Attribute
To)
will be a new editable column in the item's form.
- You
will notice that the Tracking Category (Attribute
To)
will be a new editable column in the item's form.
Note: If you have any issues using Tracking Categories in Xero, please refer to the Help Centre_Tracking Categories.