Recovery Plans and Managing Debtors
Reason
Recovery Plans provide a means to manage outstanding Debtor balances.
Different Recovery Plans can be put in place at the Vendor, Debtor and even Invoice level. Different steps or Actions can be applied that prompt such as the sending of emails or prompting a recovery phone call to be made.
Note: Recovery Action Plans are NOT retrospective. They will only begin to be applied to receivables (Invoices) once the Recovery Plan(s) has been created and applied to a debtor.
Prerequisites
The following are required to be able to create and start using Recovery Plans. Note: you will require Full Administration access to complete the steps.
Contents
Create an Email Template for sending Emailed Recovery Actions
Apply the Recovery Plan to the Vendor / Debtors / Invoices
How to Email large volumes of Invoices to Debtors
Solution
Create an Email Template for sending Emailed Recovery Actions
-
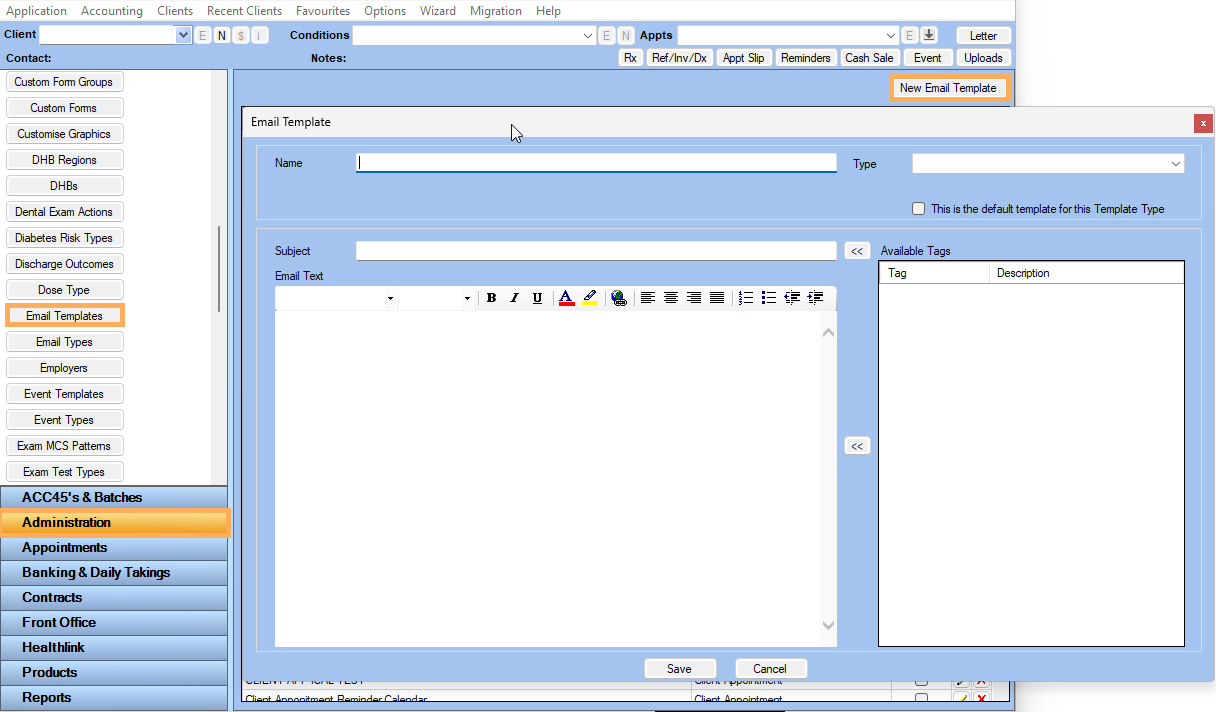
Go to Administration >> Email Templates >> New Email Template
-
Give the Template an appropriate Name e.g : Payment Invoice Recovery
-
Set the Type to Invoice Recovery
-
Create the Subject using the
 icon to insert Tags
to auto-populate the field.
 -
Create the body of the email in the Email Text area, once again using the
 icon to insert
the required Tags.
Note: Optional: You can create two templates to handle the scenarios of multiple invoices being attached to an email versus when there is only one invoice being attached
Create the Recovery Plan
In the below example we will setup a Recovery Plan that involves sending a follow up Email, as well as a secondary action which is a Phone call.
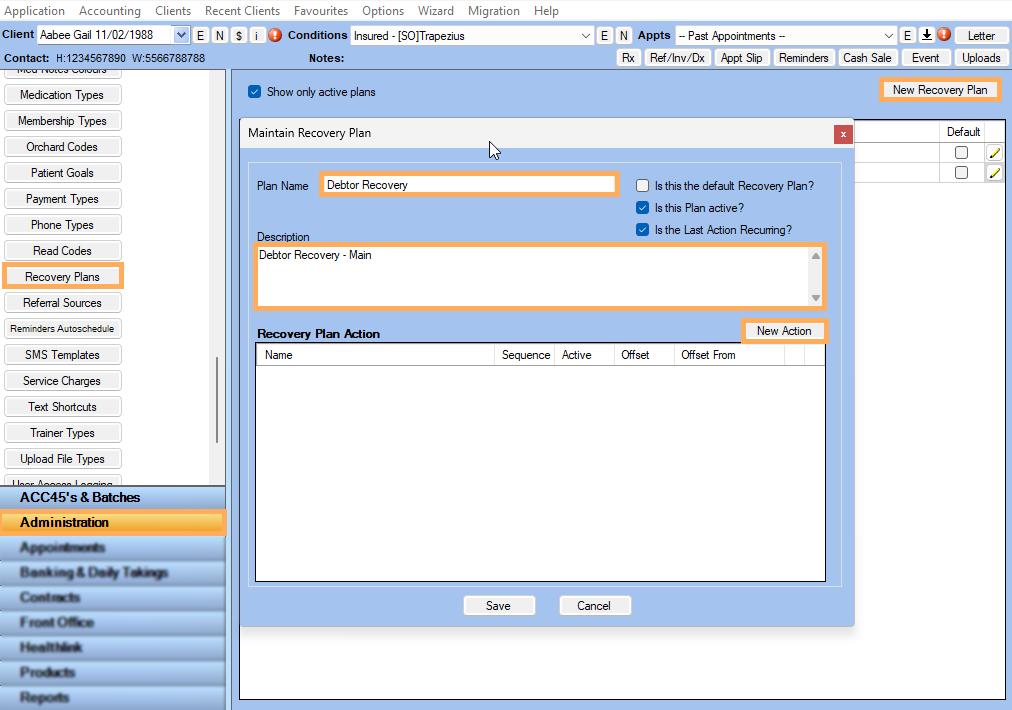
- Administration >> Recovery Plans >> New Recovery Plan
- Give the Plan a name, e,g Debtor Recovery (Note: It is possible to have multiple plans depending on the terms you may have with certain debtors)
- Provide a Description >> click on New Action
-
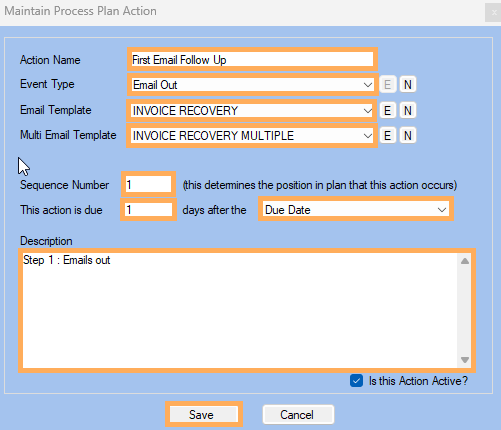
The Maintain Process Plan Action screen will appear.
-
Enter the Action Name e.g First Email Follow Up
-
Select the Event Type to be Email Out
-
Select an Email Template created for this Recovery Plan. If you have not created one already click
 . For more information see How
to Create an Email Template
 -
Select an Email Template created for when attaching multiple invoices to an email in the Multi Email Template
-
Select the Sequence Number as 1. This is the first step in our Recovery Plan.
-
Set the This Action is Due to when you want the step to occur (In the below example it is set to 1 day after the Due Date)
-
Set the Days after the to either Due Date / Invoice Date / Last Action Date
-
Add a Description >> click Save
-
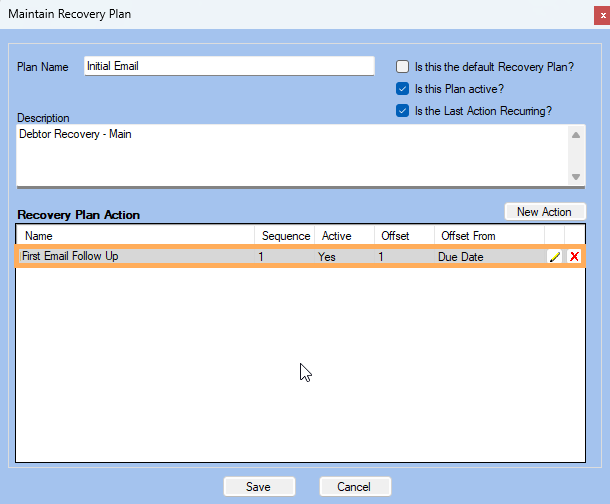
The Maintain Recovery Plan screen will be updated
-
Next we will add a second step to prompt a phone call to the Debtor, 3 days after the Recovery Email was sent.
-
Click New Action
-
Repeat the steps above (see the example below) except select the Event Type to be Phone Out
-
Set the Sequence Number to be 2
-
Set This Action is Due to 3 days after the Last Action Date
-
Add a Description: This might be the script for the phone call.
-
Click Save
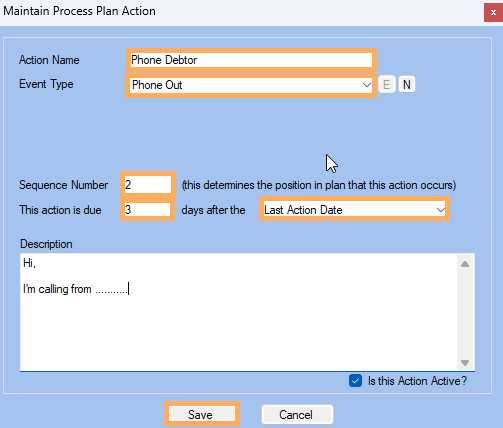
-
If you wish to add more steps select New Action and repeat the process. You can add as many steps as you wish. Note: by default the Last Recovery Action will repeat.
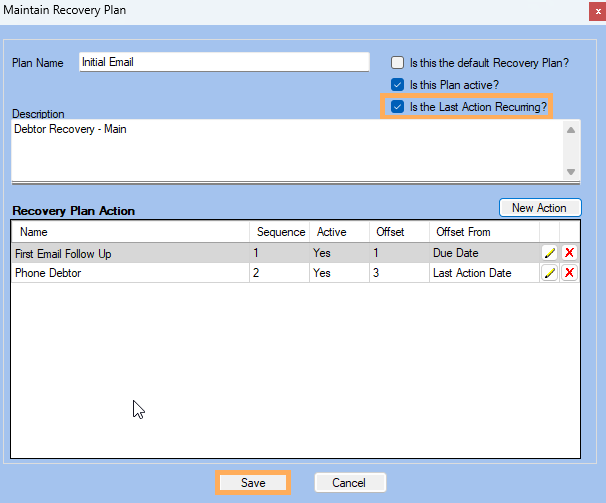
-
Click Save
Apply the Recovery Plan to the Vendor / Debtor / Invoice
Applying Vendor Default Recovery Plan
Note: This Recovery Plan will begin to apply to all Debtors and all Invoices unless overridden at the Debtor or Invoice level (See below for more information on setting Debtor and Invoice specific Recovery Plans).
-
To apply the Recovery Plan as the Default for All Debtors go to Administration >> Vendors >> Get Data Select the Vendor to edit by clicking
 to the right of the Vendor.
 -
In the Vendor Details tab, under the heading Default Payment Terms click on the drop down box next to Recovery Process Plan and select your recovery plan.
-
Click Save at the bottom of the Vendor window
-
This is now the default Recovery Plan for all Debtors in that Vendor
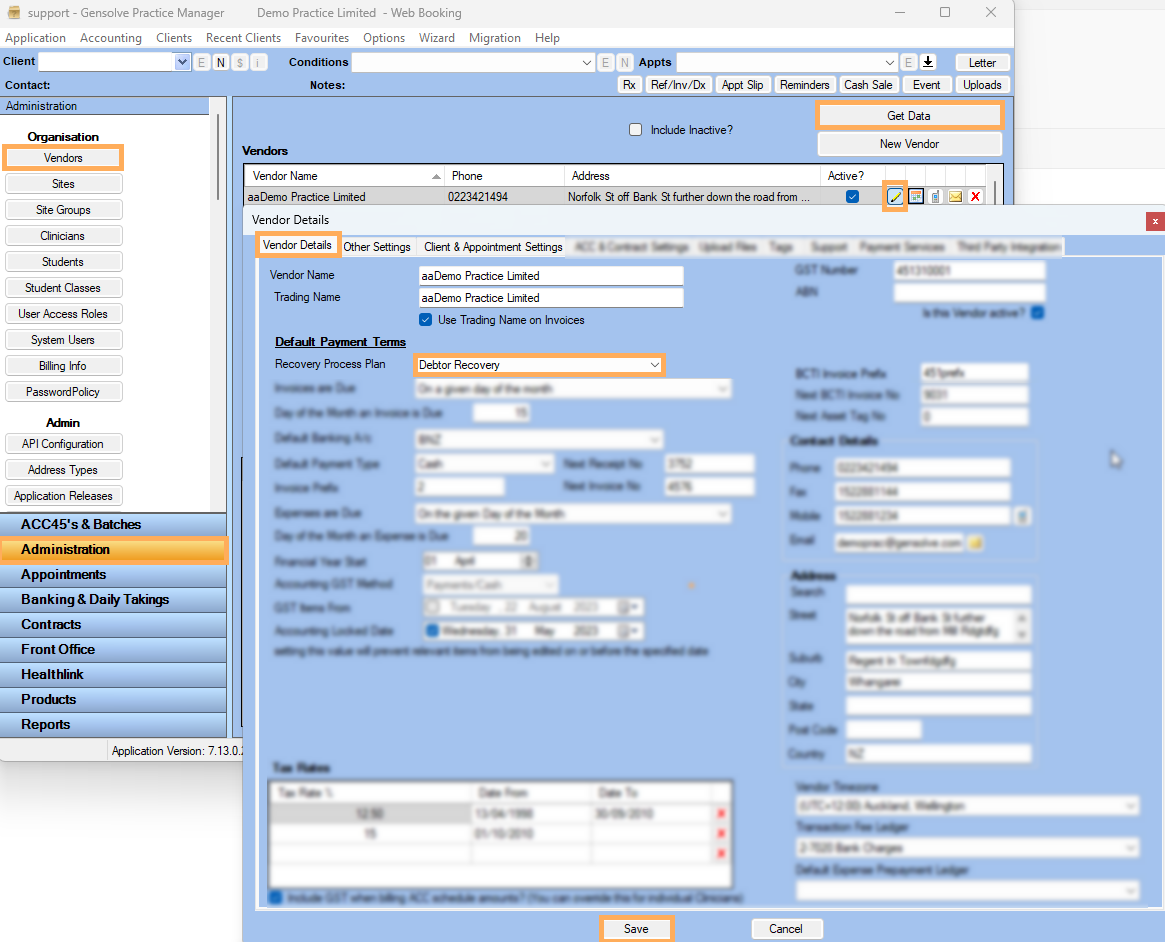
Applying Specific Debtor Recovery Plans
Note: You may wish to use this option if you have special terms with a specific Debtor that is not covered or managed via the Default Recovery Plan set against the Vendor. The below example shows an additional Recovery Plan that would have been created, called Special Terms Debtor.
-
Go to Accounting >> Accounting Form >> Money In >> Debtors >> Get Data
-
Select the Debtor you wish to add the Recovery Plan to by clicking
 to the right of the Debtor.
 -
In the Debtor Details Tab under the Default Payment Terms select the Default Recovery Plan to use for this Debtor.
-
Click Save
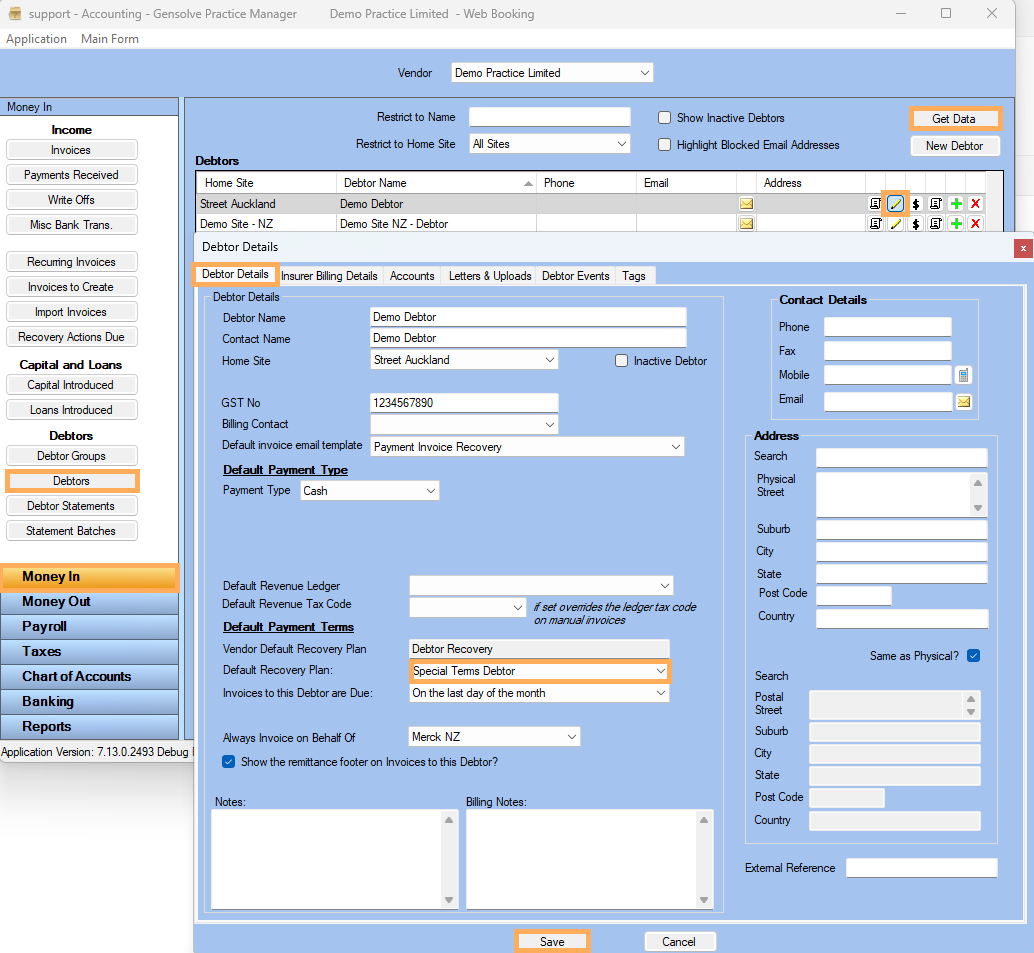
Applying a recovery plan to a specific Invoice
Note: In some circumstances you may wish to apply a Recovery Plan to a single Invoice due to a special arrangement with a Debtor. Otherwise the standard Vendor Recovery Plan or Debtor Recovery Plan will be applied.
-
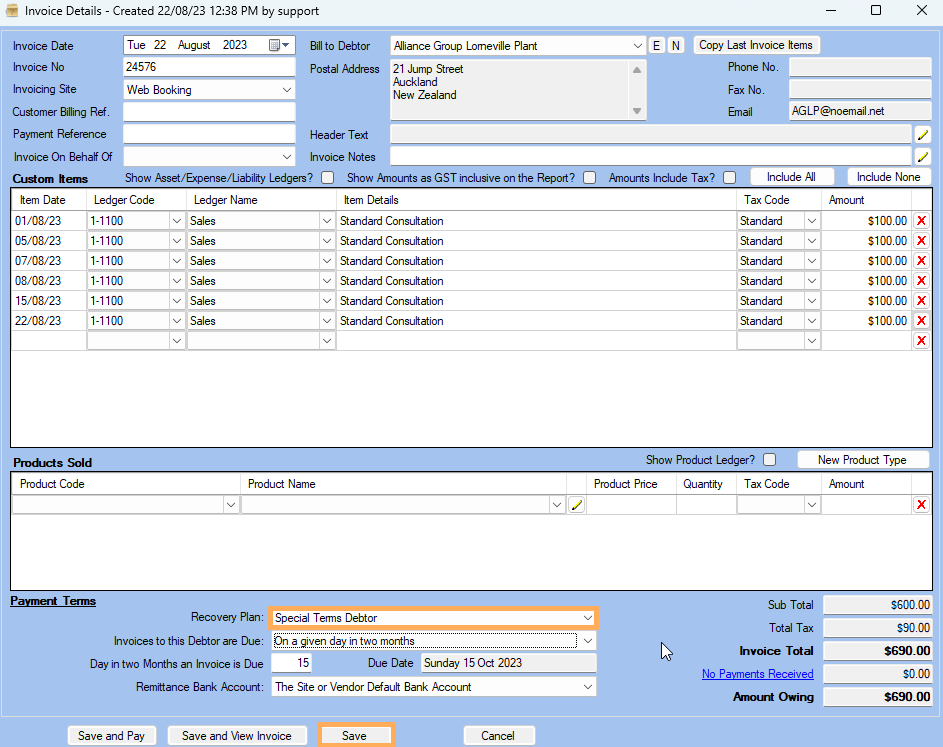
When creating an Invoice for a Debtor you can change the Recovery Plan for the Invoice. For more information on creating Invoices please see How to Create Debtor Invoices
-
In the Invoice screen next to the Recovery Plan drop down box, the default plan for the Vendor or the Debtor will be shown >> Click and select the special Recovery Plan to apply to ONLY this Invoice.
-
Click Save
Run the Recovery Plans Due
Note: As part of the Debtor Recovery process you will need to create an internal process in your organisation about when to run the Recovery Actions Due. The below provides information on how to run the Recovery Actions Due. It DOES NOT provide a method of best approach for your organisation on how often and when it needs to be run as each organisation is different.
Important Note: As mentioned in the introduction, Recovery Plans are NOT retrospective. Thus any Invoices created prior to the Recovery Plan being applied against the Debtor will not appear in the Recovery Actions Due.
Email Event Type Recovery Actions Due
-
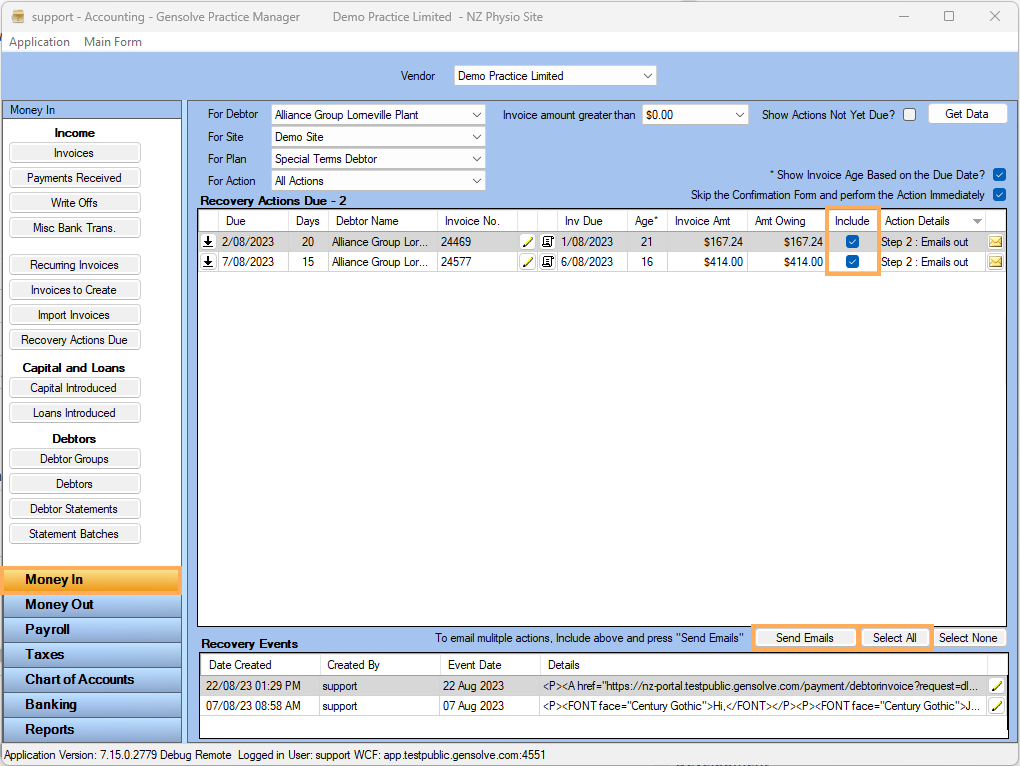
Go to Accounting >> Money In >> Recovery Actions Due
-
You can apply the following filters when selecting what Recovery Action Plans Due displays:
-
For Debtor, Site, Plan and Action
-
Invoice amount greater than (or Invoice date if unticked)
-
Show Actions Not Yet Due
-
Show Invoice Age Based on the Due Date (or Invoice date)
-
By default the Skip Confirmation and perform the Action Immediately will be ticked.
-
Click Get Data
-
The Recovery Actions Due will display.
-
You can sort the columns Due / Debtor Name / Invoice No. / Invoice Due / Invoice Amount / Amount Owing / Action Details alphabetically or date-wise by clicking on the column headings
-
The below shows Recovery Actions Due being run for a single Debtor

-
For email Recovery Actions you can Include them individually by the clicking the tick box, or click Select All
-
Click Send Emails
-
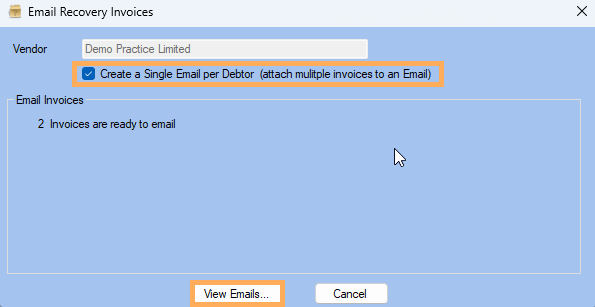
The Email Recovery Invoices window will open.
-
To attach multiple invoices to 1 email for each debtor tick Create a Single Email per Debtor (attach multiple invoices to an Email )
-
Click View Emails
-
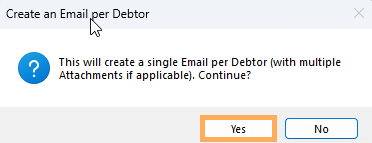
A pop up will appear >> click Yes
-
The emails will begin compiling and attaching the relevant Invoices with a green status progress bar being updated as the process continues. If you have a large number of Invoices across many Debtors this may take some time.
-
The emails will then be available for review. The To field is populated from the Debtor email and the Invoices are attached. If there are multiple emails you can cycle through them to complete your review using the 'View Emails...' button
-
Once completing your review click Send Emails (Note: Once again this may take some time if sending large volumes of Invoices.)
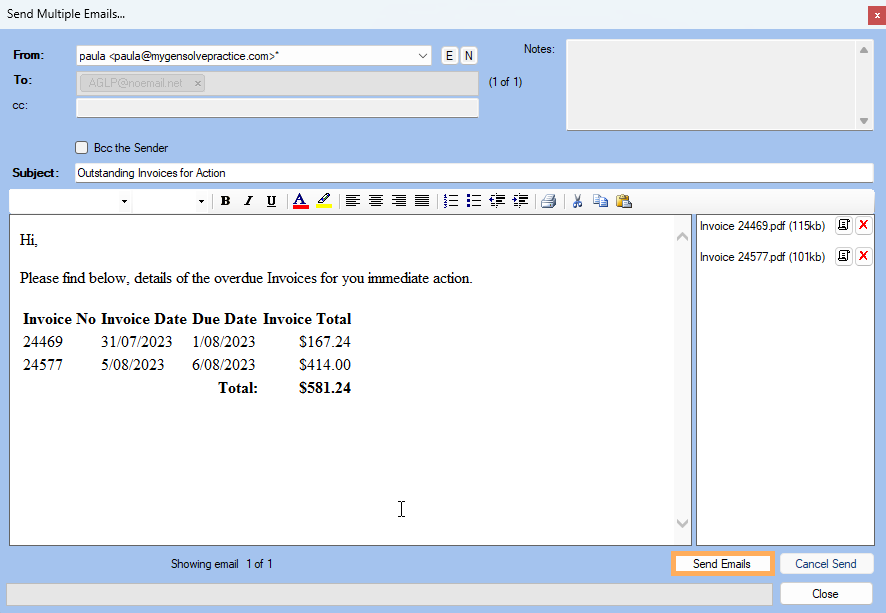
-
At the pop up click Yes
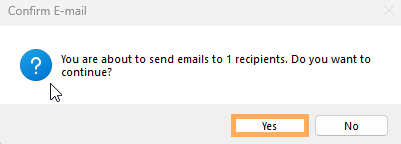
-
Once the emails are sent the Emails Send Completed pop up will appear >> Click Yes
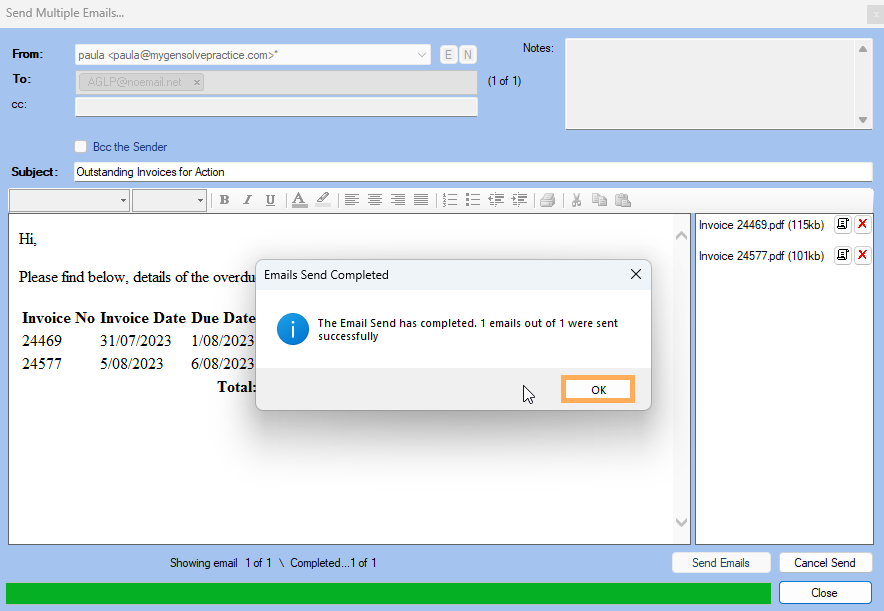
-
You will be returned to the Recovery Actions Due screen >> click Get Data
-
The Recovery Actions completed will now no longer appear.
-
This will then be saved as an Event against the Debtor.
Phone Event Type Recovery Actions Due
- Follow steps 1 to 5 above to get the Recovery Actions Due screen to populate.
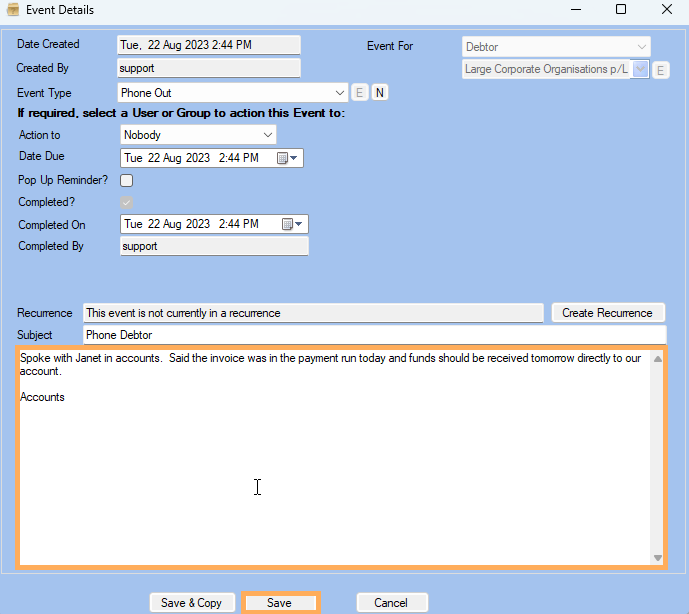
- For a Phone Action
click the
 icon visible in the Details column.
 - The Event Details window will open >> Enter the details of the call in the body of the Event >> Click Save
- This will then be saved as an event against the Debtor.
How to Email large volumes of Invoices to Debtors
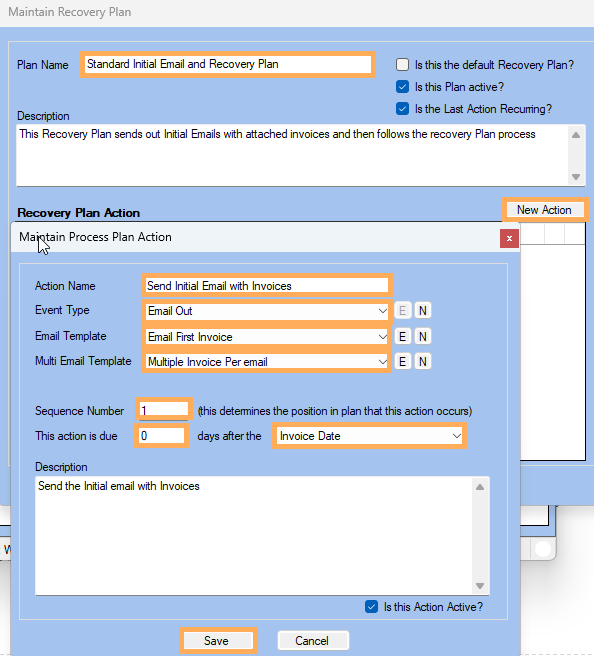
Note: You can use Recovery Plans to send the Initial Invoice email to a debtor. It is IMPORTANT to understand the setup steps shown above however, the only difference with the steps above and this section is that the below becomes Sequence Number 1 of the Recovery Plan.
- Ensure you have created an appropriate Email Template for the first time invoices are being emailed to a Debtor, as it will need to be different from the Recovery Email Templates as shown before. Note: As per the steps shown in Create an Email Template for sending Emailed Recovery Actions you may wish to create a template for emails with Multiple Invoice attachments and Singular Invoice attachments.
- Create a new or edit an existing Recovery Plan as per the steps shown in Create the Recovery Plan
- For the first Action you simply create the Sequence Number 1, Email Event Type step to have a 0 days after the Invoice Date.
- Click Save
-
Continue to add or edit subsequent Sequence Numbers depending on your needs for chasing amounts owed as per the steps in Create the Recovery Plan
-
When you run the Run the Recovery Plans these newly created invoices will be sent out as soon as you action them.