![]()
Accessing HealthOne
Follow the process detailed below to learn how to configure and use GPM with HealthOne
Obtain Your HealthOne Account
Please contact HealthOne directly to set up an account for your clinic and clinicians at : https://healthone.org.nz/support#help
Configure Vendor Settings
Once you have obtained your HealthOne Account Details, you will need to request the Gensolve Support Team to switch on the HealthOne functionality for your organisation.
Once you have received notification from the Support Team that HealthOne has been activated, you can enter your HealthOne Account details.
At the Vendor Level
Note: Unless stipulated/over ruled at the Site level, the Vendor HealthOne settings will apply. To setup Sites to have their own HealthOne Codes & ID's please see At the Site Level
- Go to Administration >> Vendors and click Get Data
- Click on
 to open the Vendor
Details window
to open the Vendor
Details window - Click on the Third Party Integration tab
- Enter the HealthOne Codes & ID's you were provided with by the HealthOne Support Team including:
- HealthOne Client ID
- HealthOne Location ID
- HealthOne Secret
- HealthOne HPI FAC
- Select a System User with suitable Admin level access to be the HealthOne Process User (Note: The user selected here is purely used for sending appointments in the background, it does not affect clinician HealthOne logins etc)
- If wanting to activate for all your clients tick "Enable for all Clients?" Note: you can setup/opt-out a single client from HealthOne in the HealthOne tab against an individual client. For more details please How to Opt-Off a Client.
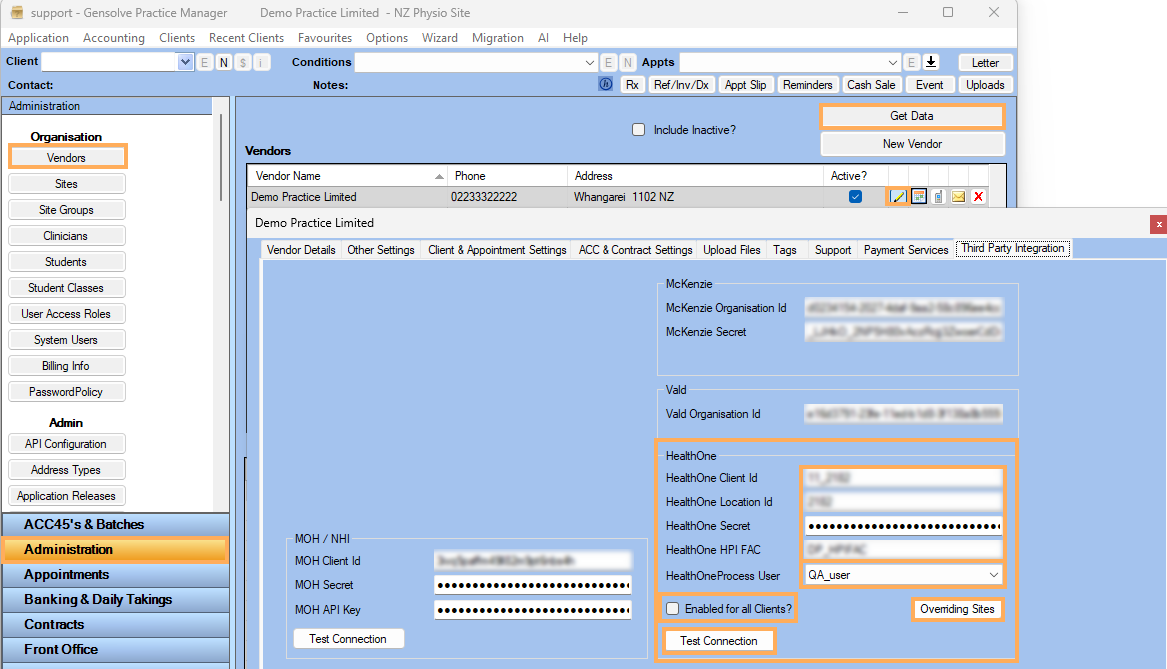
- Click on Test Connection to ensure you have entered the details correctly. Note: If the Test Connection is not successful, please check the details you have entered. If you still experience issues please contact the HealthOne Support Team.
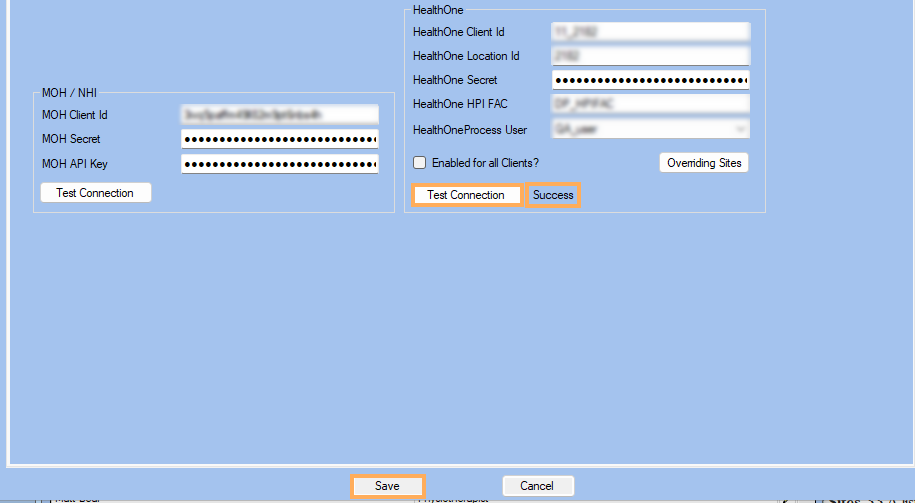
- A successful test will return "Success">> click Save.
Note: If you have setup Sites to have their own HealthOne Accounts you can view those Sites by clicking on Overriding Sites >> A list of Sites with their own HealthOne Account settings will be displayed.
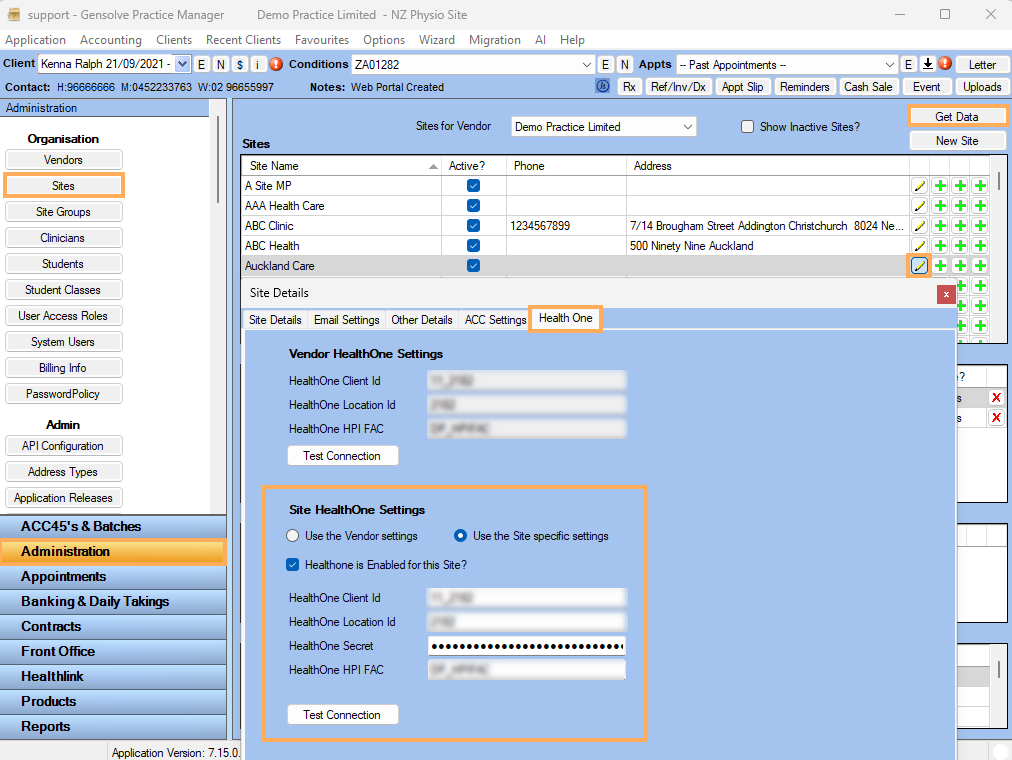
Configure Site Settings if Required
To setup a Site to have it's own HealthOne Account and override the Vendor HealthOne settings follow the below:
- Go to Administration >> Sites and click Get Data
- Click on to open the Site
Details window
- Click on the HealthOne tab
- Click >> Use the Site Specific settings
- Tick >> HealthOne is Enabled for this site?
- Enter the HealthOne Codes & ID's you were provided with by the HealthOne Support Team including:
- HealthOne Client ID
- HealthOne Location ID
- HealthOne Secret
- HealthOne HPI FAC
- Click >> Test Connection to ensure the details have been entered correctly. A successful test will return Success
- Click >> Save
Note: Entering HealthOne Account details here will override the HealthOne Vendor settings for the Site
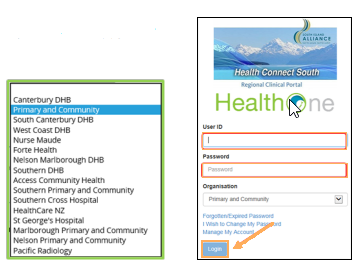
How to Access HealthOne from Gensolve
-
Select a client >> Click on the HealthOne tab.
-
Click on the HealthOne logo to the right of the tab.

-
Your web browser will open the HealthOne login screen >> Login with your credentials as supplied by HealthOne.
-
Select the relevant HealthOne Organisation
Note: The ‘Organisation’ shown in your login screen is pre-populated depending on your region of operation.
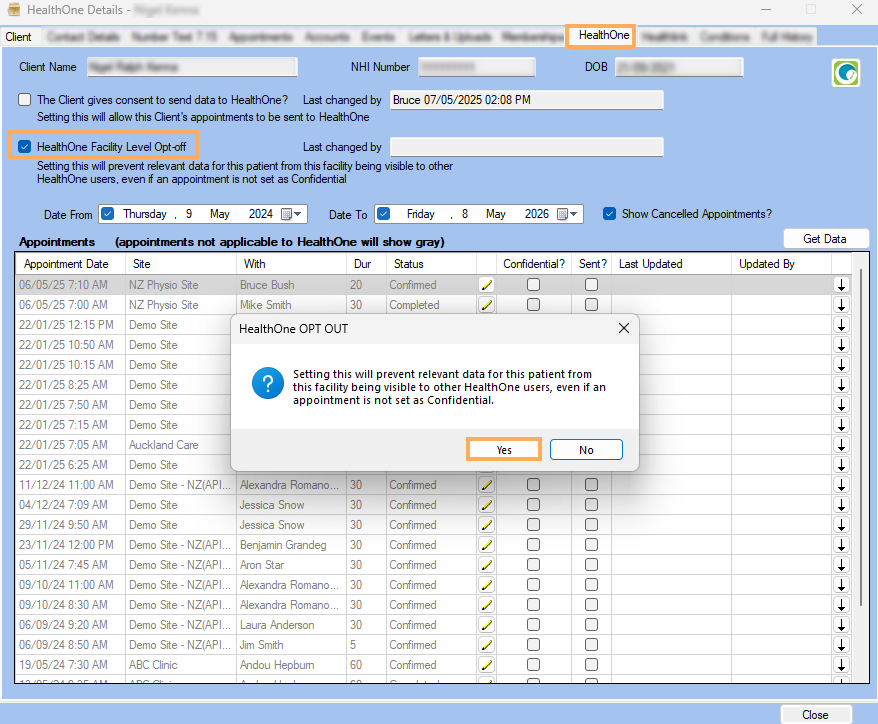
How to Opt-Off a Client
Note: Gensolve only has Facility Level Opt-Off only. You cannot opt-off the client from HealthOne for other Clinics.
- Open the relevant client's file >> Click on the HealthOne tab
- Tick >> HealthOne Facility Level Opt-off
- A confirmation pop up will appear >> Click Yes
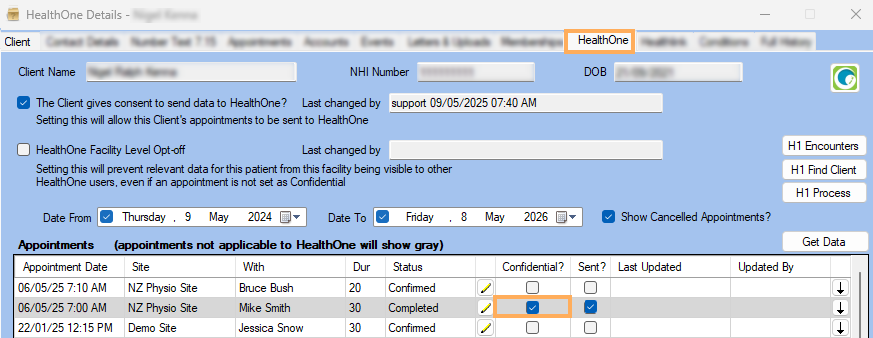
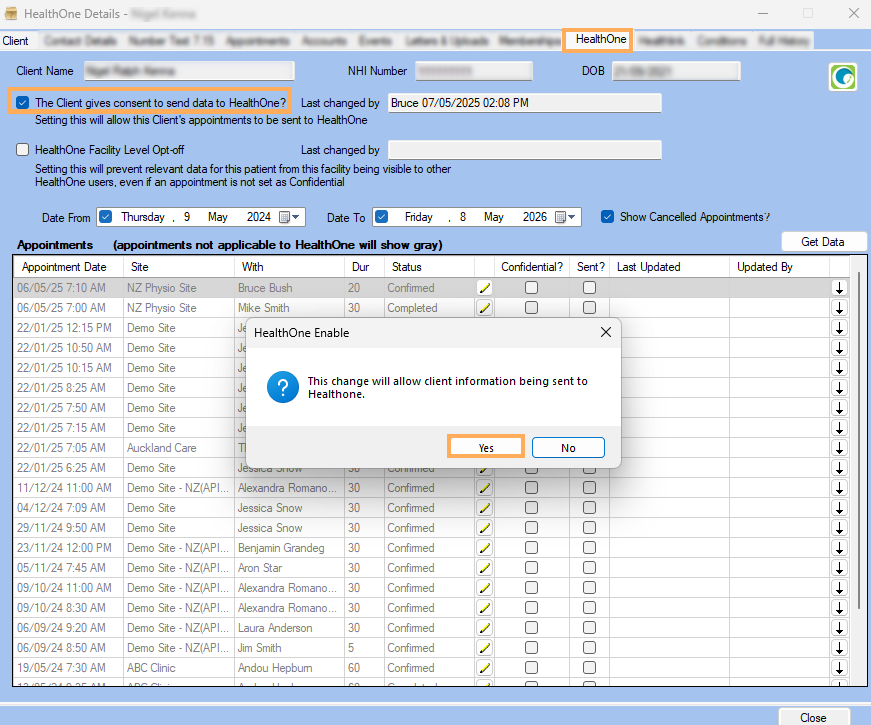
Flagging Client Consent
Note: For more information about Legal consent requirements please visit https://healthone.org.nz/faqs
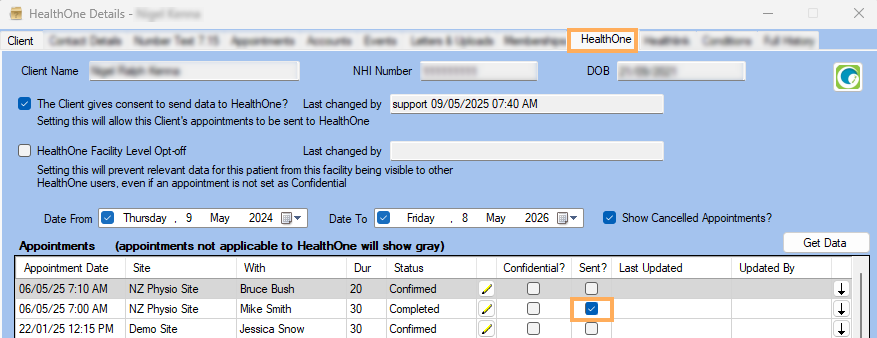
- Open the relevant client's file >> Click on the HealthOne tab
- Select >> The client gives consent to send data to HealthOne?
- A confirmation pop up will appear >> Click Yes
Sending Appointment Information to HealthOne
Note: Only Completed appointments can be sent to HealthOne
- Open the relevant client's file >> Click on the HealthOne tab.
- Click Get Data.
- Click on the
 icon to the right of the relevant
appointment
icon to the right of the relevant
appointment
.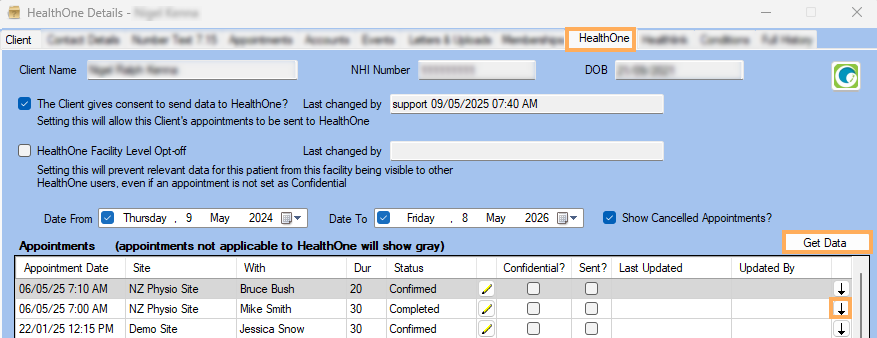
- You will be advised that the information has been successfully sent >> Click OK
- The check box in the Sent? column, will now have a tick against it.
Marking an Appointment Sent to HealthOne as Confidential
- Open the relevant client's file >> Click on the HealthOne tab.
- Click Get Data.
- Tick the box on the relevant appointment, in the Confidential? column.
- A pop up box will confirm that information for the appointment will be hidden >> Click OK
- The appointment will now be marked as confidential.