How to Create a New Clinician
Prerequisites
The System User has been created: How to Create a System User
The Site has been created: How to Create a New Site
IMPORTANT!
1. Please note that when adding new clinicians, the SMS Auto Schedule(s) (if used) will need to be edited so that the new clinician(s) can be included.
Solution
Prior to creating the new Clinician, you must have had created the System User for the Clinician. For more information please refer to How to Create a System User
Follow the Steps below to Create a New Clinician
Create New Clinician
1. Go to Administration >> Clinicians >> New Clinician
2. Enter Main Provider Type >> First Name >> Surname >> System User
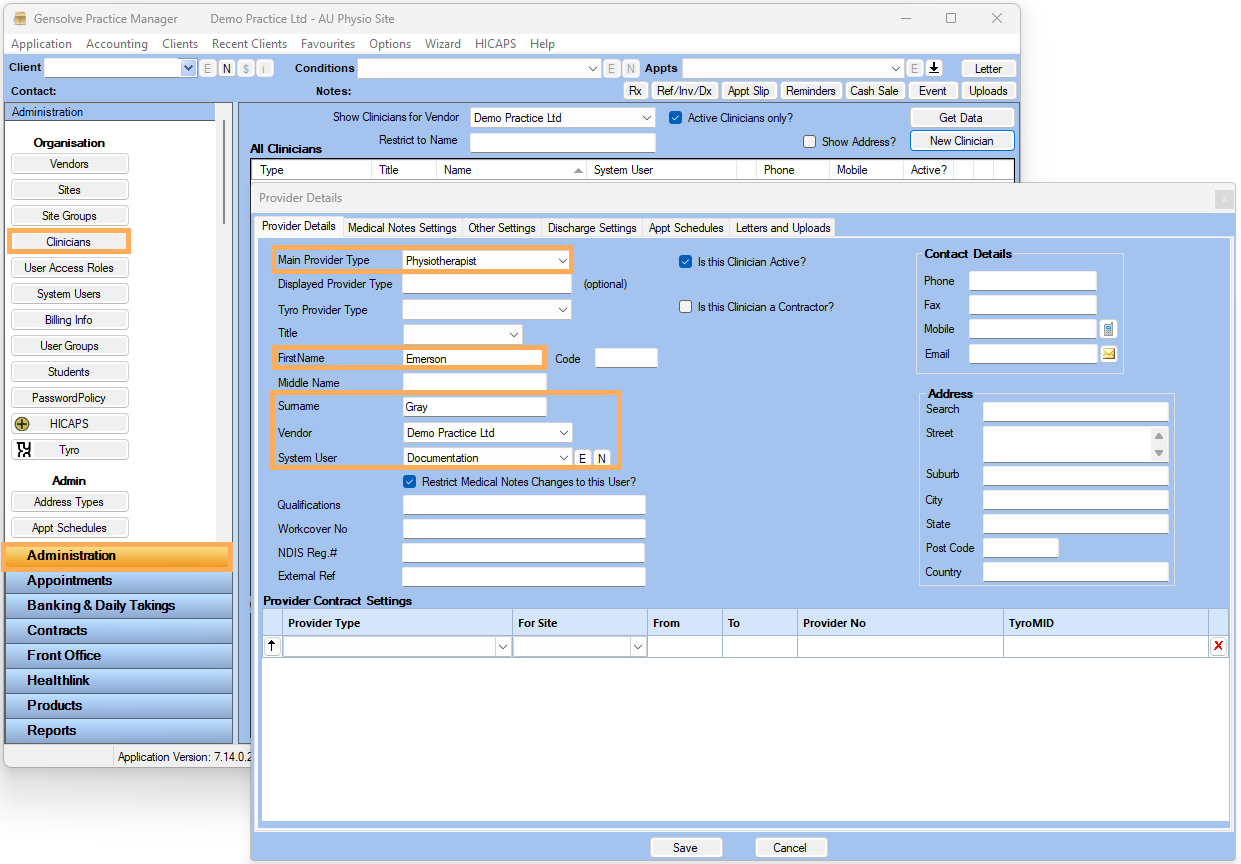
3. In the Provider Contract Settings allows to add or delete Provider
Type
NOTE : A Clinician can be a different Provider Type at different Sites
Fill in Medical Notes
Setting
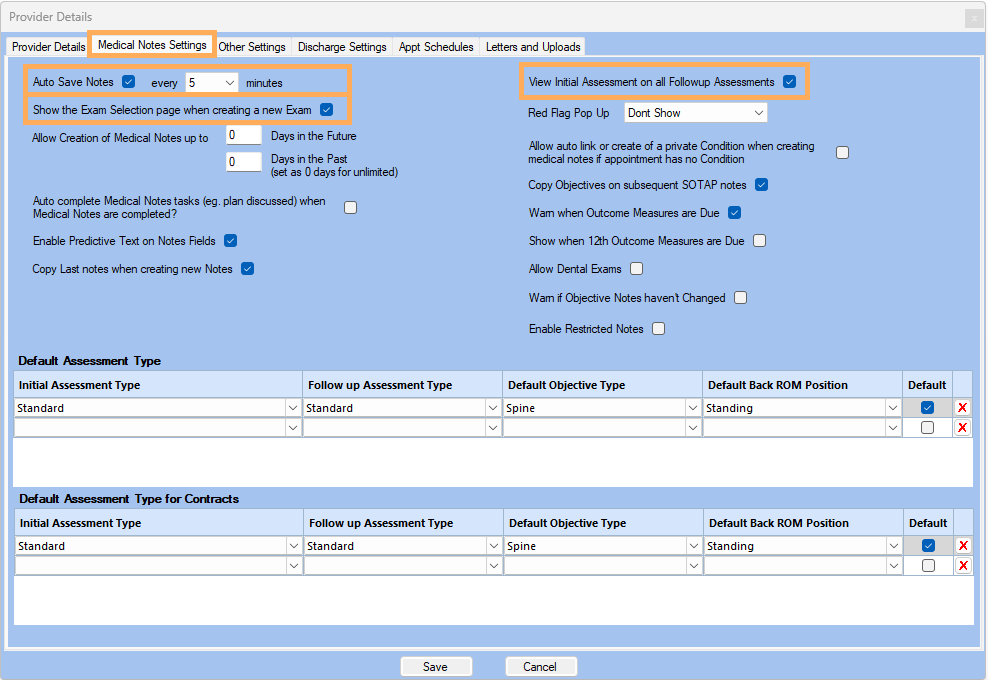
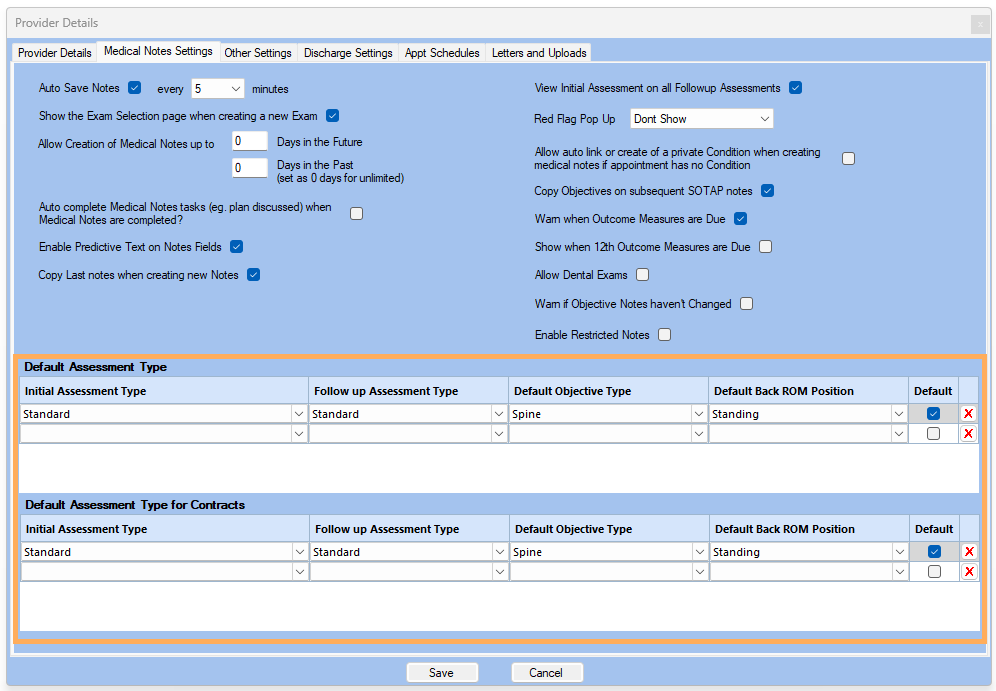
4. Click on Medical Notes Setting Tab
5. Click on Auto Save Notes
6. Click on View Initial Assessment on all Followup Assessments
7. Click on Show the Exam Selection page when creating a new Exam
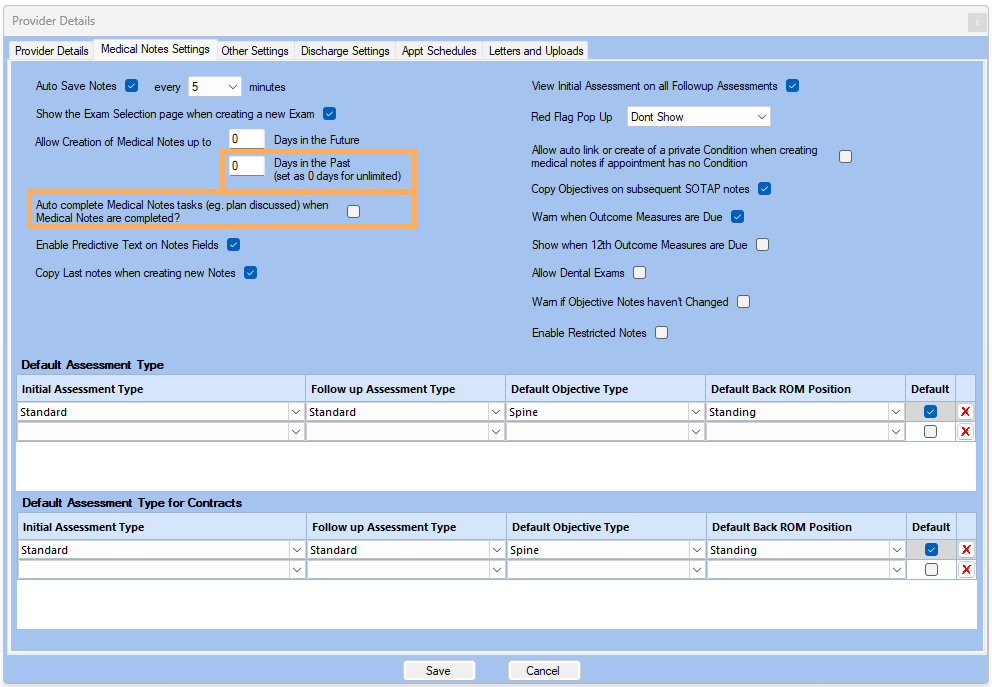
NOTE :
We dont advise Creating Medical Notes prior to an exam so we leave
Allow Creation of Medical Notes up to "Days in the Past"
set to 0
We also advise against Auto Completing Medical Notes so we leave "Auto complete Medical Notes tasks (eg. plan discussed) when Medical Notes are completed?" as unchecked
The rest of these settings are default settings and can be changed at your discretion
8. Default Assessment Type
area allows to add and delete the clinicians's assessment type
NOTE: For more information please refer to Managing Clinician's Default Assessment Type
9. Default Assessment Type for Contracts area allows to add or delete Assessment Type for Contracts Only
Fill in Other Settings
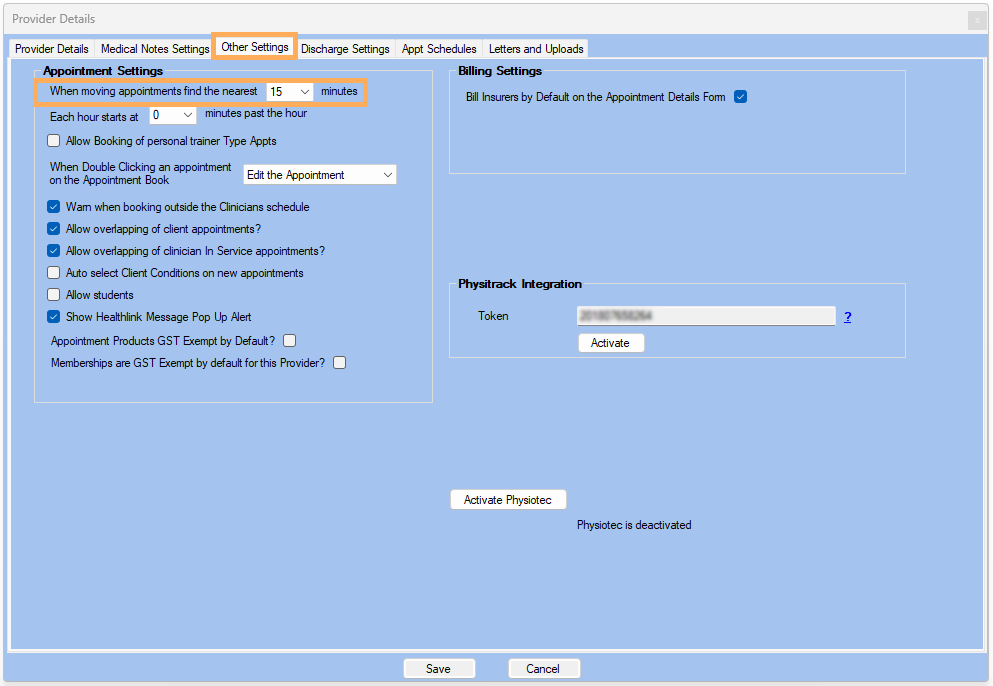
10. Click on Other Settings Tab
11. Adjust the time for "when moving appointments find the nearest 5 minutes " to 15 Minutes. If the duration of your service charges are in 15 minutes increments then you will want to move appointments to the nearest 15 minutes.
12. Change the other default settings at your discretion
Fill in Discharge Settings
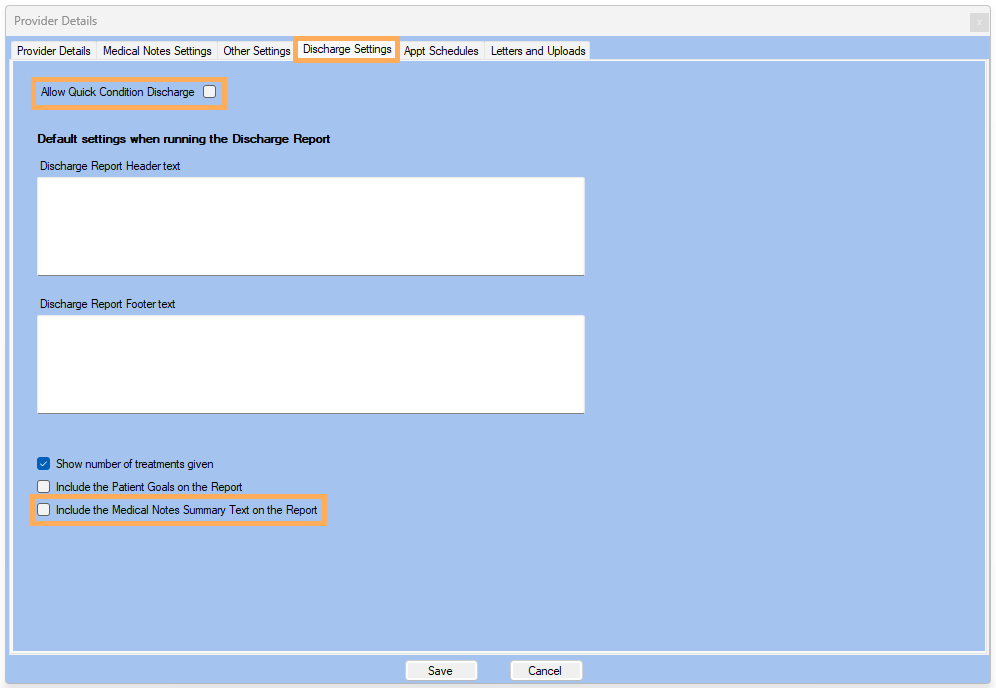
13. Click on Discharge Settings Tab
14. Uncheck Allow Quick Condition Discharge as this is not a good practice
15. Uncheck Include the Medical Notes Summary Text on the Report as you will end up with a lengthy report
Set Appt Schedules
16. Click on New Schedule
17. Select the Clinician Available Working Hours Day >> At Site >> Time From >> Time To >> Appt Mins >> Save
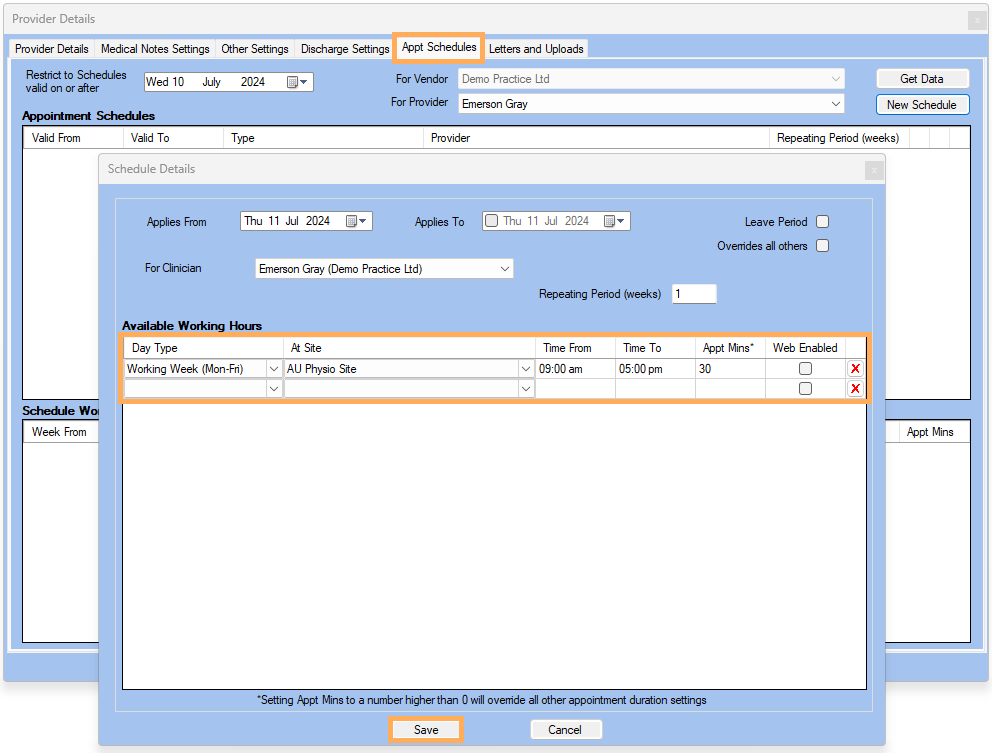
NOTE : Web Enable setting to used
to indicate that appointments can be booked online with this clinician.
For more information see: Web
Portal Configuration - Clinicians Settings
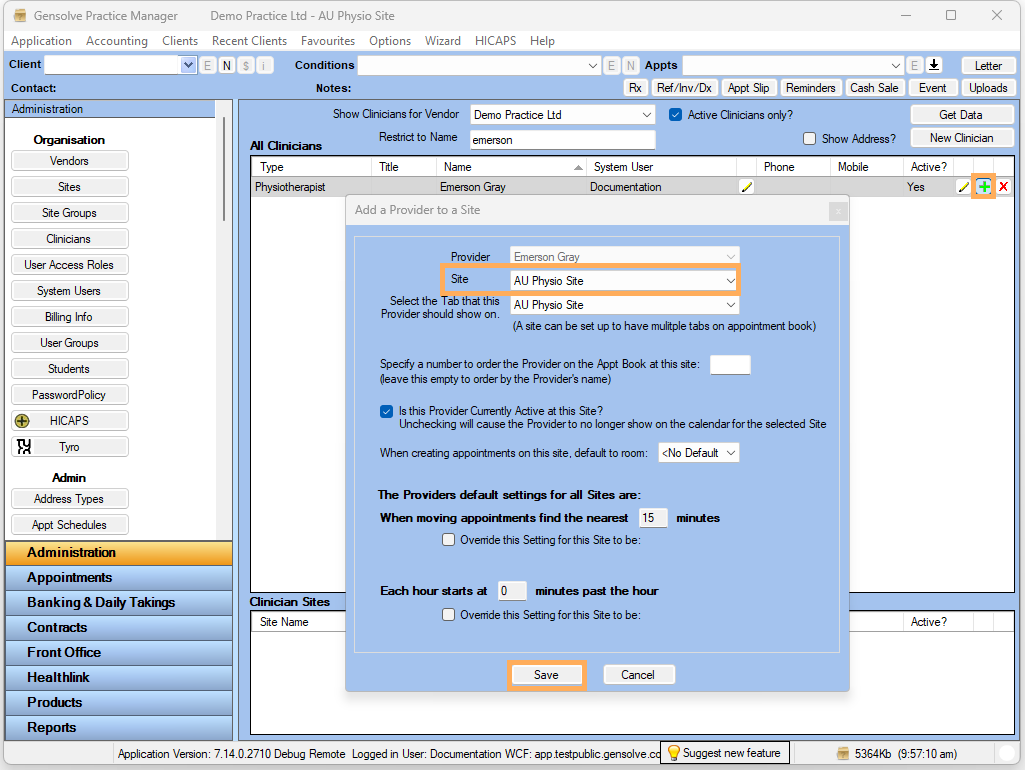
NOTE : To show the current clinician in the Letters
and Uploads "For Clinician" drop down or to add
clinician to the site. Click on the icon to add Clinician
to the Sites >> Click on Save
Set Letters and Uploads
18. Click on Letters and Uploads Tab
19. To create a new letter Click on New Letter
20. Select a Template Type >> Select the Letter Template to Use >>Select For Clinician >> Click on Create the Letter
NOTE: To show the current clinician in the "For Clinician" drop down , have to add clinician to the site
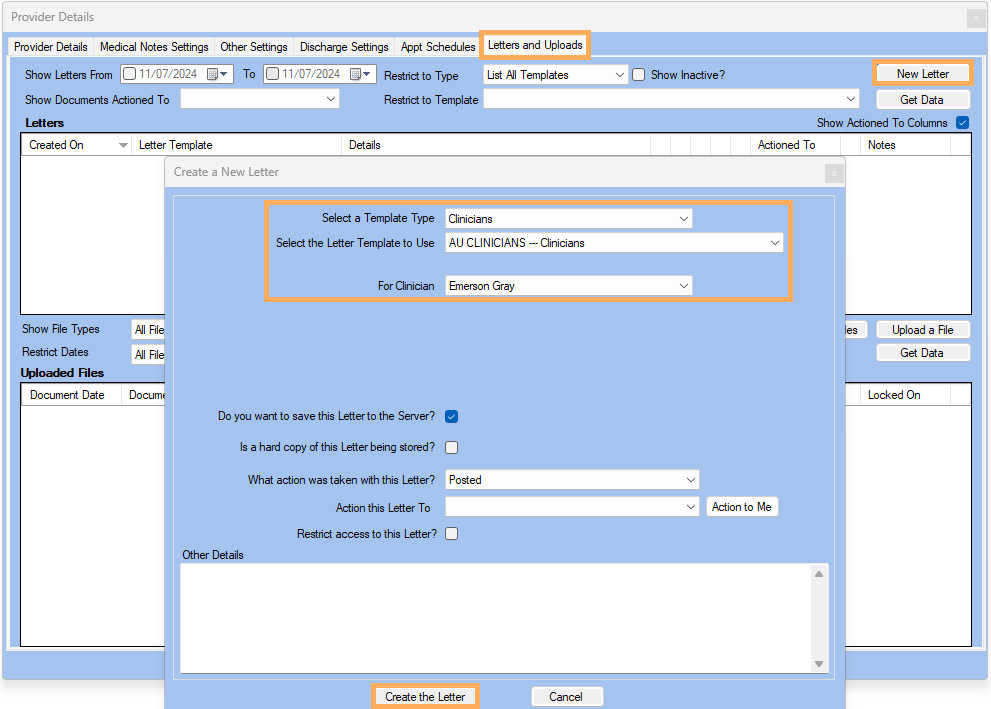
21. The letter has been created and is displayed under Letters
Table
22. To Upload a File Click on Upload a File
23. Select the File Type >> Enter Details >> Click on Upload from Files , select the file to be upload >> Click on Open
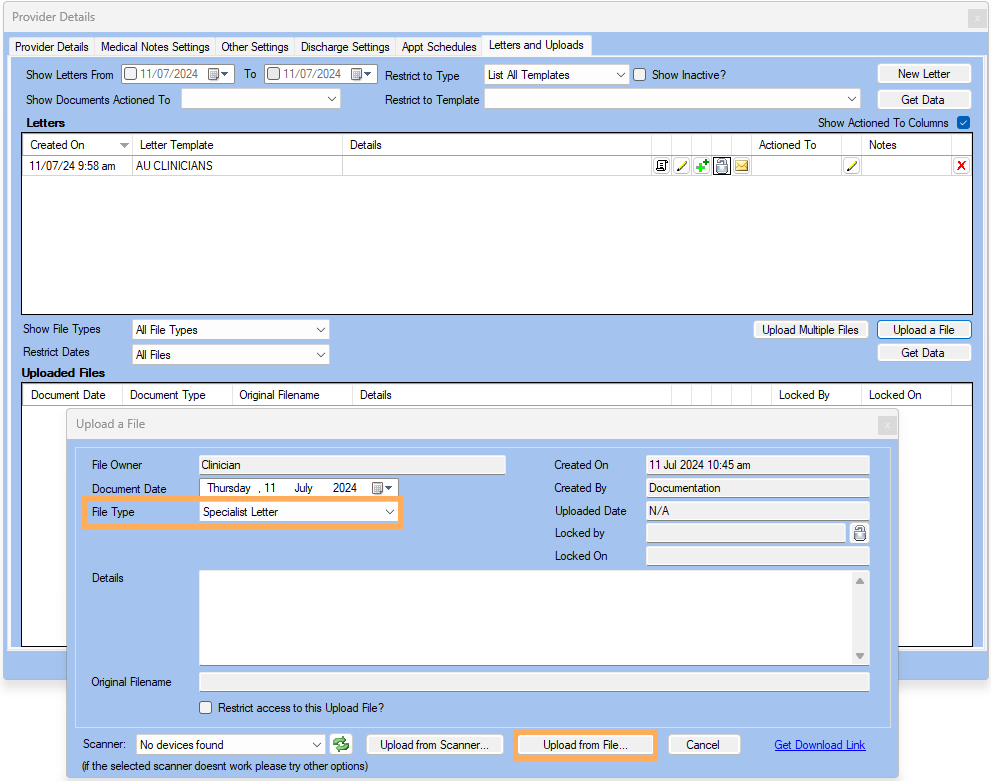
24. The new Uploaded File is displayed >> Click on
Save
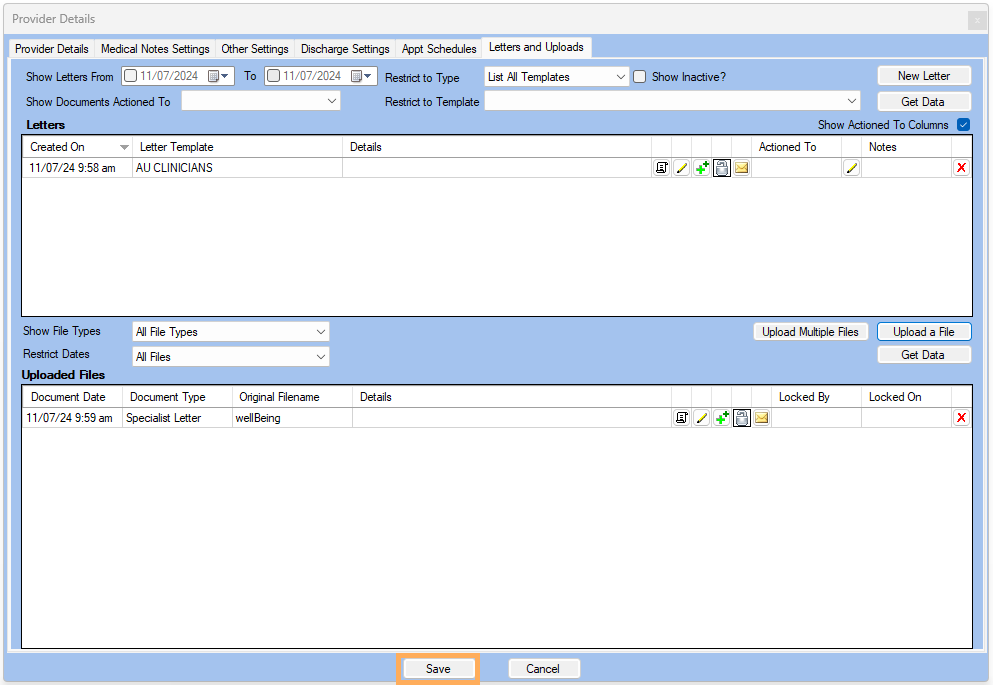
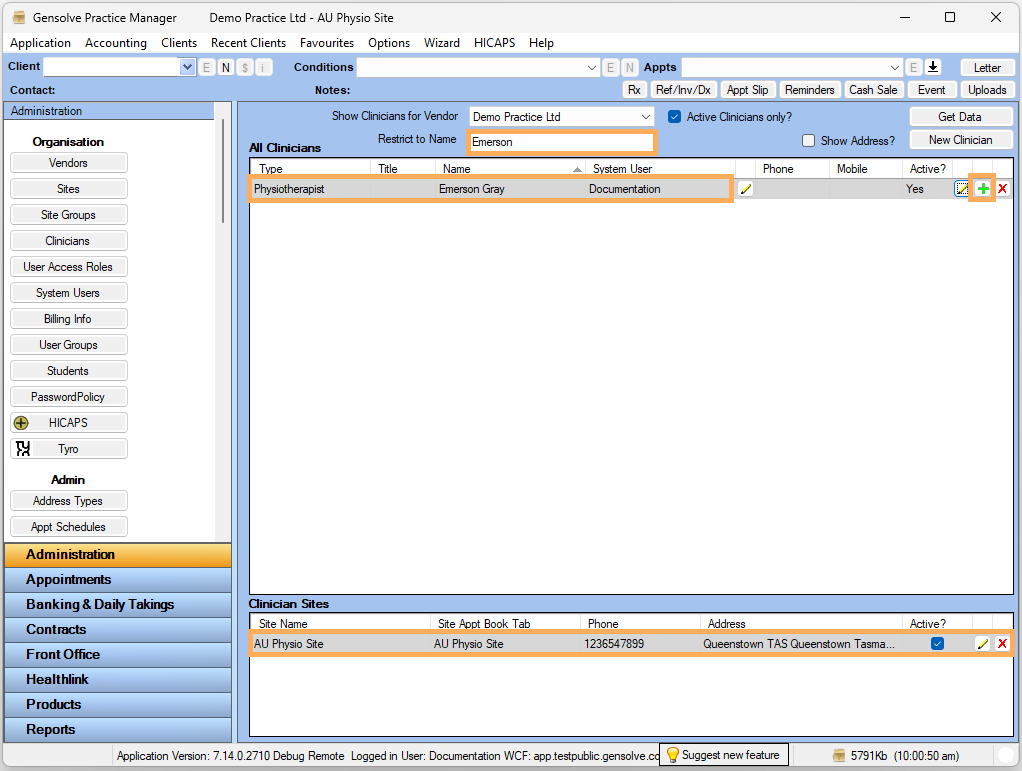
25. New Clinician created will be displayed in All Clinicians
table
26. You can restrict by name when viewing the list of All Clinicians (Providers)
NOTE: By Click on the ![]() icon
you can add Clinician to different Sites and by clicking on the
icon
you can add Clinician to different Sites and by clicking on the
![]() icon you can
edit the details.
icon you can
edit the details.
