Prerequisites: It is important to have a basic understanding of how Classes and Contracts work in Gensolve. Contract Classes are simply Weekly Classes specifically setup to facilitate the billing of Contracts.
For more information on Weekly Class basics please see:
![]() How
to Create a New Weekly Class
How
to Create a New Weekly Class
![]() How
to Change the Class Details (Changing Class Times)
How
to Change the Class Details (Changing Class Times)
For more information on Contract basics please see:
![]() How
to Create a Custom Contract
How
to Create a Custom Contract
Note: It is not possible to change Standard Classes to Contract Classes, new ones must be created. Nor is it possible to create classes that are both Standard and Contract Classes, a separate class needs to be created for each type.
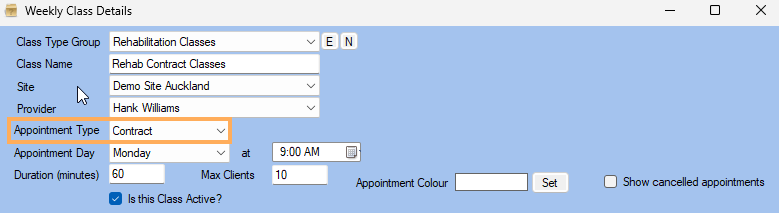
In Max Clients, Enter the maximum number of Clients that should be allowed to be booked into the class. This is displayed on the Contract Class in the Appointment Book.
To give the Contract Class an Appointment Colour, click on Set, to the right of Appointment Colour
Select the Start Date of the Contract Class Schedule to the right of Add/Remove Classes From
Select the End Date of the Contract Class Schedule to the right of 'to'.
Click on the Add button
The Contract Class Schedule will now be displayed in the table below.
Click on Save.


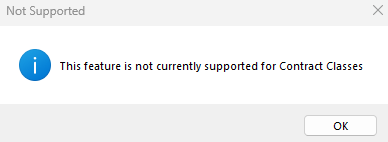
Note: It is NOT possible to Add or Remove a Client from the Class Schedule by right-clicking on the Class in the Appointment Book as you can for Standard Classes; if you try you will see the 'Not Supported' pop up notice. Instead, edit the class to add the Clients. Then add the Contract, Charge Type, and Budget if needed.