![]()
Using WorkCover QLD in GPM
Follow the process detailed below to learn how to configure and use GPM in order to send invoices electronically to WorkCover QLD.
Obtain your B2B details from WorkCover QLD
To obtain your B2B username/password from WorkCover QLD, simply send an email to providers@workcoverqld.com.au (include a reference to 'B2B' in the subject line).
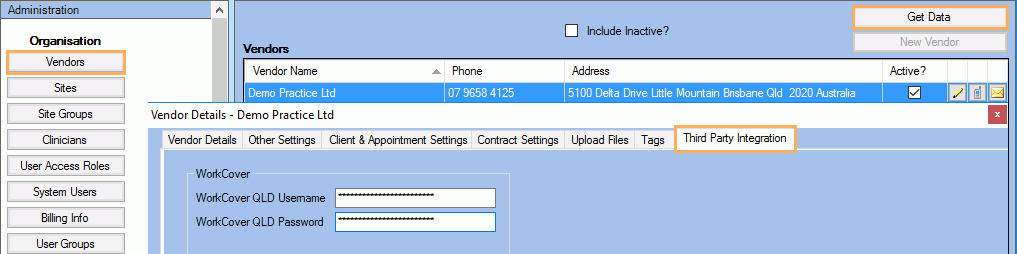
Configuring the Vendor Settings
Once you've obtained the username/password from WorkCover QLD, you can enter them in the Vendor Settings:
- Go to Administration >> Vendors and click Get Data
- Click on
 to open the Vendor Details window
 - Click on the Third Party Integration tab
- Enter the WorkCover QLD username and password.
Should your WorkCover credentials be invalid, the following message will pop up when attempting to send an invoice to Workcover QLD.
[Workcover QLD Error] Please contact Workcover QLD for support (bsdservicedesk@workcoverqld.com.au).
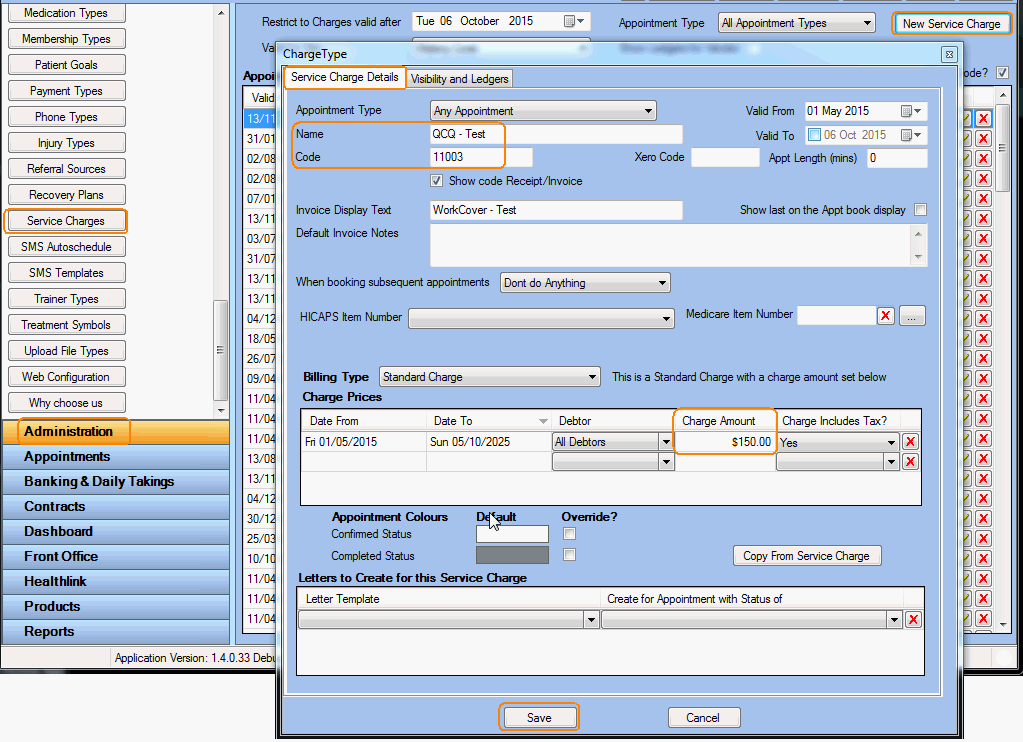
Creating new Service Charges
You will need to create new WorkCover service charges (as required) to be associated with appointments.
- Go to Administration >> Service Charges and click New Service Charge
Note: To avoid any errors during invoicing, ensure you enter a valid code as specified in the WorkCover QLD Medical Table of Costs.
For more information see: How to Create a New Service Charge.
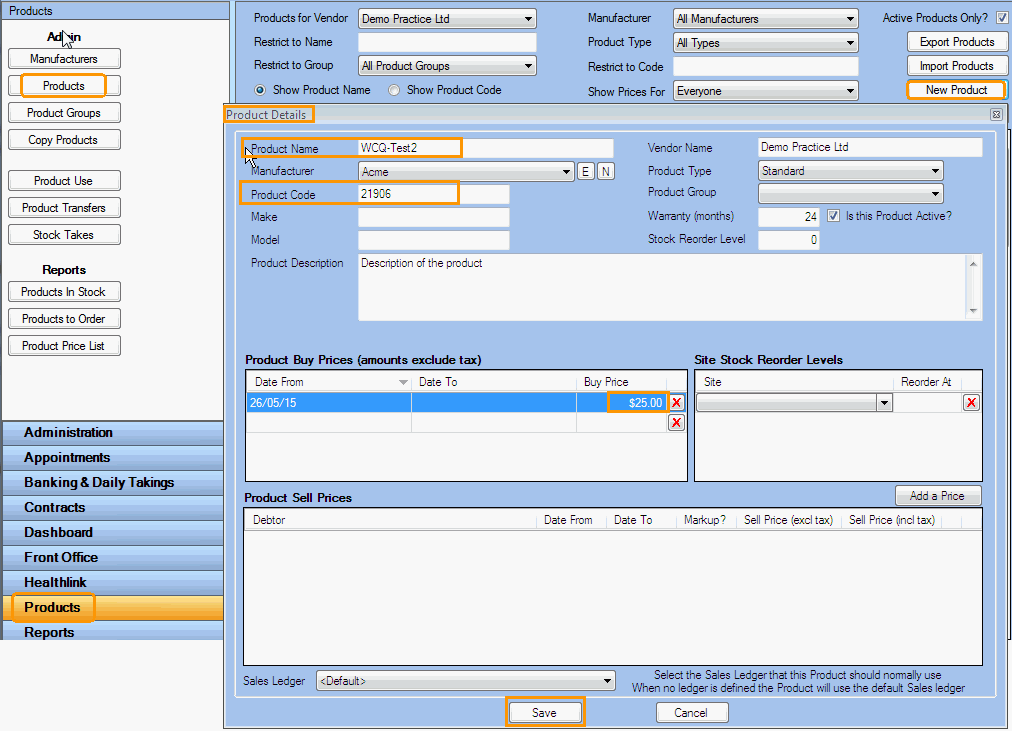
Creating new Products
For a product purchase to be invoiced to WorkCover QLD, you need to associate a product with a valid WorkCover code.
Go to Products >> Products and click New Product
Note: To avoid any errors during invoicing, ensure you enter a valid code as specified in the WorkCover QLD Medical Table of Costs.
For more information see: How to Create a Product.
Creating a new Debtor
You will need to create at least one debtor to whom WorkCover services and products will be charged.
- Go to Accounting Form >> Money In >> Debtors
- Click on New Debtor
For more information see: How to Create a New Debtor.
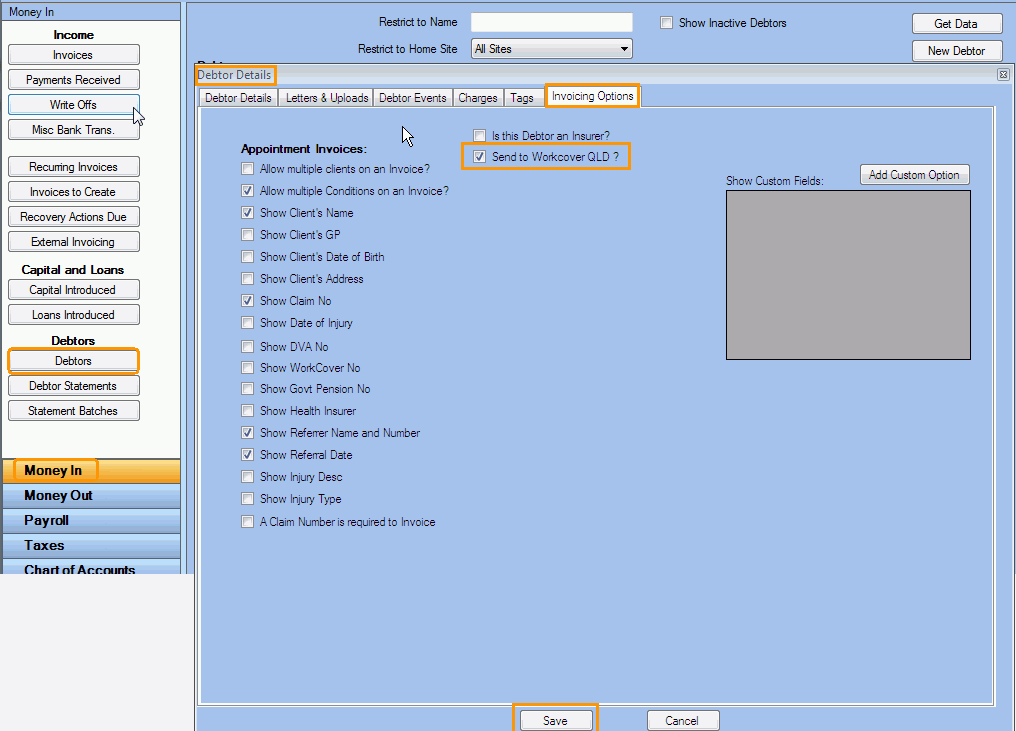
Configure the debtor's Invoicing Options:
- Open the Debtor Details window
- Click on Invoicing Options tab
- Tick the Send to WorkCover QLD check box
- Click Save
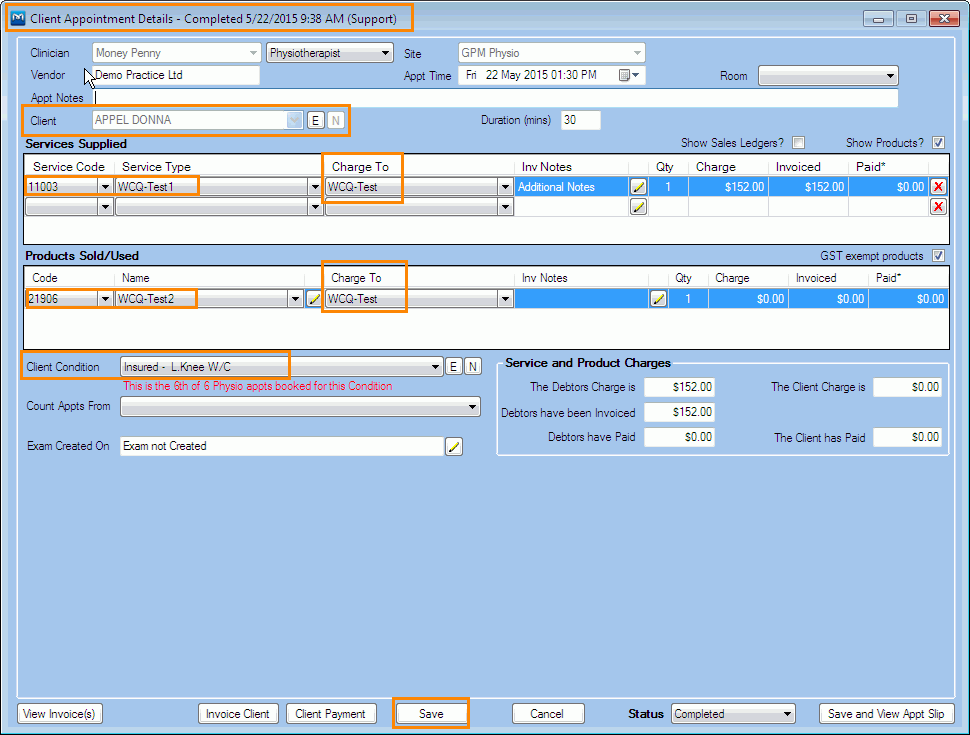
Creating an Appointment
You can now create a new appointment and assign the service charge and product created above.
- Go to Appointments >> Appointment Book
- Right mouse click and select New Physio Appointment
- On the Client Appointment Details
window :
- Select a Client
- Under Services Supplied, select the WorkCover service charge created above
- Under Products Sold/Used select the WorkCover product created above
- Ensure the debtor created above is selected in the Charge To fields
- Click Save.
For more information see: How to Create an Appointment and How to Edit an Appointment and Add Charges.
Creating and Sending an Invoice to WorkCover QLD
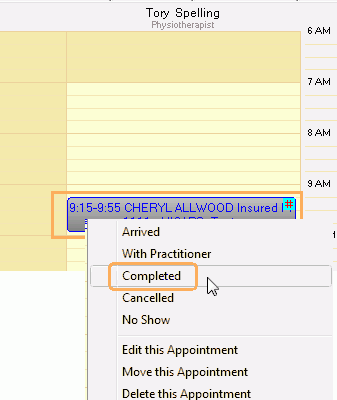
Update Appointment Status
In order to create the invoice for the appointment, you need to update the appointment status to Completed.
For more information see: How to Set an Appointment Status.
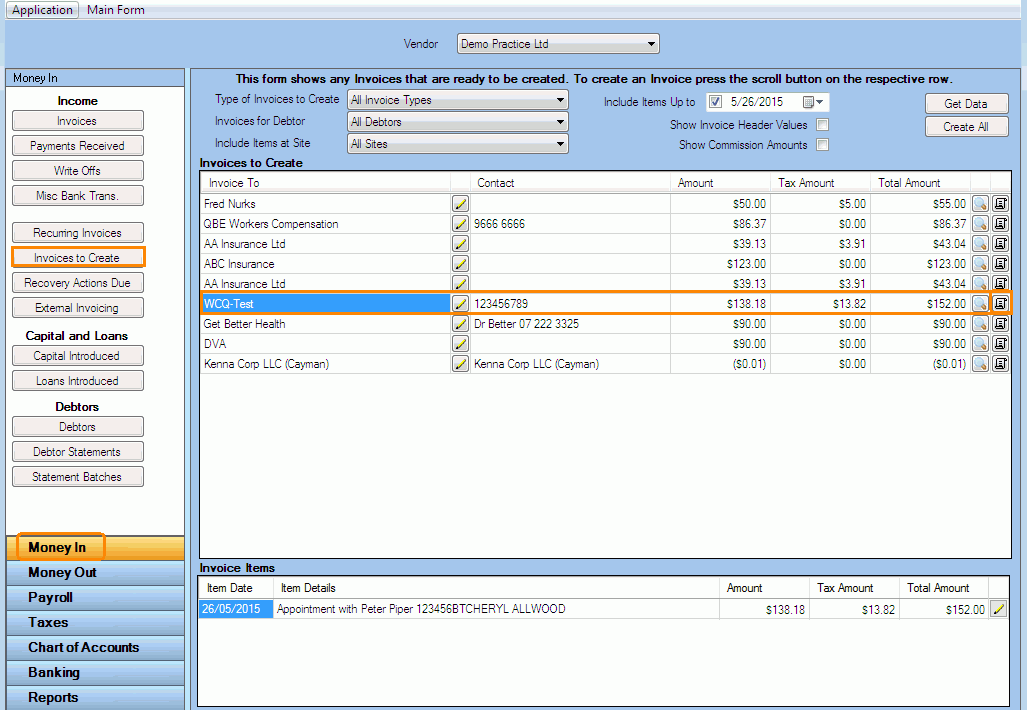
Creating the Invoice
To create the invoice for the above appointment:
- Go to Accounting Form >> Money In >> Invoices to Create
- Click Get Data
- Select the invoice to be created for the appointment above
- Click on
 to create the invoice.
For more information see: How to Create a Debtor Invoice
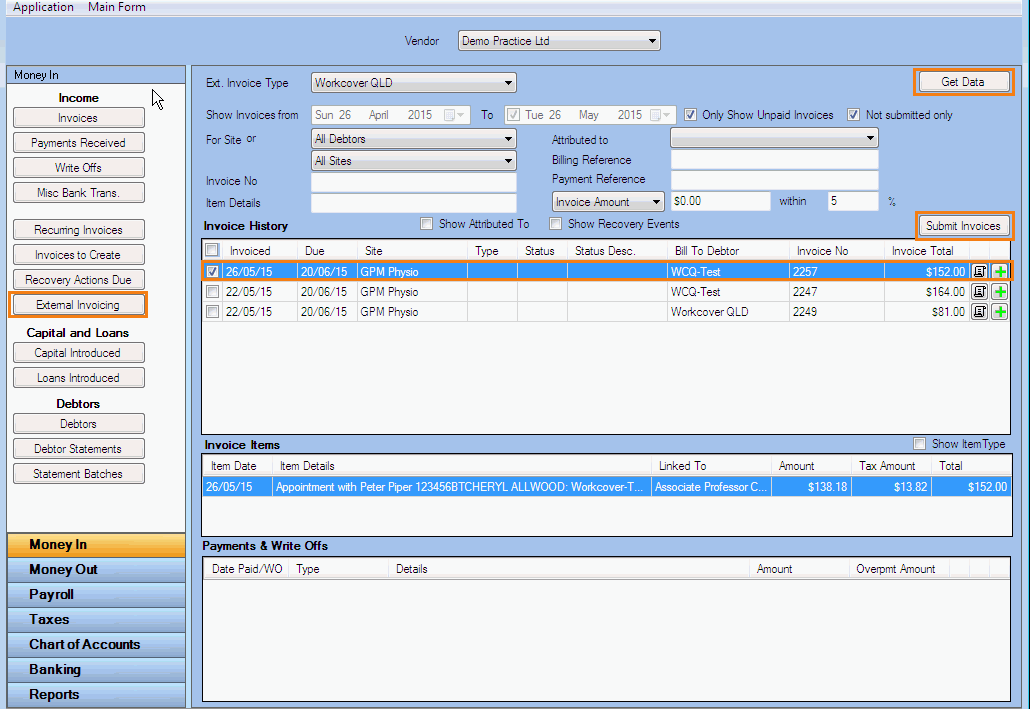
Submitting the Invoice
- Go to Accounting >> Money In >> External Invoicing
- Click Get Data
- Find the invoice created above and tick the checkbox to select it
- Click Submit Invoices
The Only Show Unpaid Invoices check box will only display the unpaid invoices.
While the Not Submitted Only check box will show the invoices which have not been sent to WorkCover QLD.