![]()
Stripe Payment for Telehealth Consultation
In order to start receiving payments for your Telehealth consultations through Stripe, you need to have a validated Stripe Account. In this topic we are going to cover the basic steps to create an account and set the API Keys necessary to connect GPM with Stripe and start sending Payment links to your client.
Configuring an Email Template with the Payment Link
Completing a Telehealth Consultation and Sending Payment Link
Creating a Stripe Account
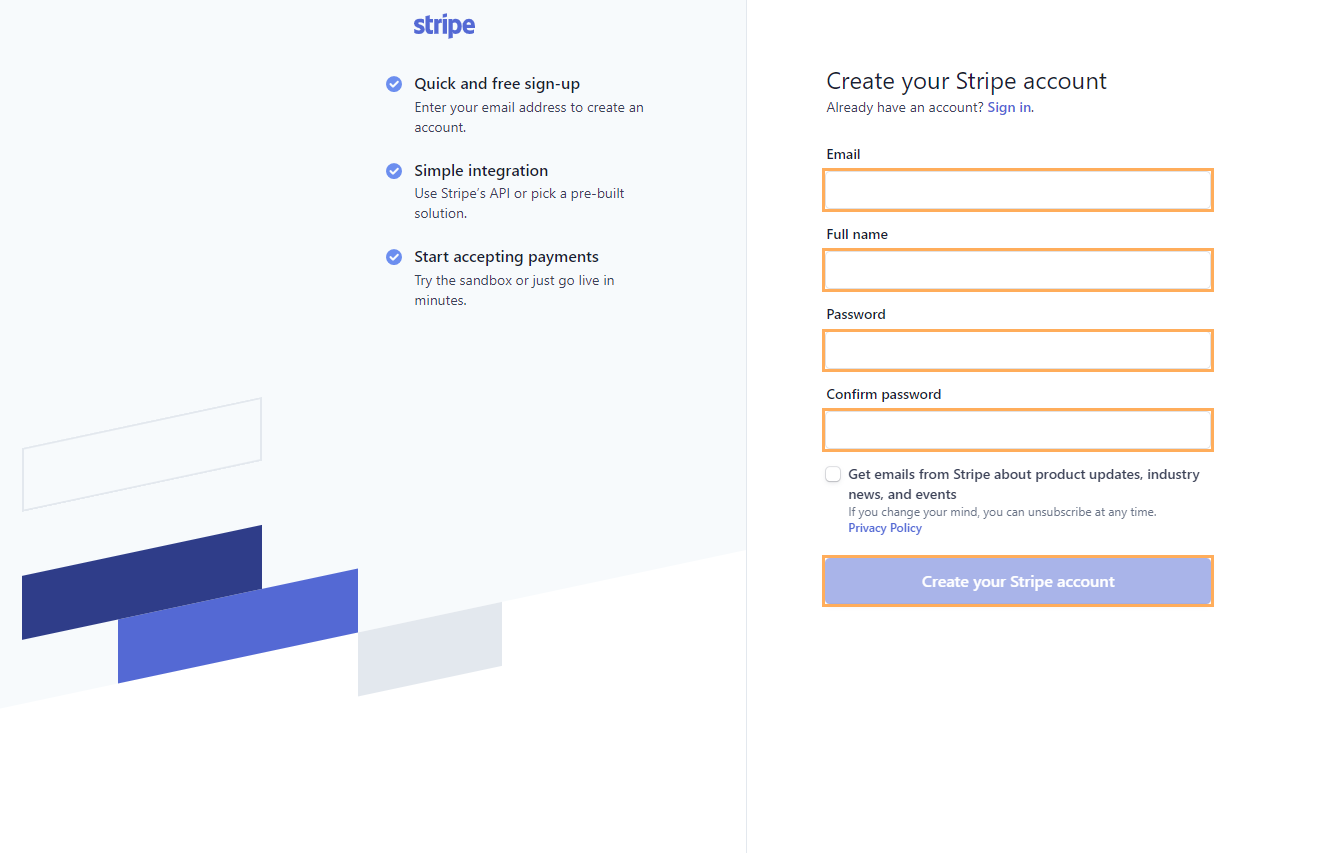
1. Go to Stripe registration page, enter credentials for your business account and click on Create you Stripe account.
Note: If your business already has a validated Stripe Account, skip to Connecting Stripe to GPM.
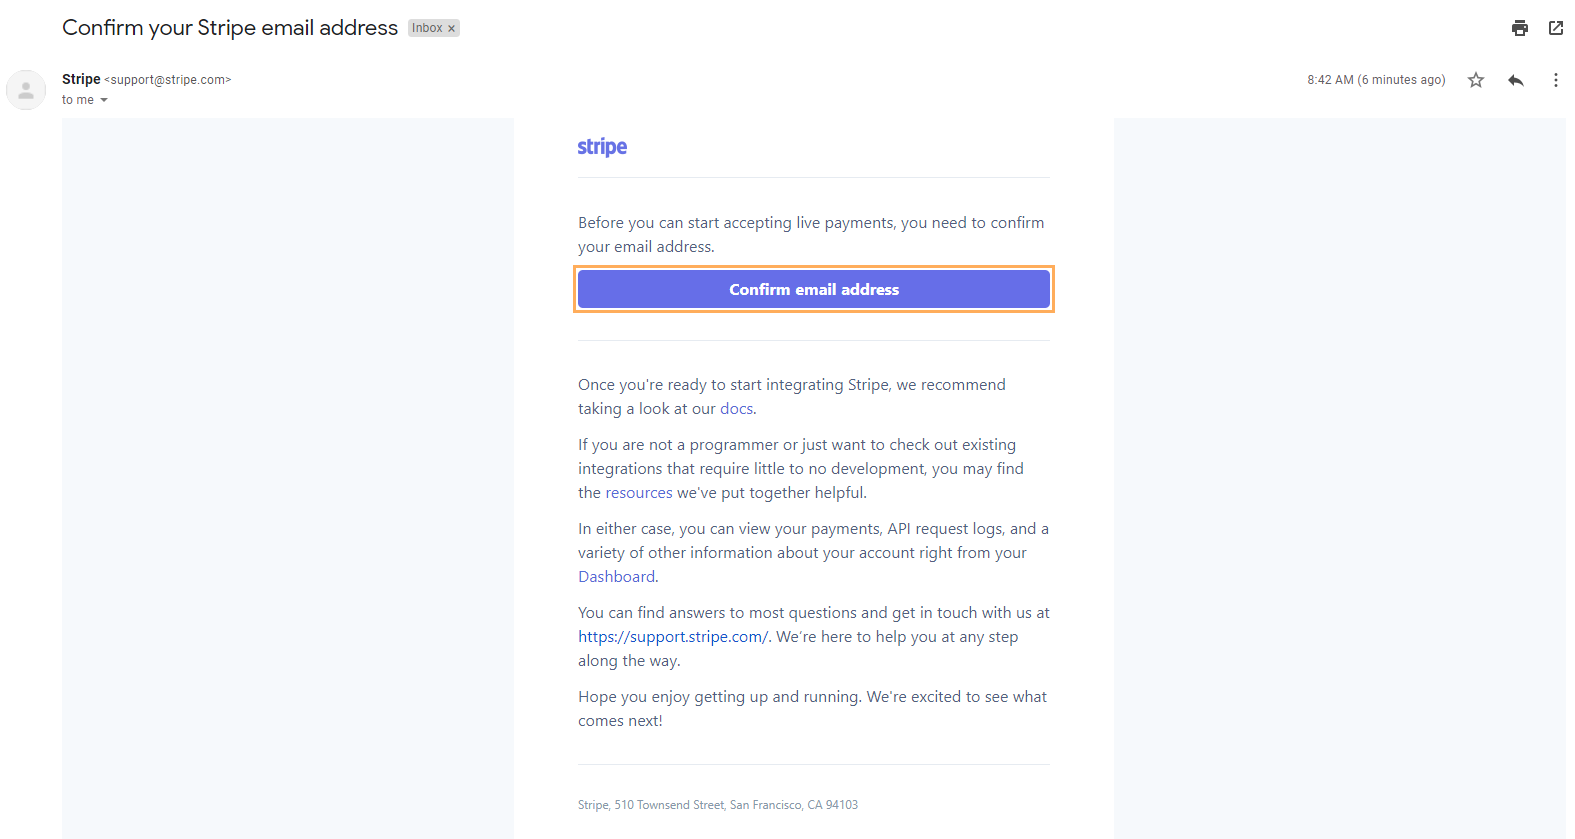
2. After creating your Stripe account you will be redirected to Stripe's Dashboard but first, you will need to verify your email address. Check your inbox for the Stripe email and when you get it, open it and click on the Confirm email address button.
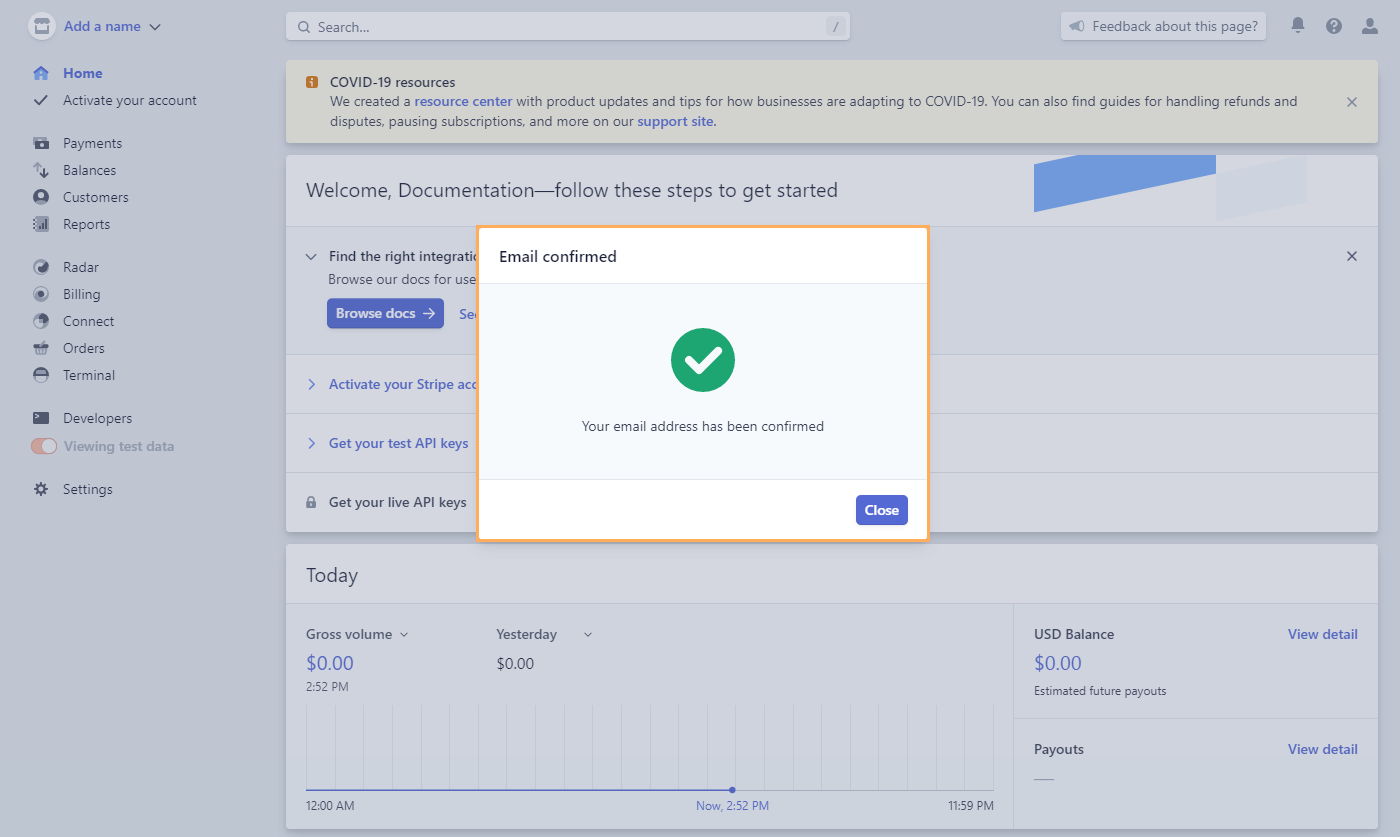
3. If done correctly, you should be redirected to Stripe's Dashboard and a window will be displayed advising that the email address has been confirmed. Click on Close.
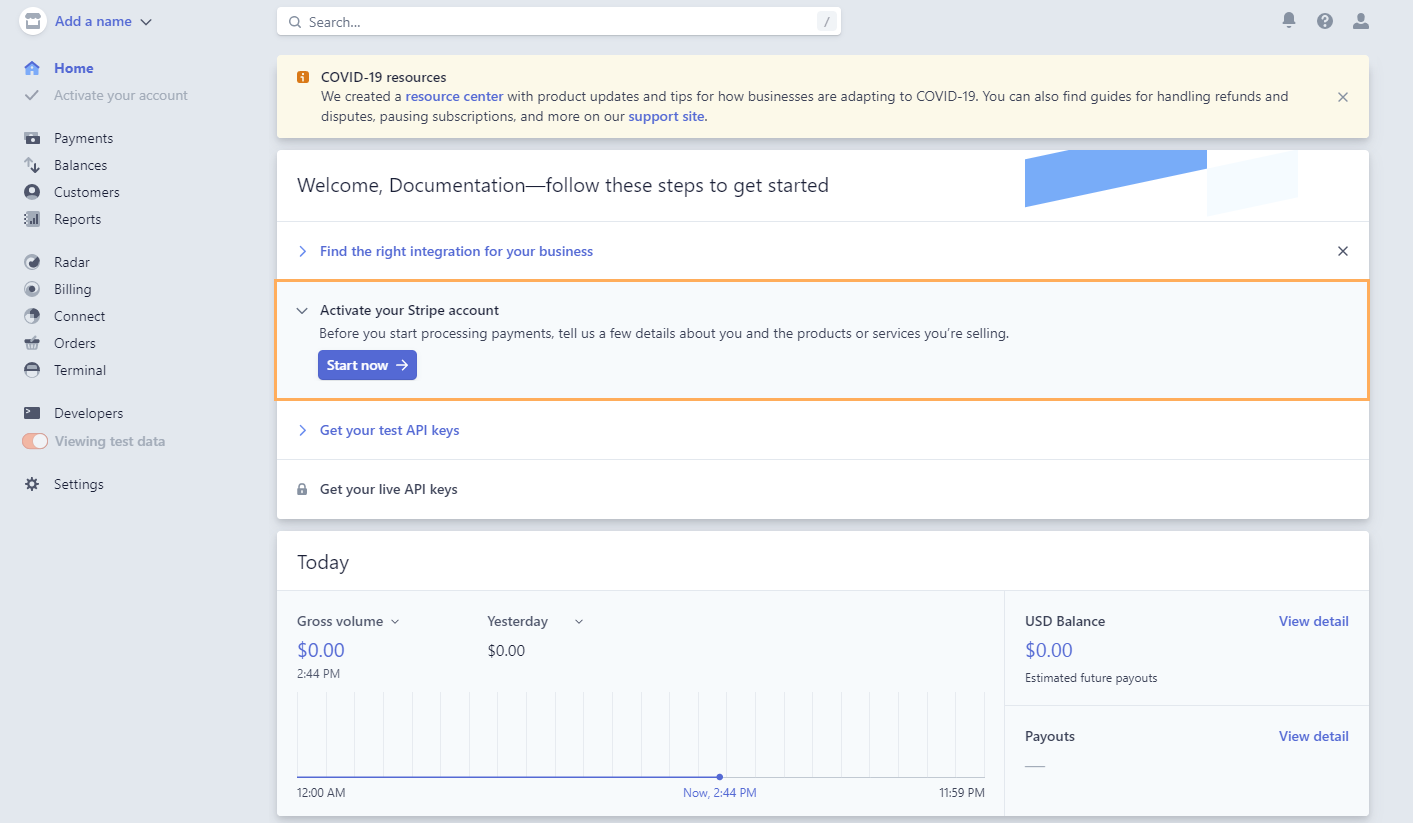
4. Then, on the Dashboard click on Activate your Stripe account >> Start now.
5. Then, select your Country and enter all of the mandatory data of the Activate your account form.
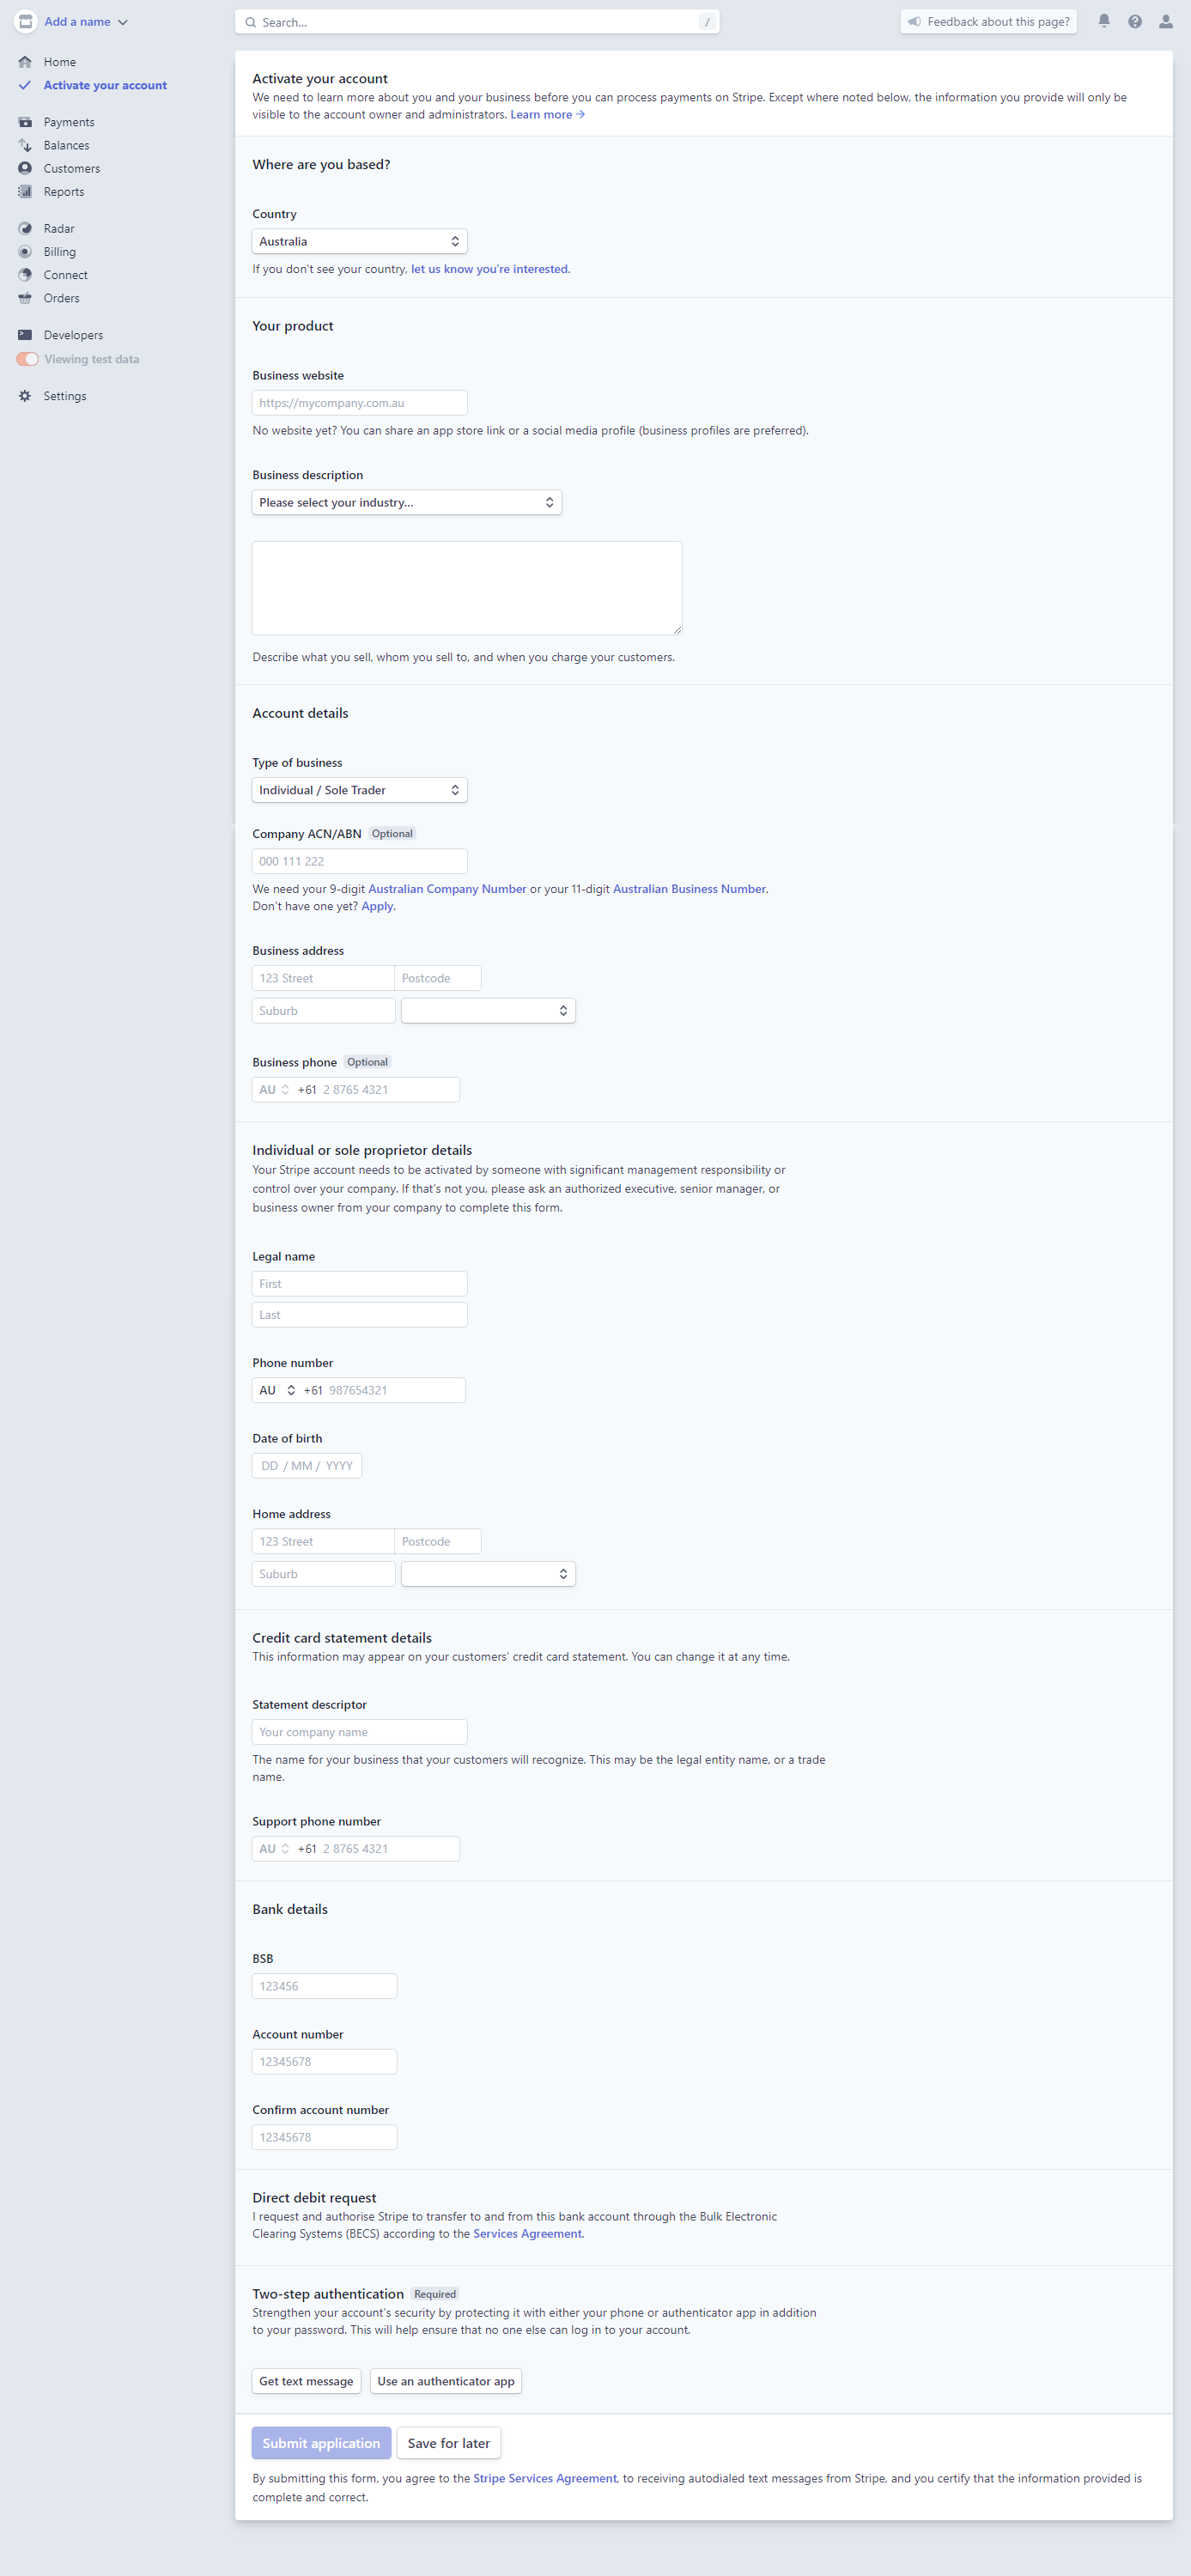
Note: It is important that the number entered on the Two-step autentication is at hand since you will have to enter a code sent to it every often when using Stripe. Also, on the Bussiness website field, if you enter the domain of your company (i.e. gensolve.com), after submiting the application you will be prompted to verify ownership of that domain by providing an email account with the same domain (e.g. support@gensolve.com). Since you will need to open an email sent to this address in order to validate the application, make sure it is a known email address so the process is easier.
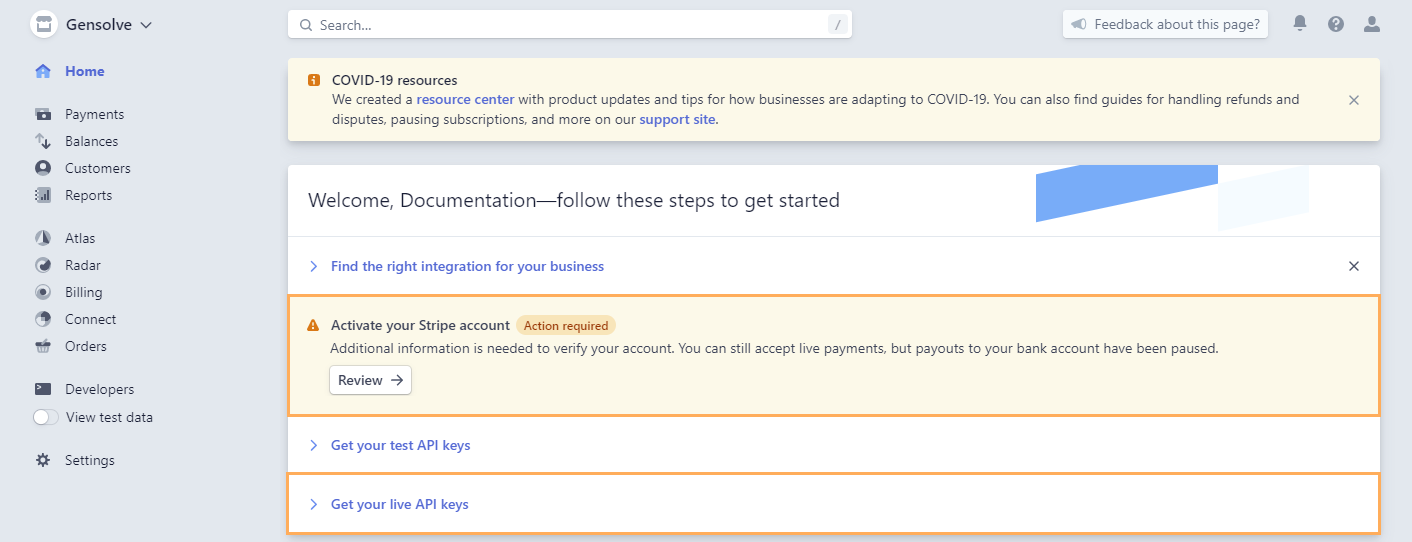
7. After submitting your application and confirming ownership of your business domain, you will be able to access your Live API Keys which will allow the connection between Stripe and GPM. But In order to fully validate your account and thus receive payouts properly, you will need to provide additional information of your business.
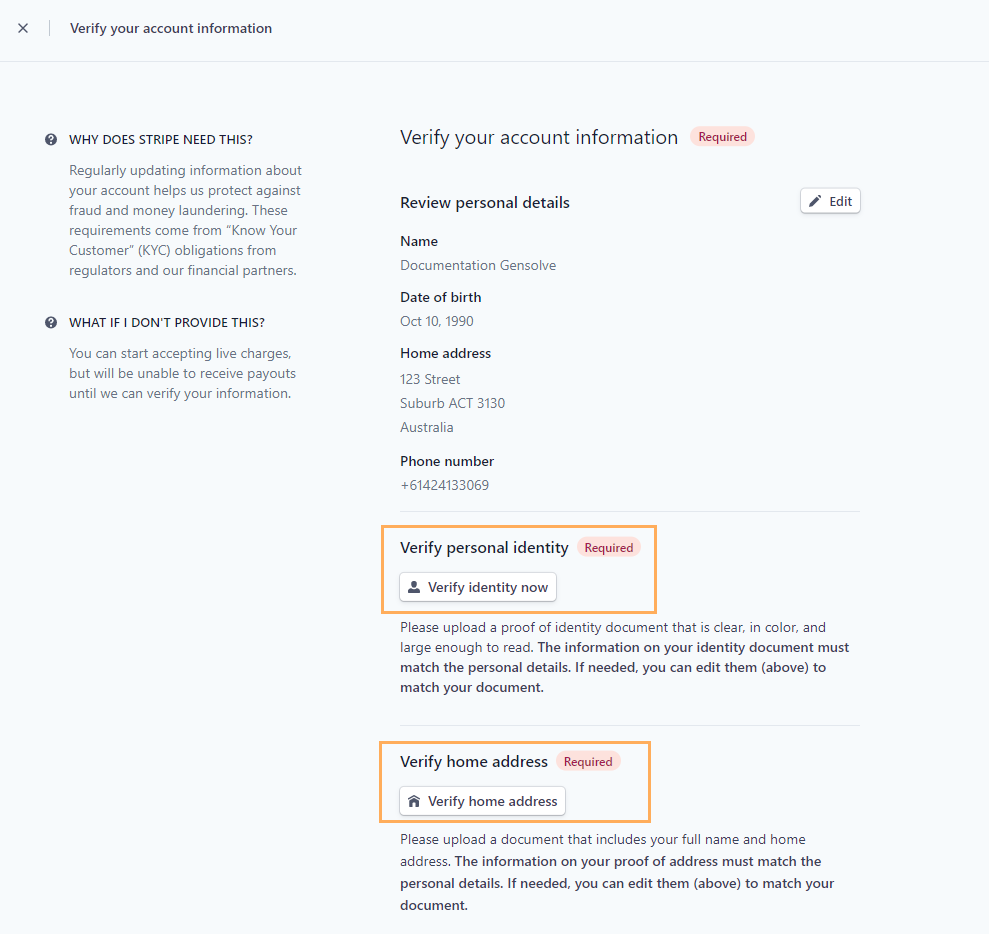
8. You will need to provide personal Identity and home address verification in order to receive payouts.
Connecting Stripe to GPM
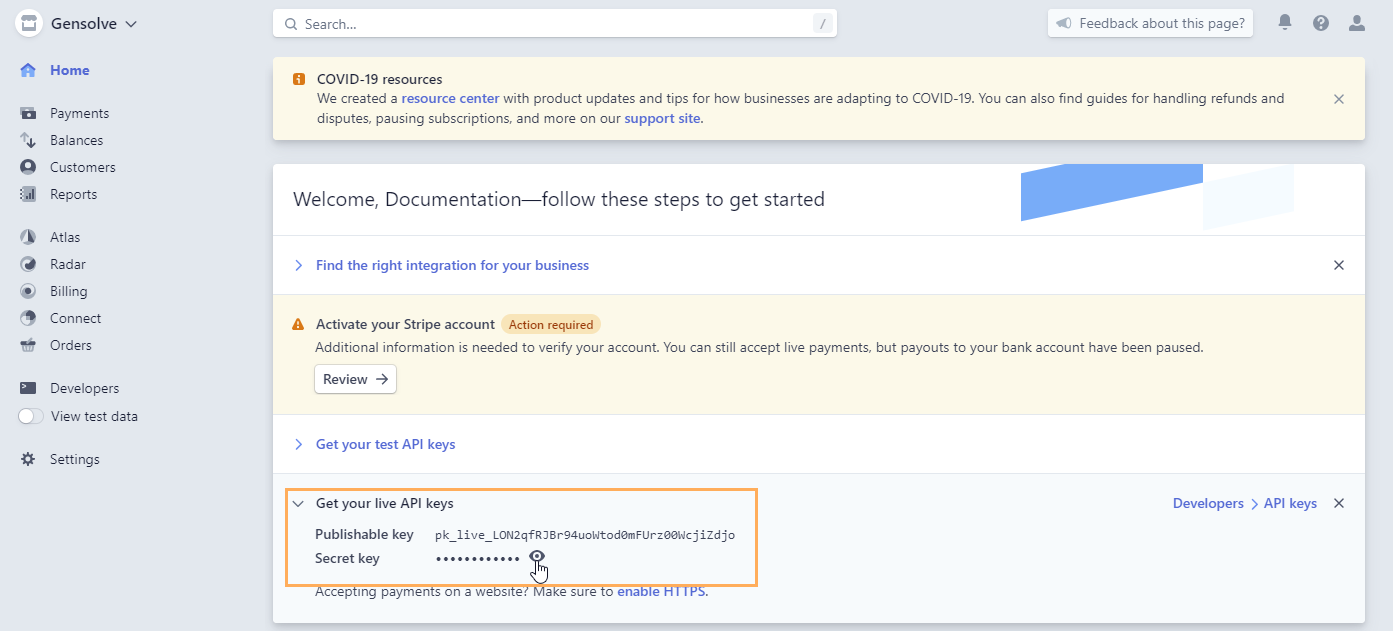
1. Once your account is fully validated, you are ready to accept live charges and receive payouts. Now, in order to integrate Stripe with GPM we need to follow a few steps. First, go to your Stripe Dashboard and click on Get your live API keys >> Copy the public key >> Click on the eye icon to view the secret key (Attention: you will be able to see this key only once, so make sure to copy it)
2. Go to GPM >> Administration >> Vendors >> Edit your Vendor >> On Vendor Details, for Web Payment select Stripe >> Then enter the public and secret keys obtained from Stripe Dashboard in the previous step and click on Save.
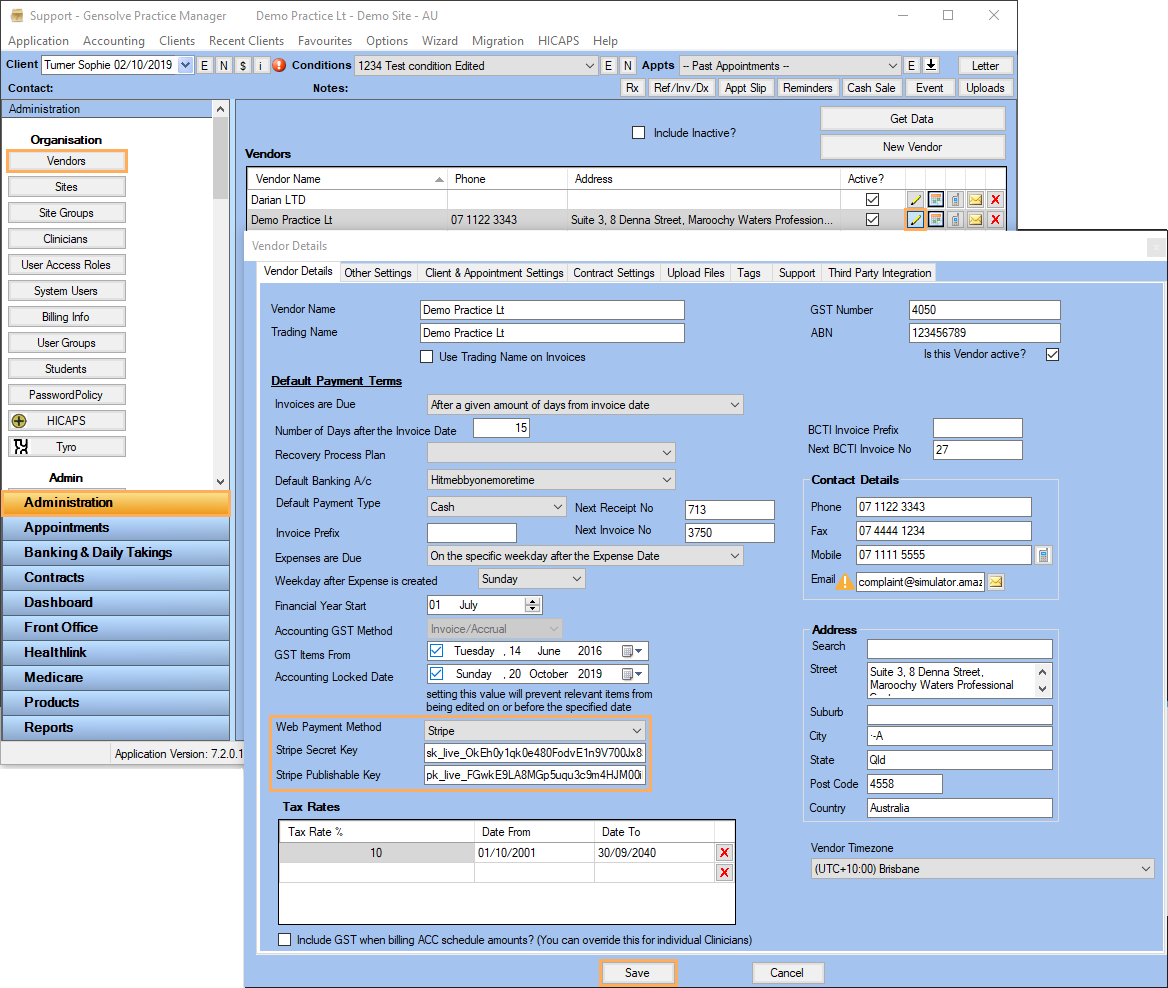
Now the payment links generated from GPM for Telehealth Consultations will be payed through Stripe and visualized on your Dashboard.
Configuring an Email template with the Payment Link
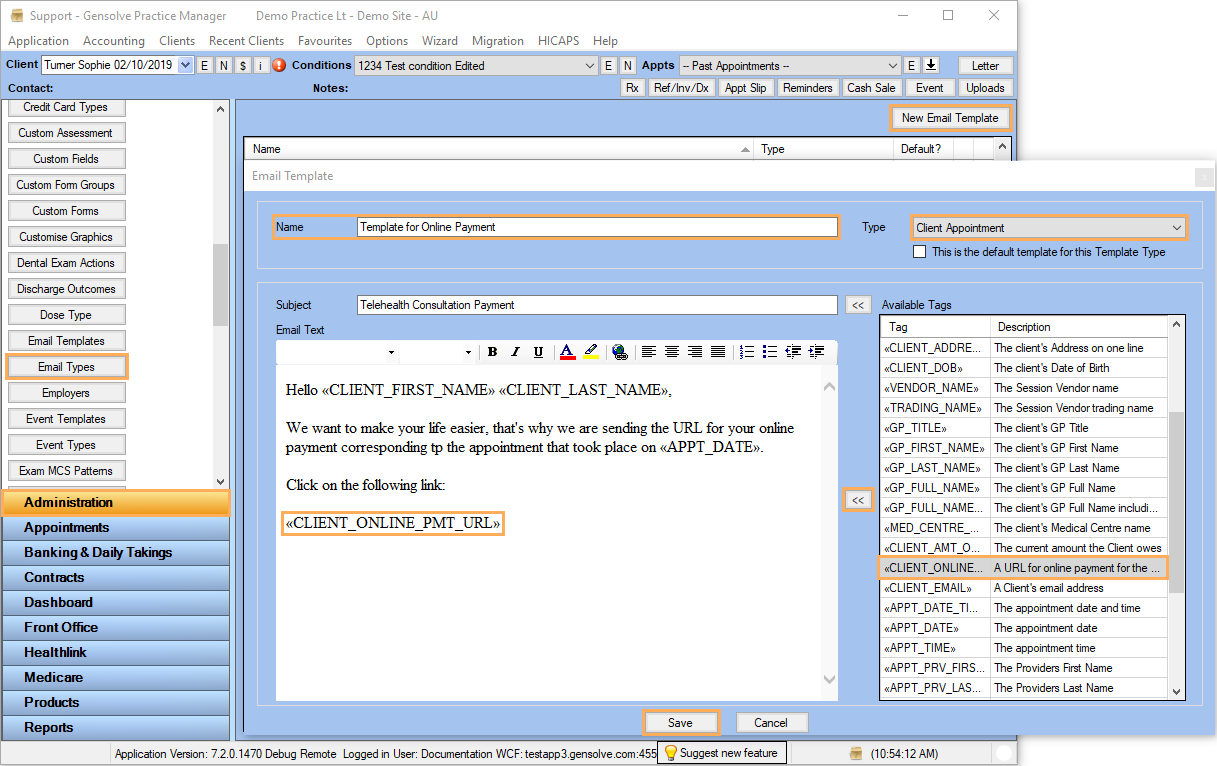
In order to be able to get a payment link and send it to a client, we need to first create an Email Template with it. In GPM, go to Administration >> Email Templates >> New Email Template >> For Type, select Client Appointment >> Fill the template's Name, Subject, and Email text >> Make sure to include the Client_Online_PMT_URL tag that can be found on the Available Tags list.
Completing a Telehealth Consultation and Sending Payment Link
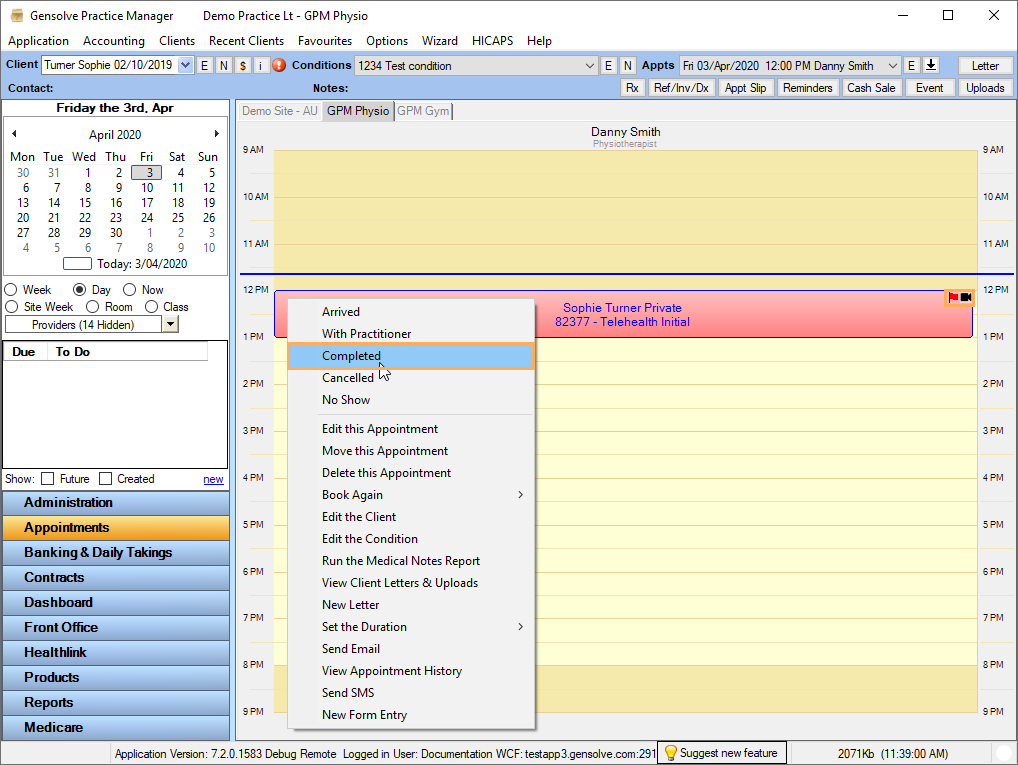
1. In order to be able to send a payment link and receive a payout, a Telehealth appointment must be completed first. On the GPM Scheduler, you will identify a Telehealth Consultation because it has a black video icon on the top right corner of the appointment.
2. After having completing the appointment a Send Email window will be displayed automatically, but in case you want to send the payment link later, you can open the appointment and click on the Email the Client button >> Then, on the Send E-mail to... displayed window, on Apply a Template select the template created on Configuring an Email template with the Payment link and click on Apply >> Verify the information, set an Email on the From field and click Send.
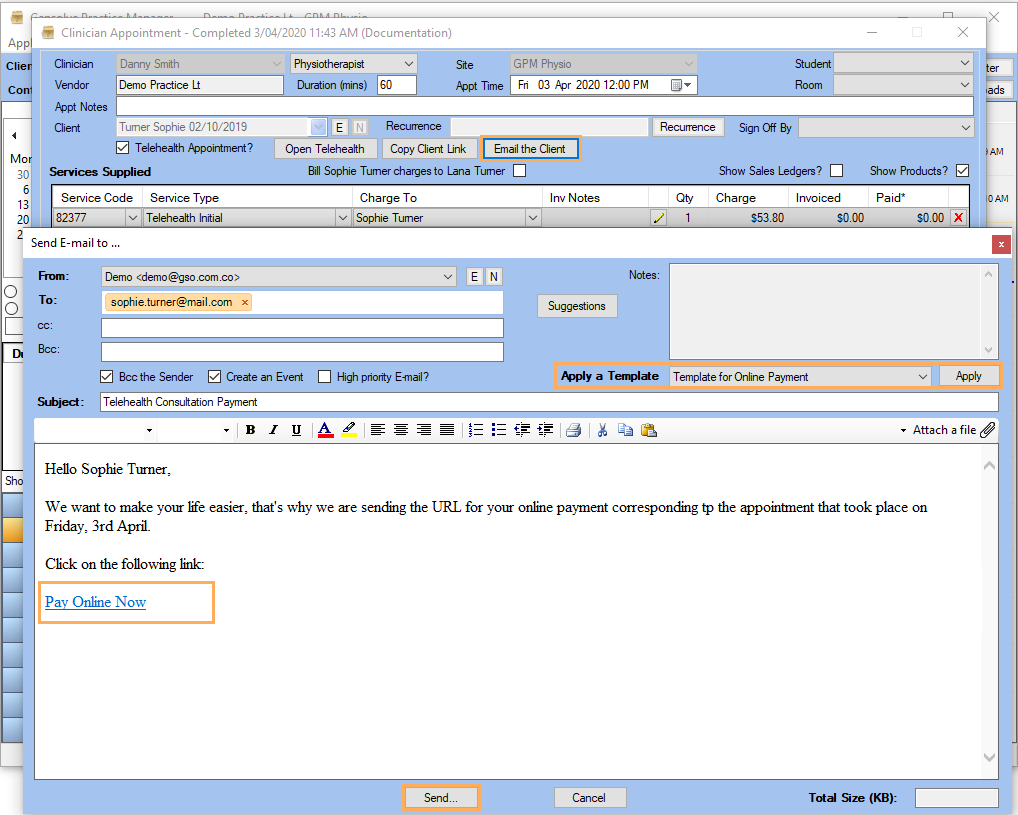
Now the client will receive the mail with the link that will redirect them to a page where they will be able to select the outstanding charge for the consultation and pay it.
Client Payment and Viewing Payout on Stripe
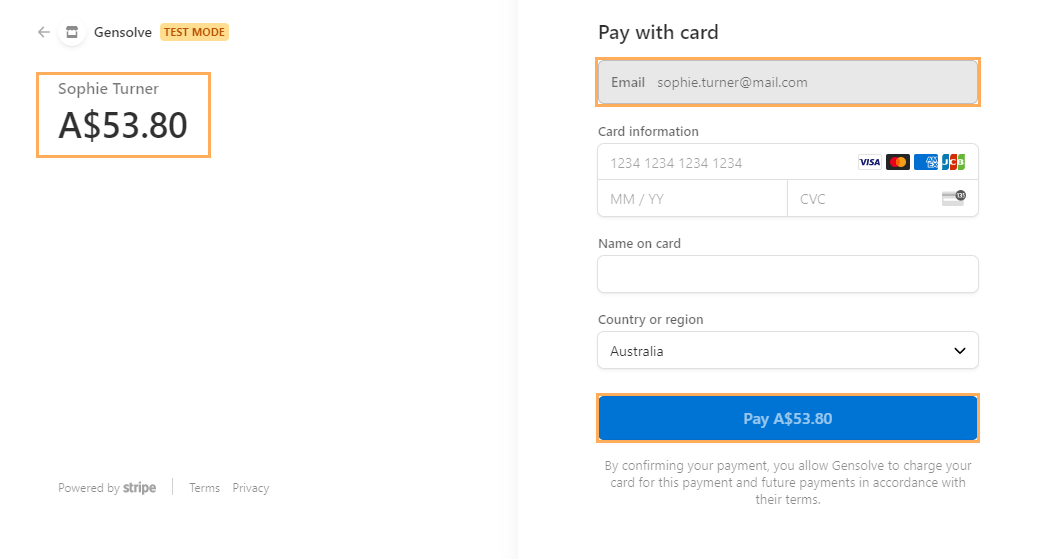
1. In this section we will see what the client sees after clicking on the received payment link

2. After the client has selected the outstanding charge related to the Telehealth Consultation and clicks on Pay Now, they are redirected to the Stripe payment page
3. After successfully paying, you will be able to see on your Stripe Dashboard the charge on your transactions. To view this information on the Dashboard click on Balances >> Transactions.
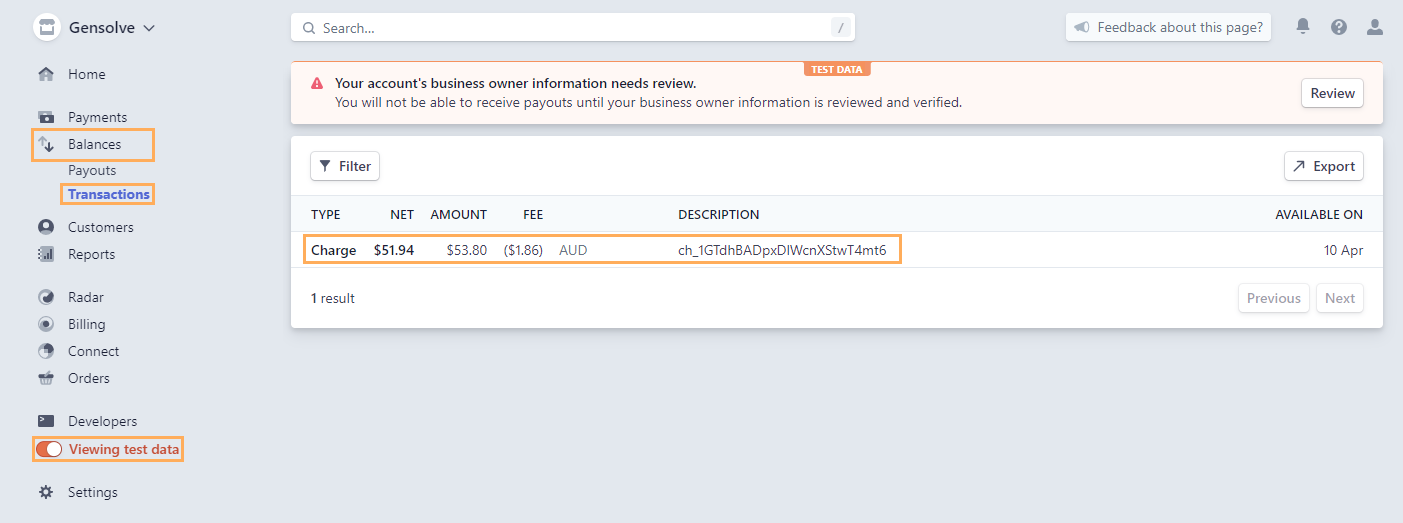
Note: this tutorial was made using test data and thus, the information represented might not be completely accurate. Also, when viewing your balances is important that the toggle Viewing test data is off.