![]()
Using Custom Forms with Data From Multiple Sources
You can create your own customized forms in order to enter and update data from multiple sources (clients, conditions and medical notes) within one single form.
The form can be used many times over a period of time, allowing you to see the changes/evolution over time.
Follow the steps below to add and view a custom form to the Client Full History tab:
Create a new custom form
Before you can add a custom form to the Client Full History tab, you will need to create it.
See
![]() How to Create a Custom Form and
How to Create a Custom Form and
![]() Available Fields for Custom Forms for more details.
Available Fields for Custom Forms for more details.
Add a form entry to the Client Full History tab
See ![]() Accessing the Client Full History tab for more details.
Accessing the Client Full History tab for more details.
On the Client Full History tab, click the New Form Entry button (at the bottom of the window)
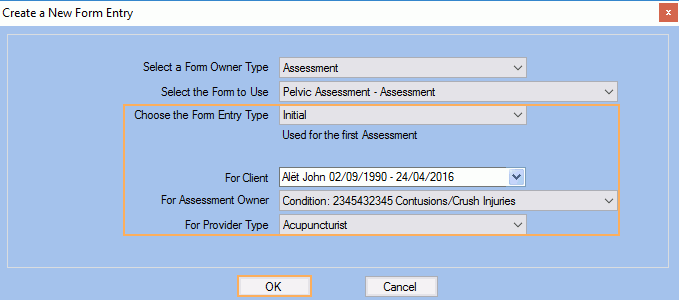
On the Create a New Form Entry window:
- Select an Owner
Type: this
allows you to filter the list of available custom forms.
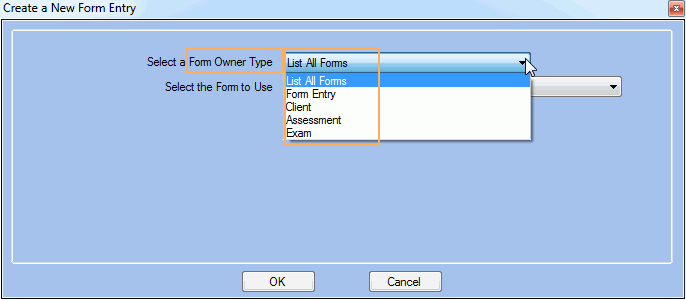
- Select the custom Form
to Use
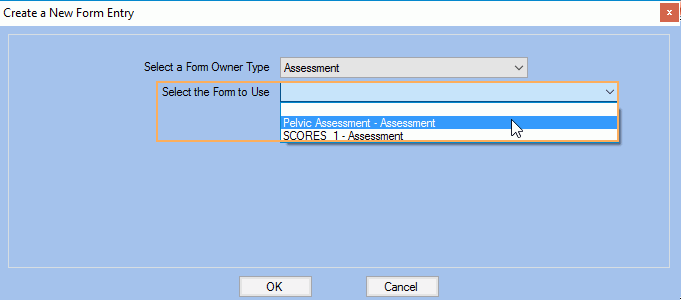
- Enter any other required data then Click OK
Note: Depending on the Owner Type selected, other data may need to be selected (eg. Client, Condition, Provider Type, Exam, Form Entry Type, etc...)
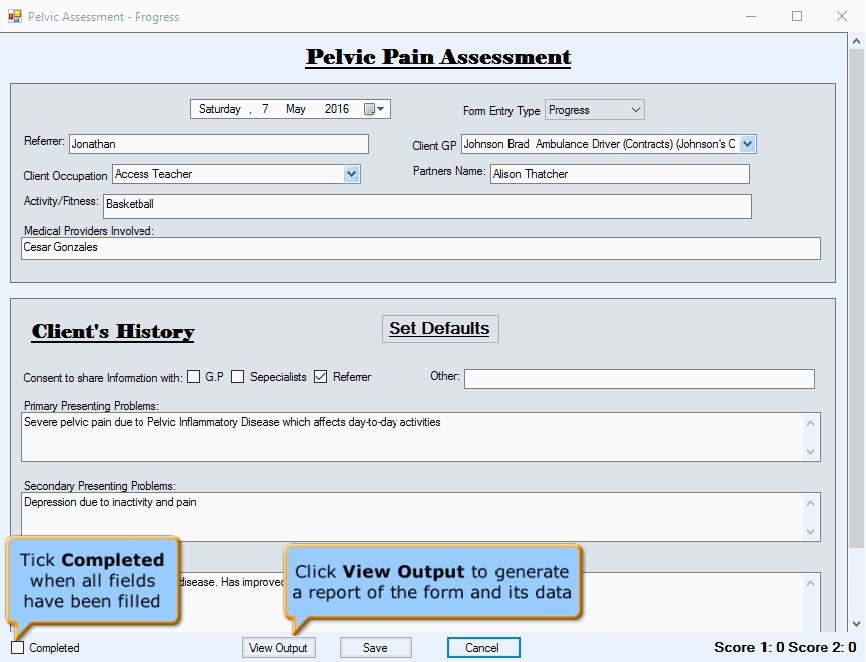
- The selected custom is now displayed allowing you to view
and enter data.
-
Fill in the form then click Save.
The customised data is now saved against the selected client/condition/exam.
Note: the same custom form can be added many times over a period of time, allowing you to see the changes/evolution over time.
View form entries
To see the list of previously added custom form entries :
- On the Client Full History tab, tick Form Entries
- Click Get Data: the
list of custom form entries previously created are listed in the
Client History panel.

- Select a custom form entry, then click
 to open
the form.
to open
the form.
You can now view and edit the data previously saved.
![]()