![]()
Appointment Billing Options
The items linked to an appointment such as Services and Products can now be invoiced and paid for separately.
Creating an Appointment
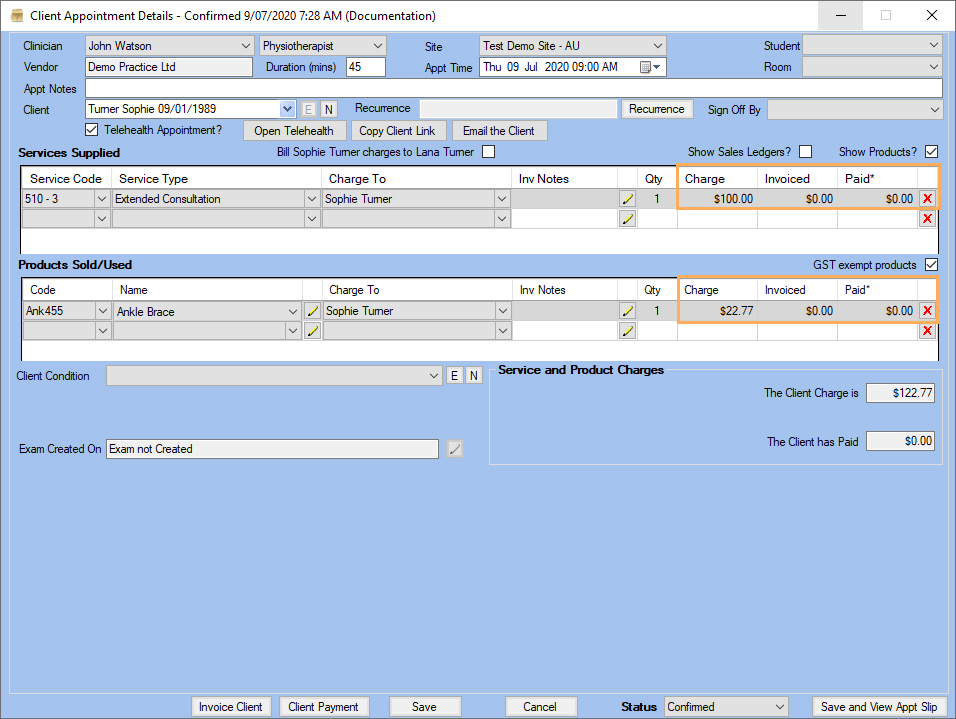
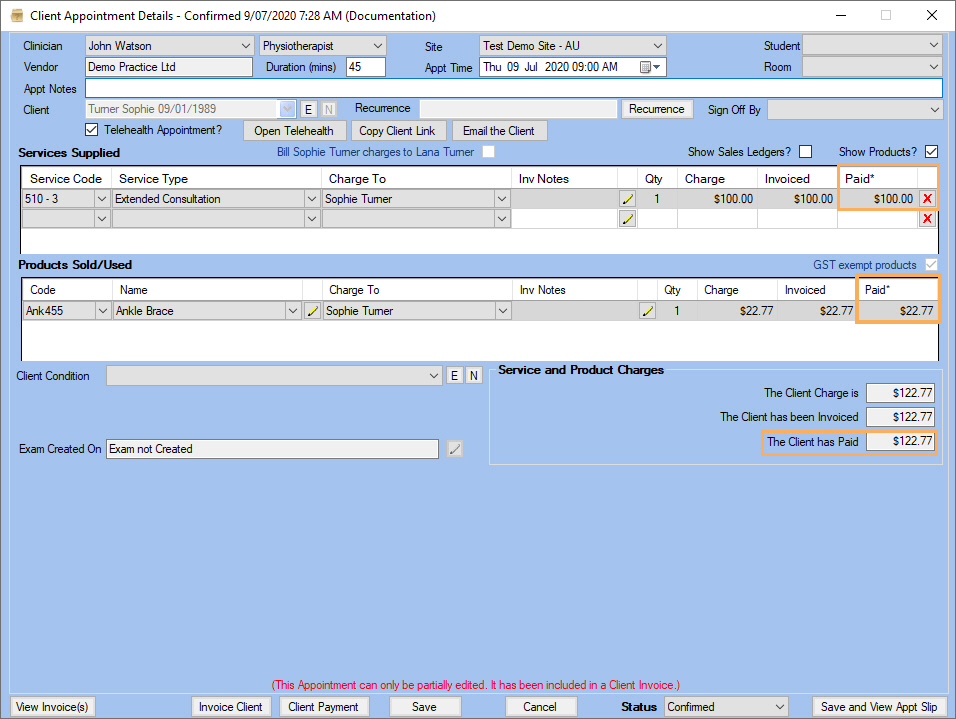
The Services Supplied and Products Sold/Used panels on the Client Appointment Details now show 3 columns:
- Charge: shows the amount to be charged for the service or product
- Invoiced: shows the amount invoiced for this item
- Paid: shows the amount paid for this item
Each service or product item can be assigned to a specific ledger to facilitate accounts reporting.
Click on the Show Sales Ledgers? check box to display the Sales Ledger column:
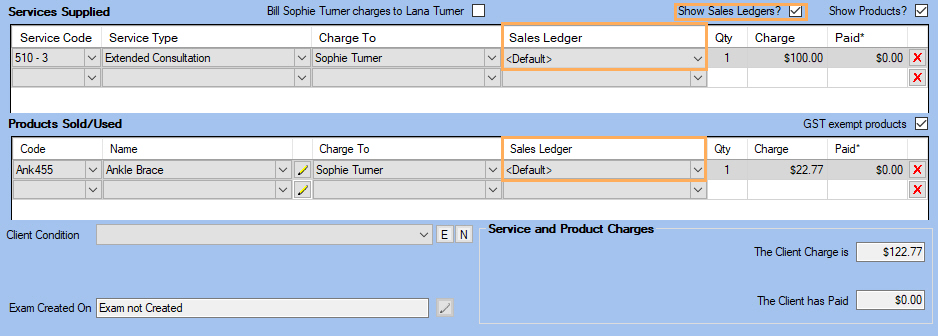
Note: If no Sales Ledger is assigned to an item, it will display <Default>. You can assign a Sales Ledger to an item by clicking on the drop down list.

For more details on how to create or edit an appointment refer to:
Note: See also Accounting Ledgers for more information on assigning ledgers.
Invoicing an Appointment Item
Items linked to an appointment (services and products) can now be invoiced separately.
- Click on Invoice Client on the Client Appointment Details view.
- Alternatively click on
 next to the client's name on the client header.

- The Invoice Details window is displayed which shows the list of outstanding items to be invoiced.
Note the 2 appointment items listed which can be now invoiced separately.
- Click on the
 next to the item to exclude
it from the invoice to be created.
next to the item to exclude
it from the invoice to be created.
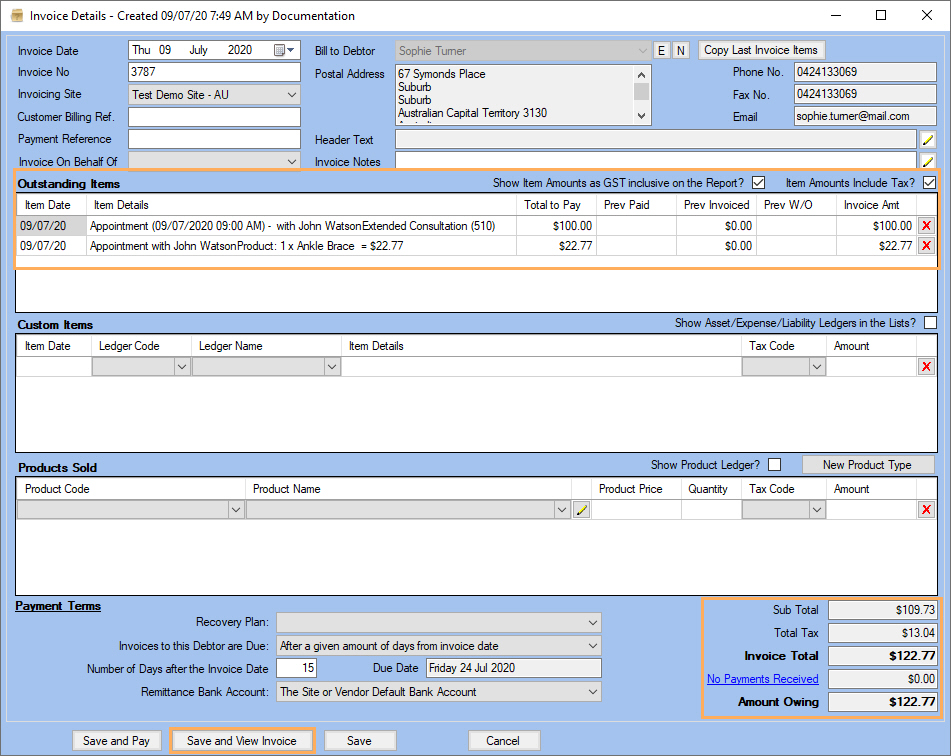
- Click on Save and View Invoice to create and view the invoice.
- The Appointment Details view now indicates in the Invoiced column the item (service supplied) that has been invoiced:

For more details on how to create or edit an invoice refer to:
Making a Payment for an Appointment Item
Items linked to an appointment (services and products) can now be paid for separately.
- Click on Client Payment on the Client Appointment Details view.
- Alternatively click on
 next to the client's
name on the client header.
next to the client's
name on the client header.

- The Debtor Payment window is displayed which shows the list of outstanding items to be paid for.
- Note the 2 appointment items listed which can be now be paid separately.
- The appointment item that have been invoiced is also indicated with the invoice number (Inv: 1826).
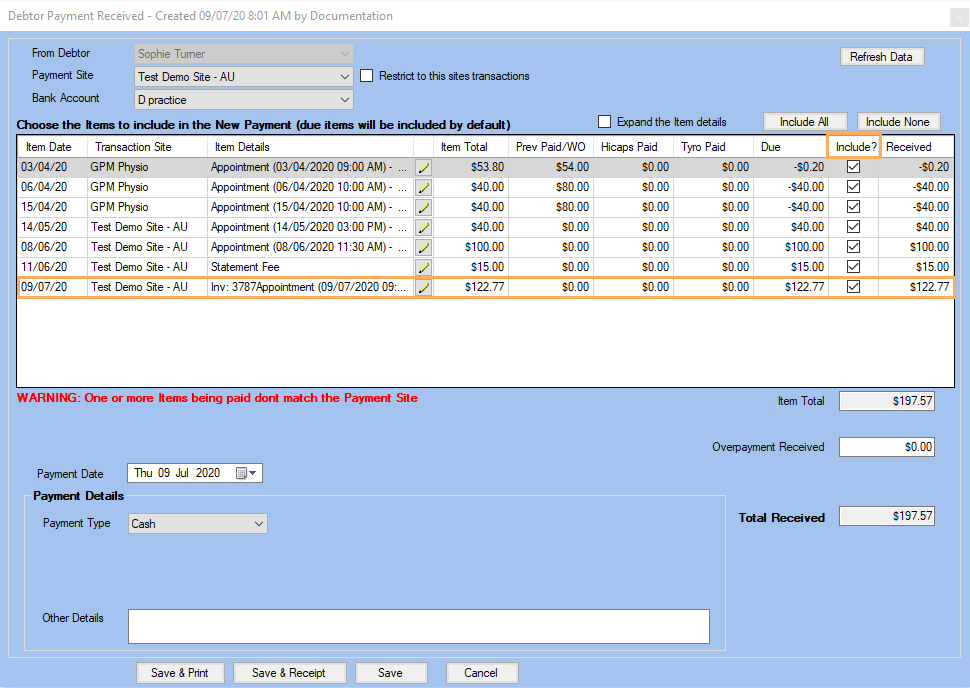
- Use the Include? check box to specify which items to include in this payment.
- In the Received column, indicate the amount received (could be less or more than the amount to be paid).
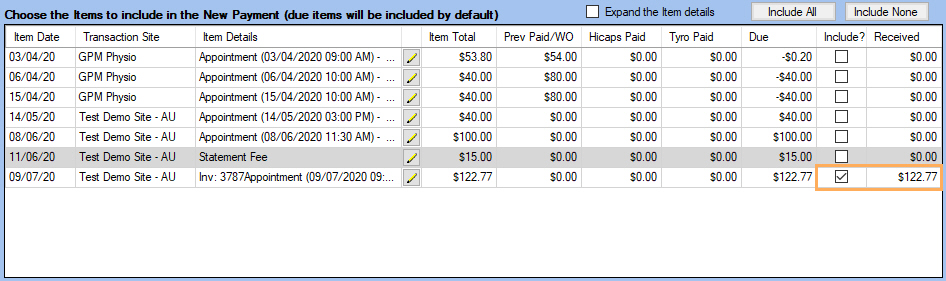
- Select the Payment Type and click Save to record the payment received.
- The Appointment Details view now indicates in the Paid column the item (service supplied) that has been (partially) paid for:
![]()