

How to Create System User
Prerequisites
A user access role has been created: How to Create a User Access Role
The site has been created: How to Create a New Site
System Users are created to allow users to log in to Gensolve Practice Manager.
System users must then be granted access privileges so that they have access to the required functional areas in GPM .
System users also need to be added to a site/Vendor before they can access that site/Vendor in GPM. The user will not be able to login if there is no access privilege, site or Vendor added.
If the system user is going to be associated with a clinician, it is advised that the new system user is set up before the new clinician details are set up due to the necessity for the correct System User name to be added to the clinician details or they will not be able to access medical notes.
For steps on how to change a User's password and how to add an Inactivity Timeout view How to change Password
For steps on how to add MFA to a User's setup view Setting up Multi Factor Authentication for GPM
Follow the steps below to learn How to create a New System User, give that system user access privileges as well as access to sites/Vendors.
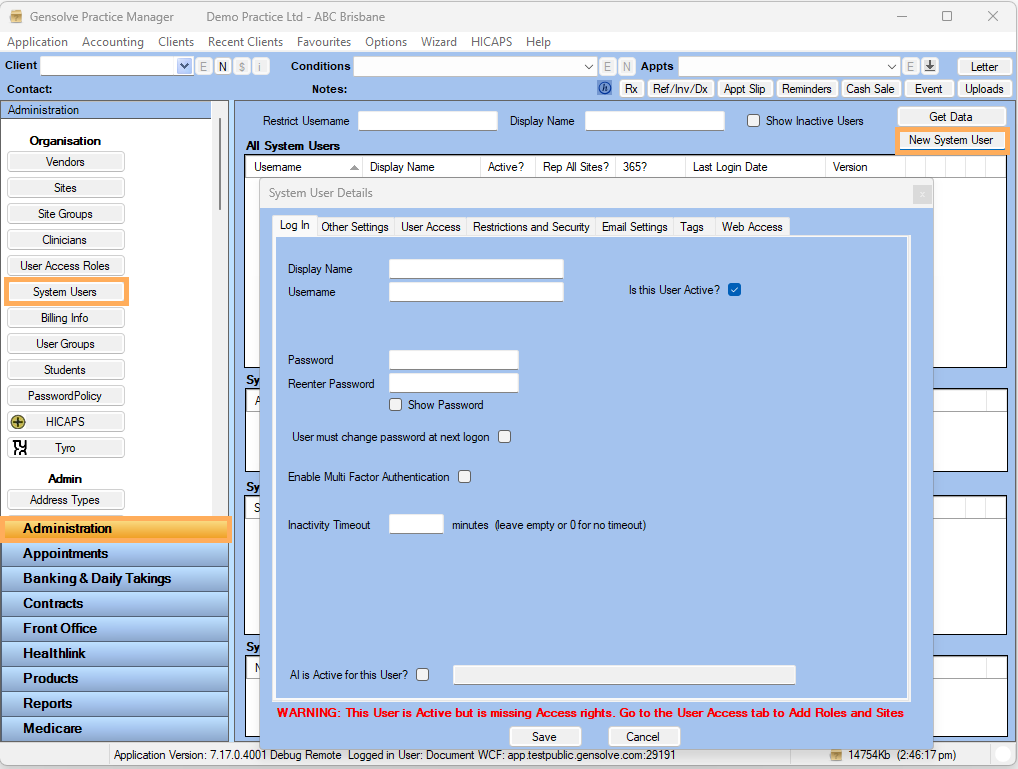
1. Go to Administration >> System Users >> New System User
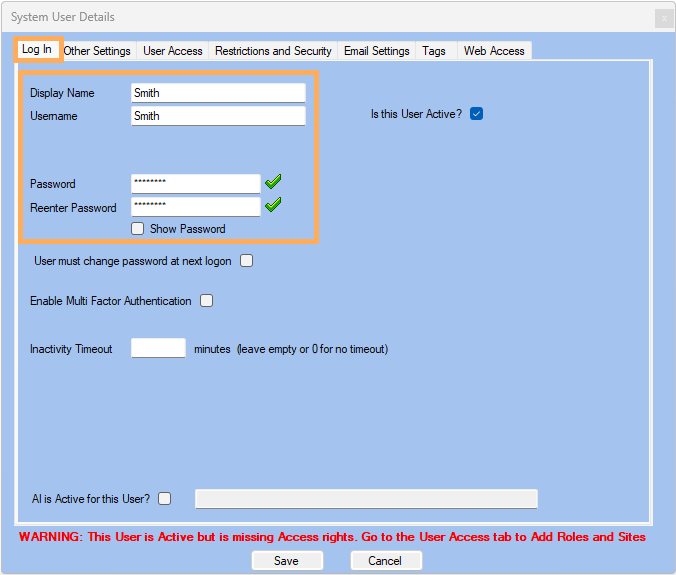
2. Enter the Login details as required
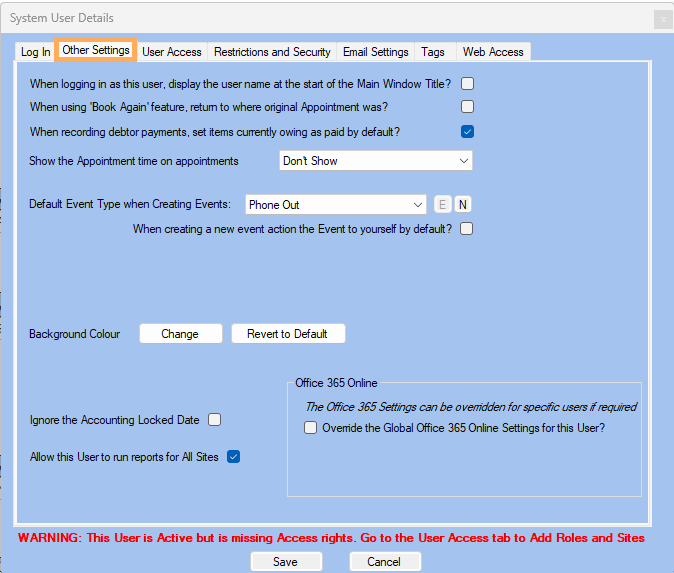
3. Go to Other Settings Tab
4. Change any of the default settings on this tab to fit the requirements for this System User
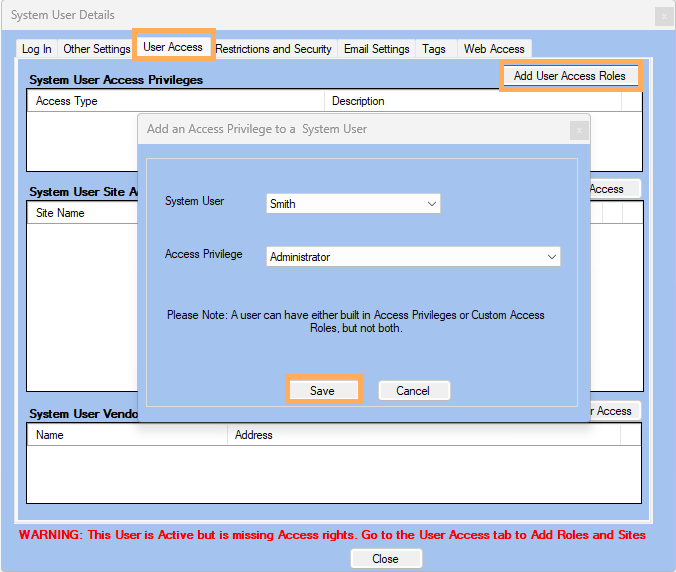
5. Go to User Access Tab
>> Click on Add User Access
Roles >> Select Access Privilege >> Save
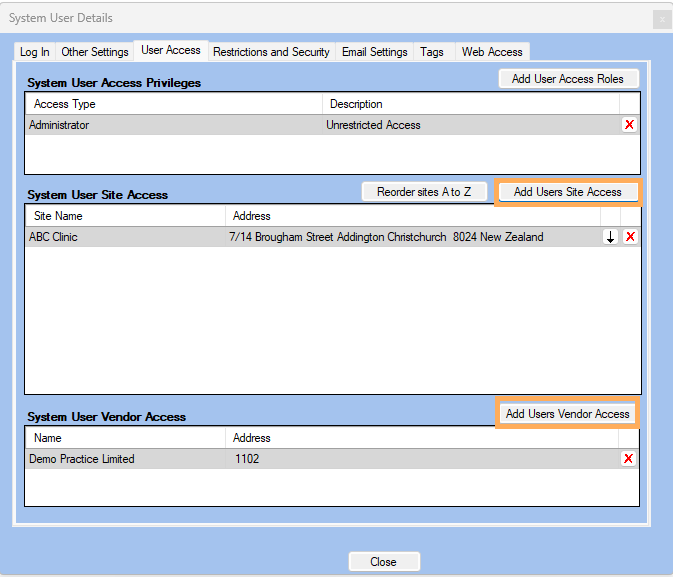
6. In the same way select Site and Vendor
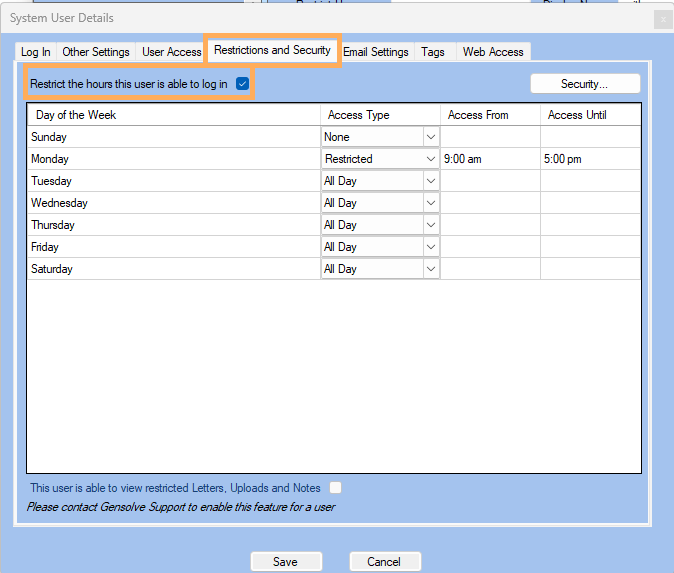
7. Go to Restrictions and Security Tab >> Tick Restrict the hours the user is able to login this is able to log in if you want to restrict the hours this System User can log in to GPM
NOTE: This is optional
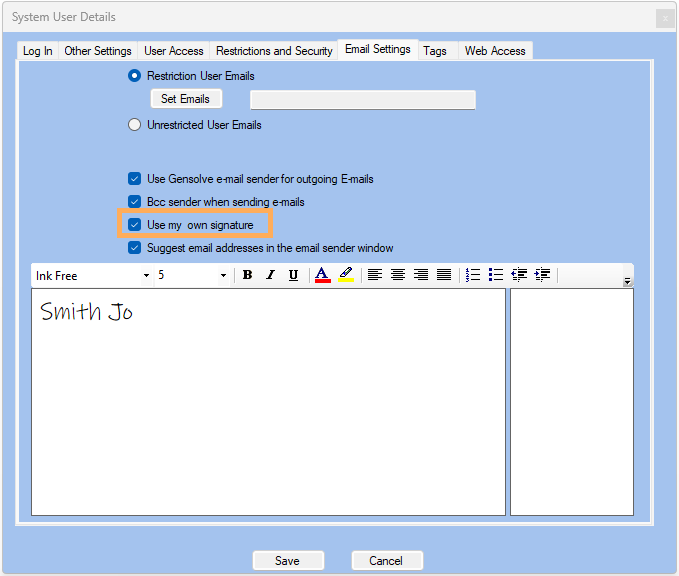
8. Go to Email Settings Tab >> Enter the Email
NOTE : A valid email address needs to be specified in order to successfully log in to the Gensolve Support Desk (to submit a ticket or view release notes)
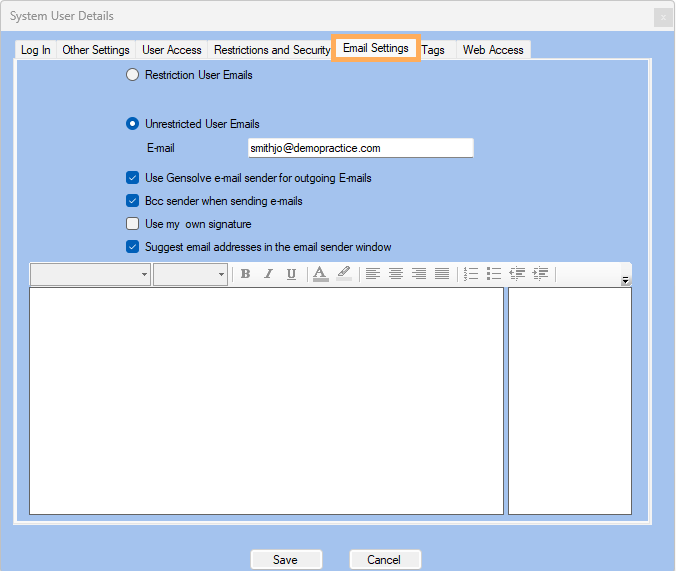
9. Tick Use my own signature to define the email signature for this system user
Note: This is optional
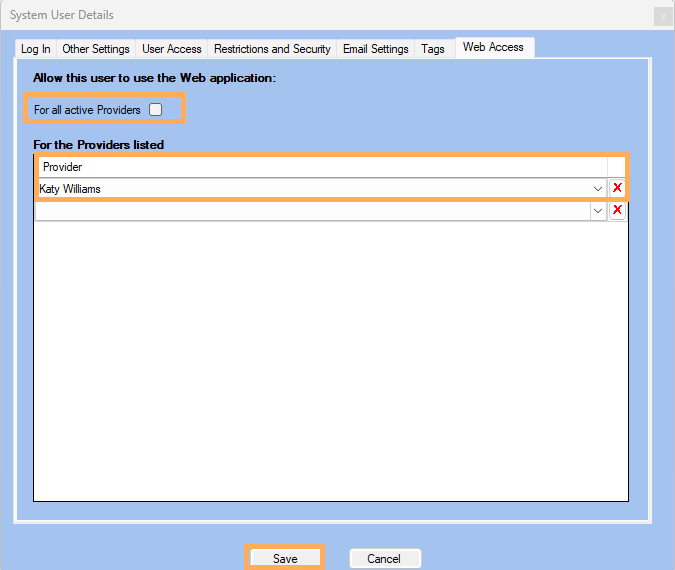
10. Go to Web Access Tab >> This area allows you to enable/disable different providers to this System User so that when accessing the Web Application, they will be able to see their own appointments (if they are a Provider) and/or the appointments of All/chosen Providers
11. Can either select the specific provider(s) you want to enable for this System User or check this box "For all active Providers" if want to enable all active providers
12. Click on Save
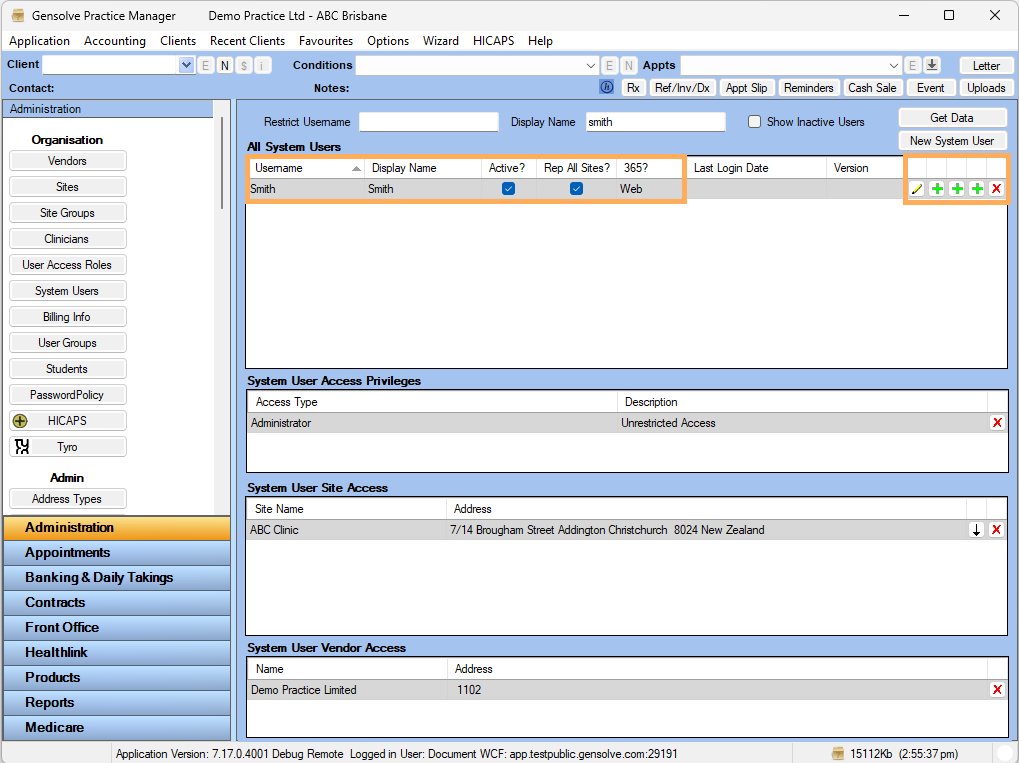
13. The New System User is shown Below
Note : Instead of going to User Access
and adding the access , you can click on the1st  icon to add User Access
to the System User , 2nd icon
to add User Site Access , 3rd icon
to add Vendor
to the System User
icon to add User Access
to the System User , 2nd icon
to add User Site Access , 3rd icon
to add Vendor
to the System User